How to Make Resin Coasters – Your own DIY Resin Coasters
This post may contain affiliate links. We may earn a small commission from purchases made through them, at no additional cost to you. You help to support resin-expert.com
Resin arts and crafts are a popular medium these days and it is something anyone can do. There are so many things you can make, but how about making something useful like a coaster? Not only can you make beautiful things for your own house, but you can also protect wooden furniture in the process. You can make resin coasters for yourself, as a gift, or simply to explore your creative, fun side. Making resin coasters is an easy project for beginners and will surely be noticed by anyone who visits your home.
Table of Contents
What is a Resin Coaster?
In short, a resin coaster is made by pouring resin into a mold. This is ideal for the protection of your furniture, especially wood when you put cups or glasses on the table.
Materials Needed to Make Resin Coasters
As with any project, you will need materials to make your resin coasters. It is also an option to rather purchase a resin kit, which will include all the necessary materials.
Materials needed to make your resin coasters:
- Epoxy Resin
- The color pigments of your choice
- A mold release product or substitute
- Any other decorations you want to embed in the resin such as buttons, shells, glitter, or sand
- 3 disposable mixing cups: preferably 2 smaller 30 ml cups and a larger 300 ml cup
- Stirring Sticks and popsicle stick
- A pair of nitrile gloves and safety glasses
- Handheld or artist torch
- Toothpicks
- Resin Drying or Curing mat
- A cleaning cloth to clean should there be a mess
- You will need an empty box or something to cover the coasters with during the curing process
- You can use cork or self-stick rubber pads on the back of your coasters
First, decide which shape and design you plan to use. The market has assorted shapes providing you with many creative options.
Different types of resin coaster molds:
- The common typical round or square molds
- Oval resin coaster molds
- Rectangular mold
- Large and smaller hexagonal shape molds
- Heart-shaped
- Flower-shaped molds
- Irregularly shaped geode molds
- Octagon or 8-sided shape mold
- Some with rims, some without
- 2-piece resin coaster molds, making a river or ocean effect
- Puzzle-type molds. This larger 4-sectioned mold crates separate pieces. Together they form a shape such as a circle, square, or geode
- You can choose to give your coaster a gloss or matt surface – give this finish to your resin after it has cured
Use a resin coaster mold or any item you have at home like a shallow, smooth type container. After finishing the coaster, it may be necessary to cut the mold to remove the cured resin. By using a proper silicone resin mold, it is so much easier to work with and you will get a better result. You can continue using the mold again.
Eventually, the silicone resin coaster will begin to wear, and tear and the resin will stick to it, causing the silicone to break or tear.
How to Make Resin Coasters
Working with resin and making beautiful, unique shapes and designs, is a fun and creative way to explore. So, let’s get creative!
Preparation
When using resin, preparation is critical. Read and follow the instructions carefully and make sure that you have all the materials you need before you start. Execute this project in a well-ventilated space, wearing protective equipment, such as gloves and respirators.
Remember to use a drop cloth or mat should you make any mess. The resin reacts best at warm temperatures. The ideal temperature ranges from 22°C to 23°C (72°F to 74°F). When preparing the mold, spray it with a release product, and then brush it with gloved fingers to cover the entire surface of the mold.
Mix and Color Resin
Before opening the resin and starting the mixing process, the resin must be placed into a warm bowl of water for approximately 10 minutes. This will help prevent bubbles from forming. In doing this, the curing time will be increased and the time you take to work with it becomes less.
Before you mix the resin, always remember to read the instructions first. The amount of resin needed to make your coaster is dependent on the size of the mold and if you plan to embed items. Mix the same amount of hardener to resin (1:1 ratio). Should you need 100 ml, you will need 50 ml of resin and 50 ml hardener.
Have your two disposable cups ready for measuring and pour both of these into a larger plastic cup. Use a stir stick to mix the resin thoroughly, scraping the sides and bottom. This assists in causing fewer bubbles. Stir this mixture for approximately 2-3 minutes until the mixture appears clear.
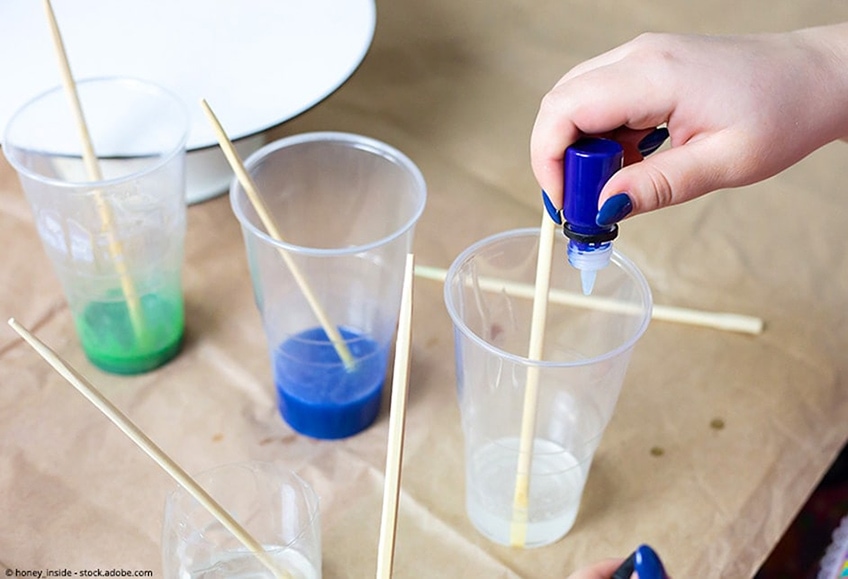
How to Make Resin Coasters: Coloring Resin
When you add color to your resin, we recommend that you use a color brand specifically designed for that brand of resin. Should you use another color brand, your resin may have different curing times and it may even cause a color difference. Color can only be added after mixing the resin and curing agent. Mixing must be done thoroughly to get a solid color or depending on the type of effect you are after.
Types of colorants available:
- Alcohol Ink
- Resin Tint
- Acrylic paint
Regardless of the color you choose, it must not exceed 6% of the total volume of your resin mixture.
Embedded Project
If you want to embed items in the resin coaster, first determine the target. Coins and things like bottle caps are popular. When you use a silicone mold, decide which side of the coaster will be the top side. The topside can be the side facing you, this allows you to see the items embedded facing upwards. If you select the top of the side of the coaster closest to the table insert it upside down. You will have to do this if you are using a framed mold or with objects that are likely to float.
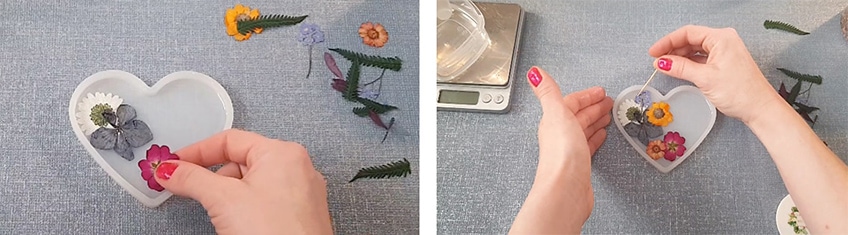
We will be following a similar process. Fix the object in place with a little resin poured into the mold. Now, add a small amount of resin to another cup. Place the item you choose to embed in the resin and then coat it completely. This will help prevent any bubbles when embedding the object. Once you have coated the object, place it in a thin layer of resin in the mold. If you plan to embed more objects, follow the same procedure, placing the item of choice where you want in the resin. Then add another layer of resin.
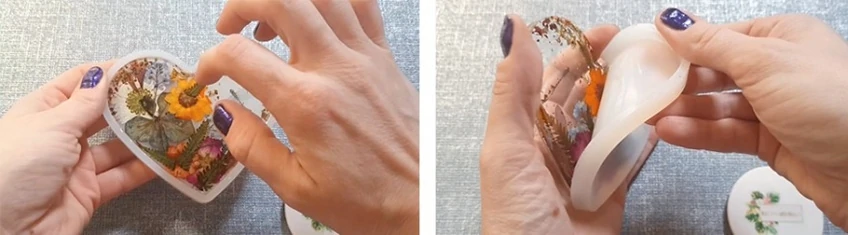
Bubbles can easily form if you move your objects too much, so be careful. Use a stick to push down objects should they float after you have added more resin.
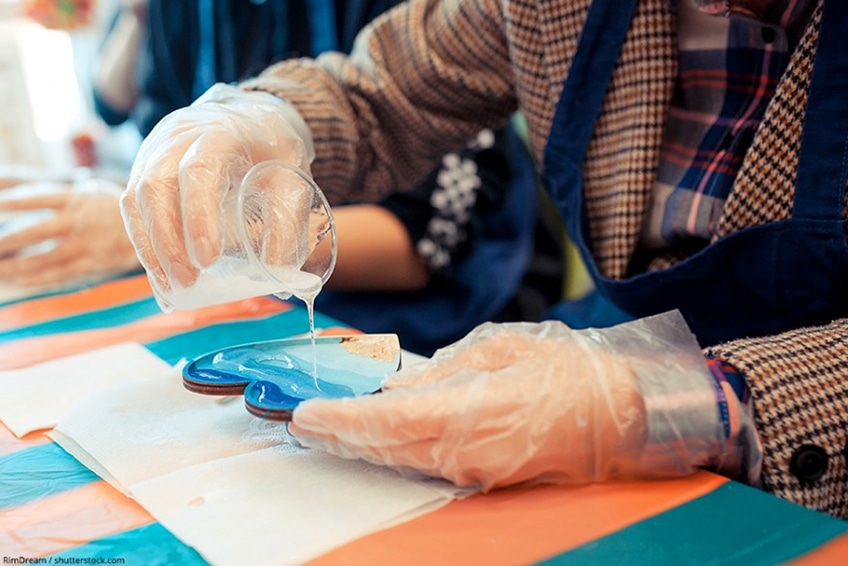
Pour Epoxy
Once everything is mixed with the added color, the resin can be poured into the coaster mold. You will need about 1/3 inches to fill it. When embedding items, add a thin layer to cover approximately 1/8 inches. When finished, add objects.
After you have finished placing your items into the resin, cover it with more resin, filling the mold. Pour in enough resin until it is about 1/8 inched from the lip. Be careful not to overfill the mold.
How to Make Resin Coasters: Second Method of Pouring
The first method is to pour a single layer of resin, but you can also pour two layers. The first layer must be a small amount of resin for a thin layer, as discussed above. This should cover 4 coasters, using about 60 ml of resin. After that, embed your objects and remove any bubbles. You should allow about 4 hours for curing after which you add your topcoat and final layer of resin. You should use about 88ml – 100ml for a single round coaster.
Remove Air Bubbles from your Resin
Remove air bubbles with a toothpick or a heat gun. Once you have poured the clear resin into the mold, use a cutting torch to remove air bubbles. Keep moving the heat source over the surface, as it must not stop in a single spot for too long.
Coasters embedded with objects:
- Before embedding, the items must be coated with a thin layer of resin
- Once you have the objects arranged in the resin, make sure there are no bubbles
- The resin must stand a maximum of 10 – 15 minutes. (If you leave it for longer, the resin will harden.) This will bring bubbles to the surface
Cover and Cure
After pouring the resin, leave it to cure. It is possible to handle the resin after 24 hours, but rather leave it to cure completely – a process of between 48 – 72 hours. Cover the coaster while curing takes place so that no dust or particles can land on the surface.
Remove Silicone Mold
Should the resin still be able to bend and flex, do not remove it from the mold just yet. This can distort your coaster and cause it to not set as flat as it should. However, when using a silicone mold, this should not happen, and the casting should release quite easily. If you use a mold release product, it will help with demolding the coaster and it extends the life of your mold. Should you not make use of mold release, the silicone mold will age over time and become brittle and may even rip.
Alternatives to mold release agents:
- Non-stick cooking spray: It is non-toxic, won’t damage the mold or resin, and should not affect the finer details of the mold
- Vegetable and mineral oils: We recommended these for simple molds. If the layer you apply is too thick, the details of the mold may be affected
- Petroleum jelly: It can be used for basic molds, that is without finer detail
- Talcum powder: This is ideal for more basic molds without much detail
How to Polish your Epoxy Coaster
The final resin item, in this case, your coaster, should have a polished look, especially if you used a silicone mold. Otherwise, use sandpaper to smooth the surface. You might not have to use sandpaper at all, as you could also use a resin polish. This is easy to apply and leaves your coaster with a gloss finish.
If the casting is dull or has light scratches, you must wet and sand it. This can be done by hand as a coaster is a small enough object to do easily. Use from 120 coarse-grained to 3000 fine-grained sandpaper. A sandpaper holder will be handy but is not necessary. If you plan to do larger projects, consider buying an electric sander and polisher.
You will need a squirt container or water spray bottle, as heat is emitted while sanding. When sanding, wet the sandpaper or add water to it. Remove all dust or dirt particles. Begin with coarse sandpaper and move to finer sandpaper, making circular movements. Use water every time and wipe the surface clean afterward. When finished, the resin surface should be even and smooth. The surface must be completely dry, then you can start with polishing.
For the clearest surface, consider:
- Type of polish that is best to use
- Type of cloth used
After finishing and you are satisfied, you can complete the resin coaster by adding bumpers or corks to the coaster.
Create Resin Coasters for Hot Beverages
Normal epoxy resin can only withstand up to a maximum of 150°/300° F (65.5°C/148°C) for a short time. After that, the product will begin to distort. Hot coffee cups are, therefore, not the best to place on a resin coaster.
However, you can still make coasters for hot beverages if you purchase heat-resistant resin. Depending on the brand and manufacturer, certain heat-resistant resins can withstand temperatures up to 600°F (315°C). Resin8 is one of the most popular heat-resistant resins on the market. When used with silicone, it is very safe to use around the house and can tolerate heat. Read more about heat resistant resin.
Ideas for Different Types of Coasters
There are thousands of ideas to create resin coasters. So many things can be embedded in resin, from plastic to metal, clay, and glitter to create a special and unique coaster. Although you can add almost anything to resin, rather stay clear of real flowers and leaves as they contain moisture, which must be avoided in resin products. Moisture can react with resin, and your item will color brown and be destroyed. Should you wish to embed flowers, use dried flowers.
Ideas for your DIY resin coasters:
- Shells
- Coins
- Bottle caps
- Photos
- Clockwork pieces
- Paper
- Buttons and Beads
- Dried flowers
- Mosaic tile pieces
- Stones, sand, and glitter
Other inspiring DIY Resin Coaster Ideas
There are so many paints, objects, glitters, colors as well as all kinds of mold shapes available on the market. You can easily create the most beautiful coasters and impress your guests.
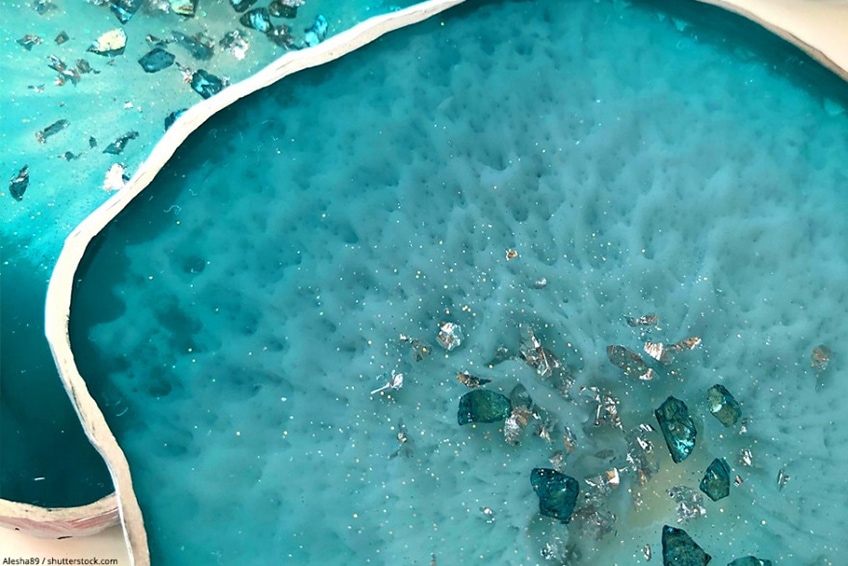
Ocean Beach: You can create epoxy coasters for your beach house with some simple easy-to-make ideas, which will beautifully match your style and theme. This is a way to almost capture some of the ocean and beach. You can use resin dyes and pigments and beach sand in resin coasters to create blue oceans and waves.
Galaxy Epoxy Coasters: Create beautiful, magical, glittery, galaxy coasters with resin, colors, and glitter.
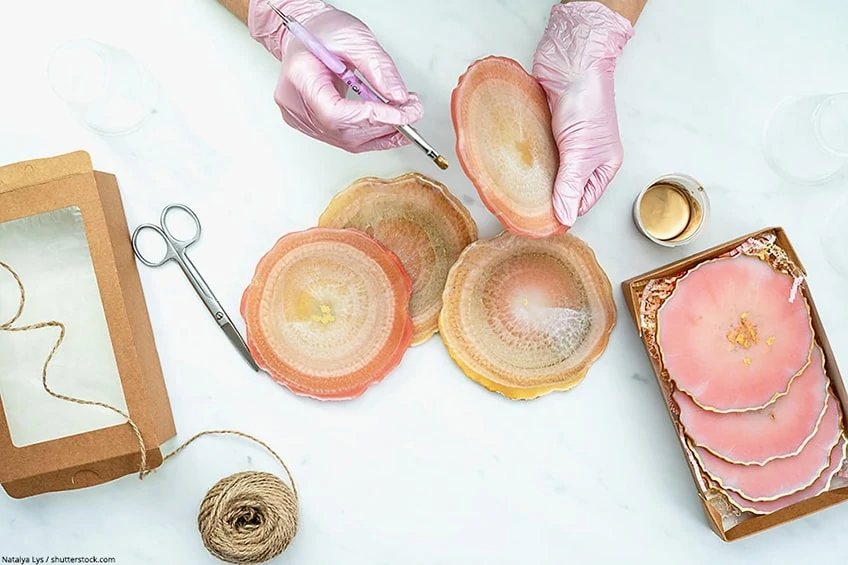
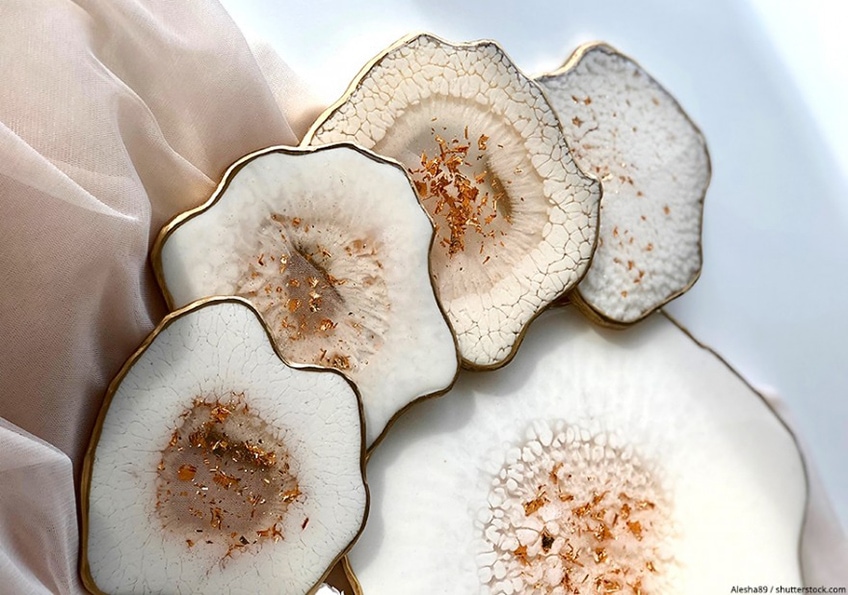
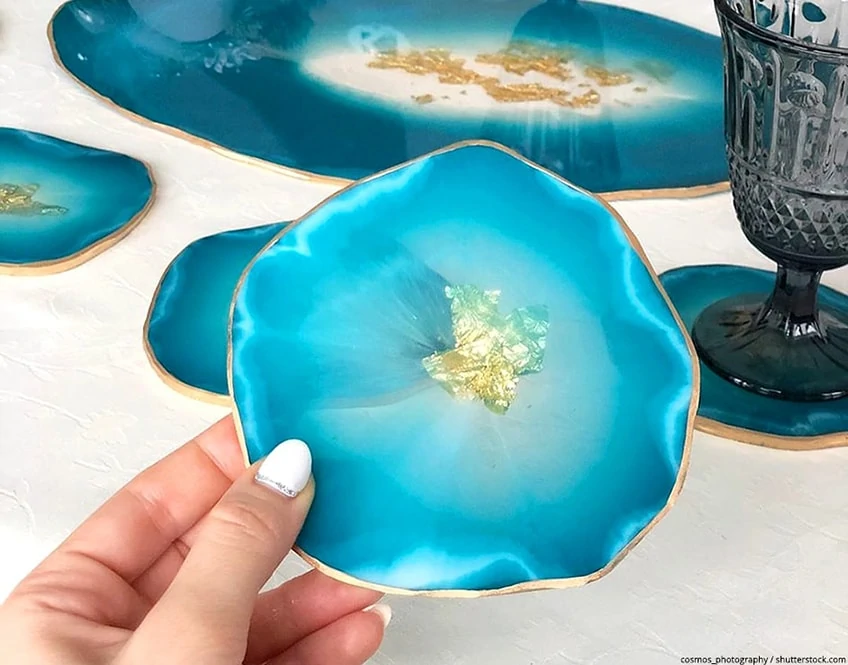
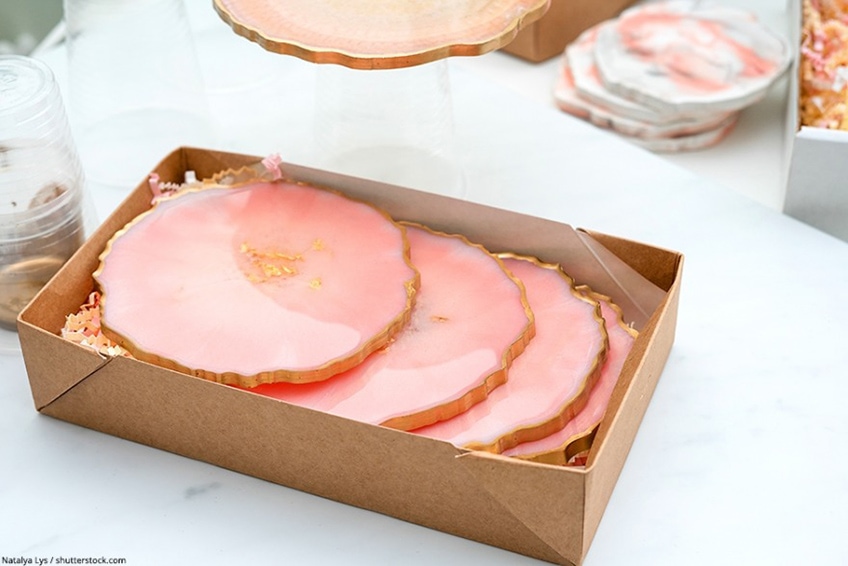
Geode Coasters: This is one of the most popular coaster types. The coaster reminds you of a geode crystal with different effects and colors. You can create beautiful coasters with his idea. There are also special geode molds on the market. For example, a puzzle geode mold, with four separate molds that you put together to form a circle.
Aluminium Foil and Resin Epoxy Coaster: Use different resin pigment colors and foil to create a textured appearance.
Coasters that incorporate natural elements: You can use various natural materials like a piece of square wood, or how about a rock. Cover these with a resin layer, which serves to protect and preserve it.
Resin Petri Dish Coaster or Alcohol Ink Coaster: The reaction of alcohol ink and resin is beautiful, creating amazing patterns and bright colors. White alcohol ink is slightly different, as it is heavier. Therefore, when it is used with other colored inks, it forms a deeper layer.
The basis of wooden coasters: You can buy ready-made non-drip wooden coasters with rims around the edges. These will allow you to pour the resin on the coaster without it dripping over the side. It is also easy to design various effects and colors.
Epoxy river coaster: Similar to a river table, but on a smaller scale. If you prefer, you can use live edge wood, but you can also use a special coaster mold to produce the same effect.
When it comes to the ideas available for resin coasters, you are only limited by your imagination, so allow yourself the joy to explore.
