Preserving Flowers in Resin – Complete Guide with Tutorial
This post may contain affiliate links. We may earn a small commission from purchases made through them, at no additional cost to you. You help to support resin-expert.com
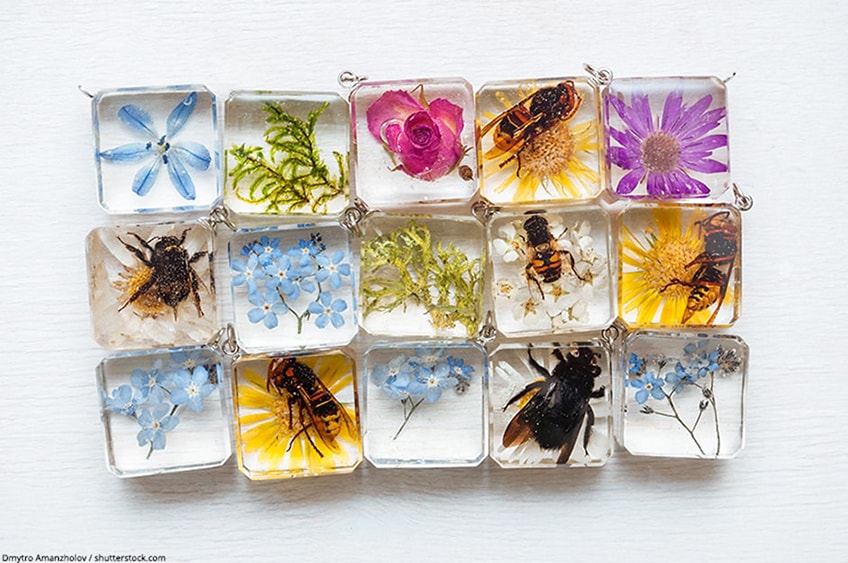
Resin is the perfect method to preserve something special for many years to come. This versatile product remains popular in various artworks, such as the preservation of flowers and their beauty for decorative purposes. By adding flowers in resin, you can create and preserve beautiful mementos, make a special birthday gift or add resin flowers to art and decorate your home in a fashionable, inexpensive way. There are various techniques to ensure the perfect product and in this article, we will show you in easy steps how to cast fresh and dried flowers in resin.
Table of Contents
Various areas to use dried flowers
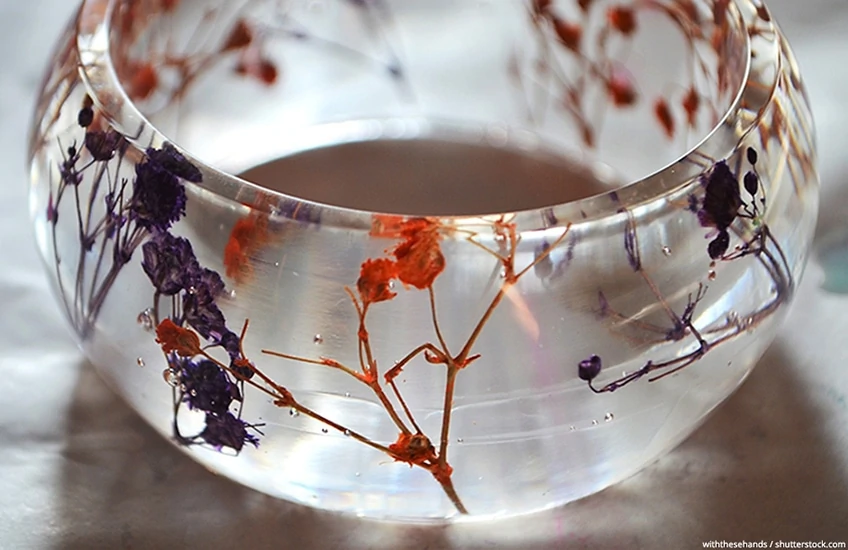
There are hundreds of ways to use dried flowers in resin projects. It is also the perfect way to remember a special occasion and make your very own gift for a special friend. You will only need dry flowers and resin, it’s as easy as that! Some ideas include making your very own flowery jewelry such as pendants, earrings and bangles.
Dried flowers can be used in many artworks such as trinkets, coins, stones, beads, bottle caps, coasters, serving trays, wall art, paperweights, bookmarks, birthday cards, flowerpot holders, picture stands, cell phone covers, wind chimes or suncatchers, body scrubs, potpourri, candles and even teas.

Materials needed for flowers in resin
Best Resin for Preserving Flowers in Small Molds – PRO MARINE SUPPLIES Art Resin
One of the most beautiful effects that you can achieve with rein crafting is setting dried flowers into a clear resin. If you are doing this, you will need a super clear resin that sets easily and won’t yellow. Our top product pick in this category would go to this resin by Pro Marine, thanks to its high-performance glossy finish.

- Specifically designed for art projects, excellent color stability
- Very easy to use with 1 : 1 mixing ratio, 100% solids, hard-shell finish
- High gloss and crystal clear, your all-seal solution, excellent air release
This clear epoxy resin has a UV-protected formula to [prevent it from yellowing. With a self-leveling formula, you get an intense shine and smooth texture once the resin has set. It is also fairly easy to work with, as it just needs a simple 1:1 resin to hardener ratio to achieve the ideal consistency.
This durable resin is multipurpose and can be used with all kinds of different surfaces and materials. It also produces no dangerous fumes, is non-toxic, and safe to work with. As it uses a food-safe formula, this resin is great for use on items like coasters, countertops, or jewelry.
Pros
- Food safe and non-toxic
- UV protected to avoid yellowing
- Clear and glossy finish
- Cures to a perfectly smooth texture
- Easy to work with
Cons
- It can be difficult to remove air bubbles from this resin
Best Resin for Preserving Flowers in Deep Molds – INCREDIBLE SOLUTIONS Deep Casting Resin
Incredible Solutions has formulated a special deep pourable plastic casting resin, especially for large molds. This kit is suitable for river tables, live edges, casting, and embedding in deep molds thanks to its 2” thickness and pourability. If you are setting flowers in a deep mold, then the consistency and pourability of this resin make it a smart choice.

- Thick pours up to 2" per application, low viscosity and long working time
- Super clear results, compatible with pigments and dyes
- 2 : 1 mix ratio by volume (100 A to 44 B by weight)
The resin is crystal clear with a low viscosity. It allows for long working times and involves minimal shrinkage. Another reason that this kit is suitable for deep molds, is that you get plenty of resin! The kit contains 3 gallons in total.
As you would hope for from a clear casting resin, this product is UV protected for enhanced clarity, color compatible, and highly durable. It is also zero VOC and low odor, making it a safer product to work with.
Pros
- Can successfully pour between 2 – 3 inches
- Pours in a consistency close to water
- UV protected
- Crystal clear and shiny finish
- Mixes to a good volume of resin
- Great value
Cons
- Doesn’t include very detailed instructions
- You can get lots of bubbles
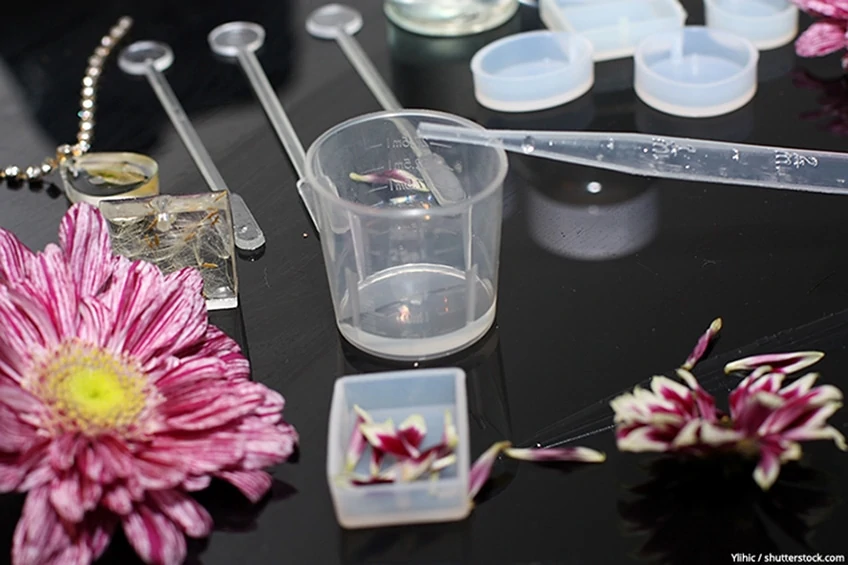
Different materials you also need
You will need the following supplies to preserve flowers in resin:
- High-quality resin
- Dried flowers
- Silicone mold of your choice
- Heat gun/heat torch
- Toothpicks
- Painters tape
- Rubber gloves
- Measuring cups
- Mixing cups
- Stir sticks
- Catch tray
- Optional glitter or mica powder
Different kinds of dried flowers
It is best to use dried and not fresh flowers for your project. The process of drying flowers can seem intimidating, but this is only because it may still be an unfamiliar process. Since time began, the most popular method has been to bundle a bunch of flowers, hang them upside down in a ventilated area for a couple of weeks until they are completely dry.
Luckily, there are many other options other than air-drying if you need a quicker method to begin your resin flower project.
Artificial Flowers
Most florists and home retail stores also stock artificial flowers which allow you to purchase exactly what you need as well as the quantity. Search online for artificial flowers on search engines such as Amazon and Etsy.
Dry the flowers yourself
Flowers need to be dried before using in your resin project. You can dry any flowers or leaves you can lay your hands on. The secret it for all flowers to be completely dry. Should there still be moisture in the petals, it can lead to discoloration and decomposition in the resin and your artwork will be destroyed.
How to Dry the Flowers yourself
Press dry:
This is a procedure where the flowers will dry in a book or flower press. The pressing of petals between the pages of a heavy book is one of the oldest methods to preserve flowers and leaves, however, the petals will be flattened.
There must be absolutely no moisture (water or condensation) on the petals. Put them on an absorbent material such as a napkin or parchment paper and neatly arrange the petals in between the layers in a book or put the heavy book on top of it. Flowers that are best to use for this include Gladiolus, Delphiniums, Pansies, Poppies and Geraniums.
Allow between 3 – 4 weeks for thorough drying. Once they have dried, they are ready for usage on cards, invitations, to decorate cakes or candles or display in picture frames.
Pros
- Apart from being one of the oldest ways of drying, this is also the easiest and cheapest method.
- There are no ingredients needed and no complex instructions.
- Flowers remain beautiful and are flattened to use in your artwork.
- Apart from it being used in many different art projects, it is also an easy project for kids to undertake.
Cons
- This method is a timely process and can take up to a month.
- There are no guarantees that the colors or your flowers will be kept intact.
- Your flowers may become brittle and delicate and should be handled very carefully.
- This process flattens the flowers.
- Should there be any moisture left, the flowers will get moldy.
Silica gel:
This is an easy and very effective drying method, especially with delicate flowers. Dry silica gel, comprising of tiny blue and white silica gel crystals, absorbs moisture from your petals. Again, ensure that the petals or leaves have no water or condensation on and are completely dry.
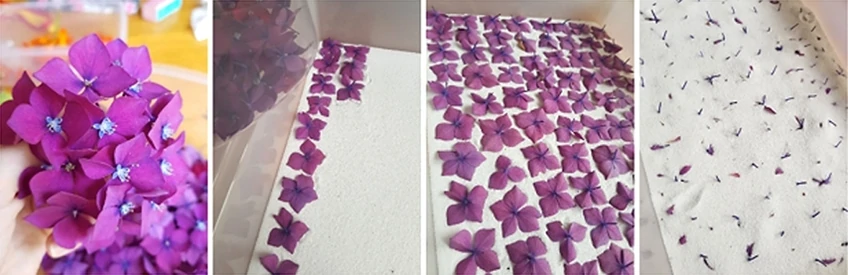
Firstly, pour a layer of dry silica gel into the air-tight container. Insert flowers upright into the gel, carefully place long flowers on their side and put flat flowers face down onto the layer of gel.
Carefully pour a cup of silica gel onto your petals, making sure there is gel between all petals and that all the flowers are covered. Now your flowers are ready to begin their drying process. Seal the container and check back after 3-7 days if they have completely dried.
You can also use cooking salt as it is extremely economical and works just as well.
Pros
- This is one of the quickest, cheapest and easiest methods to dry your petals.
- The whole flower as well as the color can be preserved.
Cons
- Damage to the delicate petals can occur if you pour the gel too quickly.
Hanging flowers to dry:
This allows for a beautiful 3D effect. Dry your flowers in a place where it will remain completely intact and thus no disturbance. Allow a drying period of around 3 weeks. Once your flowers have completely dried, spray it with an unscented hairspray for long-lasting protection of your petals.
Pros
- By hanging the flowers, the whole flower gets preserved.
- The complete bunch can be preserved without separation of the flowers in the bouquet.
- Dried flowers will last many years.
- It is an easy, costless method and you will preserve the colors of the bouquet.
Cons
- Drying time is between 3-4 weeks, so you will need a bit of patience.
- It’s best to begin your resin process as soon as possible after drying to maintain the optimal color of the flowers.
- The flowers are delicate and can easily break, so handle with care after drying.
- Some flowers shrink, so keep that in mind when choosing your flowers.
- Orchids must not be air-dried, as they take a long time and lose color.
Microwave flower press:
This method is one of the quickest to dry your flowers and begin with your resin project. Use 2 flat microwave-safe ceramic plates or even tiles, line both sides with coffee filters or hardboard and paper. Place the flowers in the middle, almost like a sandwich, and put it into the microwave.
Use a low-temperature setting and heat for 30-60 seconds at a time, allowing everything to cool down after every cycle until your flowers are completely dry.
Pros
- As it is such a quick process, you can begin with your project once the microwave process is completed.
Cons
- Some flowers may overheat, change color or have a brownish tint or even be destroyed, as flowers all dry at different temperatures.
Microwave with Silica Gel:
This is similar to the above-mentioned method, but with less time needed. The flowers that are best suited for this method include roses, daisies and white or pale-colored flowers. Pour some silica gel into your microwave-safe container and arrange your flowers on top of the gel. Then gently pour more silica gel on top of the petals.
Microwave the container (without the lid) on a low heat level for about 2-5 minutes. Check often, as flowers all dry at different times. Once you have achieved the desired dryness level, immediately cover the container with its lid. Leave the container for about 24 hours, before carefully removing your petals from the gel.
You can spray the petals with acrylic spray to ensure longer preservation. Pros and cons are the same as above, but be careful to not handle the silicone gel as it along with the container, gets extremely hot.
How to preserve flowers in resin – Tutorial
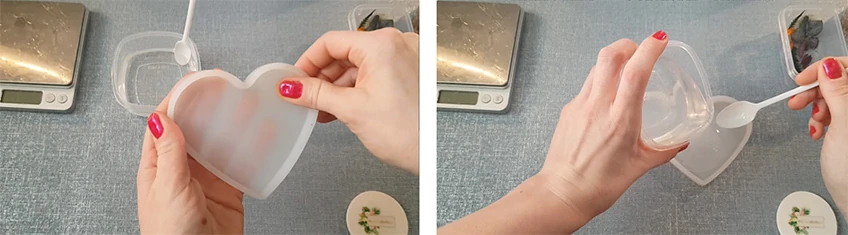
Mixing the Resin
All resins consist of a two-part system: the base resin and the hardener. Once the base resin and hardener are mixed, a chemical reaction takes place. The drying time varies between 12-48 hours. The mixing ration and even mixing of these two parts are crucial when using resin to ensure that your resin cures properly otherwise the chemical reaction will prevent proper curing.
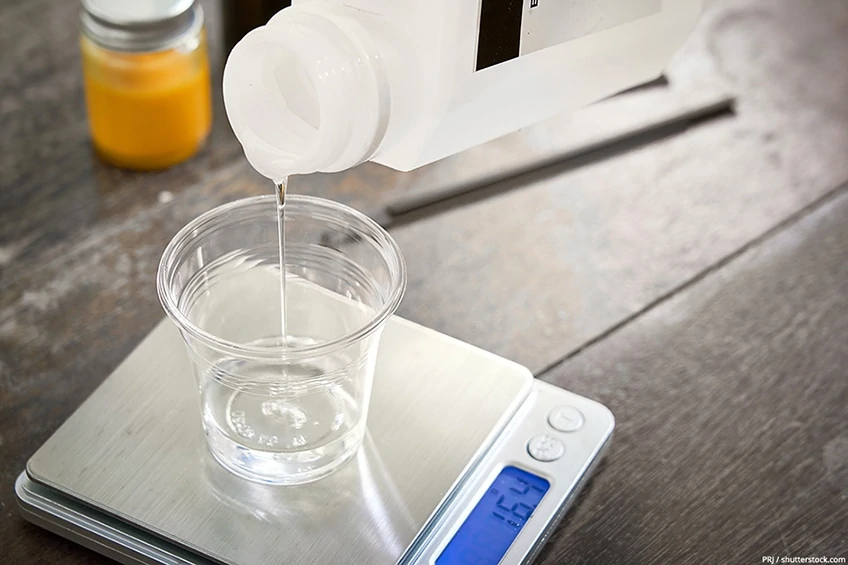
Casting may also end up being too fragile or doesn’t set completely and is sticky. A tip is to pour the mixture from one container into another when mixing the two parts. Equal parts of Part A and Part B of the Culture Cast Casting Resin must be combined by using measuring cups and a mixing container. Use a stir stick and mix the resin for 2-3 minutes.
Note that most of the resin will be left clear so that the flowers are visible after curing.
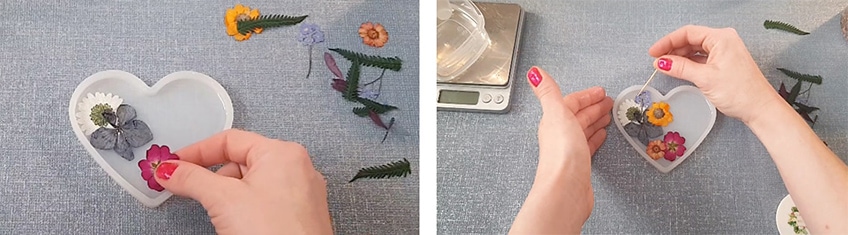
Pour the base and place the flower(s)
Ensure that the mold you pour your first layer of resin into is dust-free. Should there be any dirt in the mold, it will be visible as you are trying to create a medium where it seems as if the flowers are floating in resin.
Depending on the thickness of the resin and the article you are creating, you may need to pour more than one layer. Use your heat gun to remove all air bubbles. Place the flowers face down on the resin. If you want to add additional petals, leaves or art, position it now with a toothpick. The resin must cure for approximately 5 hours, before moving onto the next step.
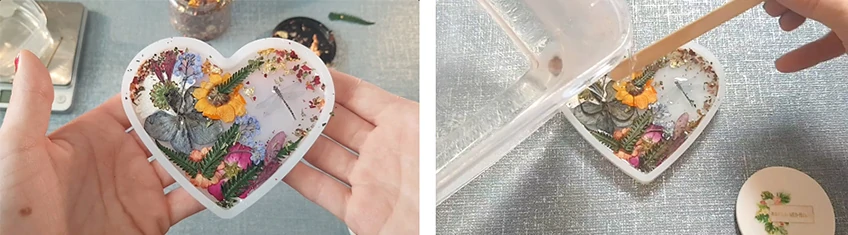
Curing and casting of layers
Cure the first layer and remember to remove any bubbles that may arise before the epoxy resin is cured. Make sure that the flowers stay in place in the beginning, as they can still easily shift during curing. Adhere to the manufacturer’s instructions when hardening the resin.
Once the base layer has cured, pour the 2nd layer of epoxy resin and mix it with fresh casting resin. After mixing, the resin must be briefly torched with the heat gun for all bubbles to evaporate. Fill the mold with resin and again remove the bubbles with your heat gun. Continuously follow the curing of the resin during this drying phase to avert bubbles from forming.
Remove the air bubbles
Air bubbles can easily get trapped under the flowers. Remove these bubbles by gently pushing down on the flowers and move them sideways with a toothpick. Remember the flowers are very fragile, so all movements must be carefully executed. Use your heat gun to remove any air bubbles.
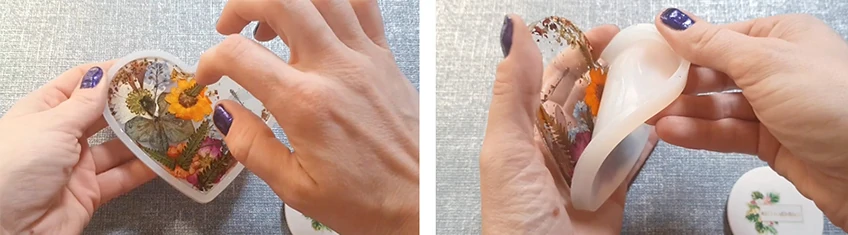
Curing and Finishing
In the finishing stages of the curing time, check that the resin has dried enough and can be removed from the resin casting mold. At this point, the resin isn’t fully cured yet, but should not be sticky at all. Continue to carefully remove the resin from the mold as it will still be flexible.
Leave your object in a flat position to allow it to completely cure. Silicone molds are usually smooth and shiny and sanding may not be needed. However, should the edges be a little sharp, sand it with sandpaper for a silky smooth appearance.
Tricks and tips when creating resin flower designs
Sealing of flowers before casting in resin
Certain dried flowers become semi-transparent once they are put into the resin. To prevent this from happening, seal the flowers before usage to prevent the resin from penetrating the petals.
Sealing can be done with hairspray or any other lacquer spray. Place the petals on a non-stick surface and spray several thin layers on both sides before moving on to the next step.
How to preserve fresh flowers in resin
The casting of fresh flowers and to accomplish preserving them in resin, is to put them into the silicone mold and cover them with well-mixed resin.
Roses in clear resin
These steps are the same as with any other flowers. Remove any loose petals from the rose and trim off leaves from the stem that you don’t want to use in your design. Gently tie a piece of string to the rose and hang it upside down in a well ventilated and dry space. Drying will take a couple of weeks.
Taking care of your creations
Protect your resin creations from any direct sunlight, as it can cause the flowers to bleach and over time flowers may lose their luminescence.
