How to make Silicone Molds – Mold Making for Resin and other Materials
This post may contain affiliate links. We may earn a small commission from purchases made through them, at no additional cost to you. You help to support resin-expert.com
''Making objects or art objects from epoxy resin requires not only a sense of proportion, creativity and a skilled hand. The right negative forms are also essential. But what if you lack the molds for your project and they are not available on the market? In our article you will learn how you can produce your own individual silicone mold with relatively little effort.
Table of Contents
Working with Epoxy Resin
For the art with epoxy resin you need the resin itself and of course the hardener. Depending on what you want to make for a work of art, various other materials are added, such as paint – acrylic or alcohol ink – and silicone molds. For example, if you want to make Petri Dishes, you can colour round silicone molds. However, there are of course no limits to your imagination: whether round or square, rhombuses, flowers, stars, small buckets, boxes, archways for model making – in principle you can fill in every conceivable three-dimensional form with the help of epoxy resin or other casting materials.
The ready mixed epoxy resin is put into the mold. Then you can experiment with colours or, as in resin casting, you can add various objects such as flowers or shells. Once the resin has hardened, it is carefully released from the mold. In this way unique works of art and very special gifts are created.
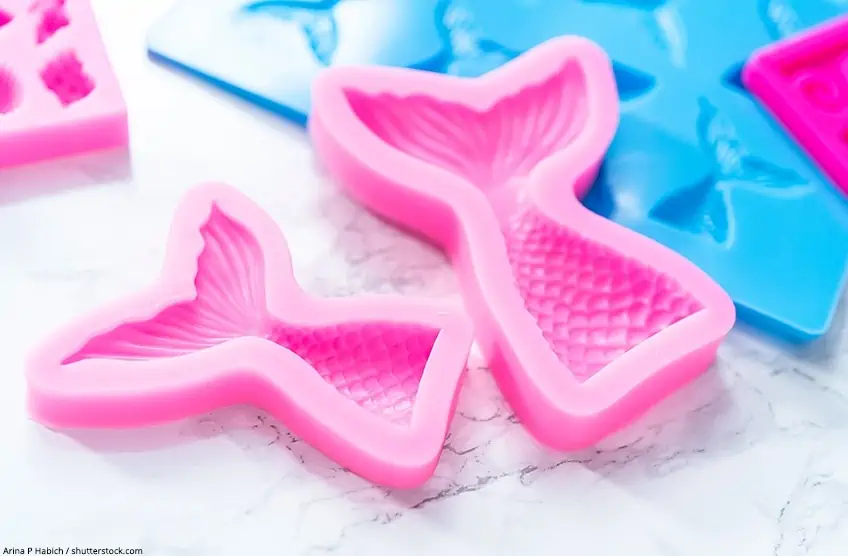
Which Silicone Molds are Available?
Silicone is perfectly suited as a material for casting molds, as it acts as a natural release agent. Because of this and because silicone is very flexible, the resin can be easily removed from the mold after curing.
Furthermore, there are almost no known allergies to the material. It is also considered gentle and above all non-toxic. It is not without reason that it is even used in the manufacture of dummies and baking molds.


The range of molds already available on the market is wide, because theoretically baking molds can also be used for resin art. For beginners especially these molds are well suited to try out. However, the wear and tear is quite high: over time the surface of the mold becomes dull and after some applications the resin can hardly be removed from the mold. This happens especially when using soft silicone. Furthermore, the molds available on the market are of course predetermined and often do not leave the necessary scope for your own creativity. If you would like to let off steam creatively and have a completely individual form, then producing a silicone mold yourself is the only way.
Silicone Rubber – The Degree of Hardness
To make a silicone mold yourself, you need silicone rubber. This soft compound, which hardens relatively quickly, is available in specialist shops. After curing, the silicone is elastic. Its brittleness depends on the chosen degree of hardness. If it is overstretched, cracks or fractures will occur in the material.
Silicone rubber is available in several degrees of hardness. These are specified in Shore, whereby a low value stands for high elasticity and a high value for low elasticity:
- A Shore of 0 – 20 stands for a high flexibility and therefore soft, but quite unstable material.
- The value 20 – 40 denotes a medium elasticity. The material is not only flexible, but also relatively dimensionally stable.
- A Shore value of 40 – 80 stands for a material that is hardly elastic and therefore rather hard. It is more resistant to stress, but is also quite brittle.
Which degree of hardness is best for you depends on your project and is also to some extent a matter of trial and error. The softer the material, the easier it is to release the workpiece from the mold. However, due to the high elasticity and low brittleness the mold is very unstable. The opposite is the case with a solid mold: workpieces are not so easy to release and you have to be careful that the brittle silicone does not break. However, casting molds with a high Shore value are of course easier to handle because they are less mobile and do not deform as easily.
In addition to the degree of hardness, other properties are important. For example, silicone masses with different viscosities are available, i.e. thin or thick silicone. Which variant you choose depends on your project.
The heat resistance as well as the food safety are important if you want to bake or make chocolate with your own mold. Make sure that it is heat resistant up to 200° C.
Another criteria should be checked, depending on the type of your project: The resistance of the material to chemicals. It should also be resistant if you work with epoxy resin, concrete or other casting materials.
You can find out whether the silicone meets your requirements by asking your specialist dealer or consulting the technical data sheet.
In addition to the silicone rubber, you will need a self-made frame and the blank you want to reproduce to produce a negative mold with original shape. If, on the other hand, you want to work without the original mold, the frame is omitted and you only need the blank. The differences between the methods of mold production are explained in the following sections.
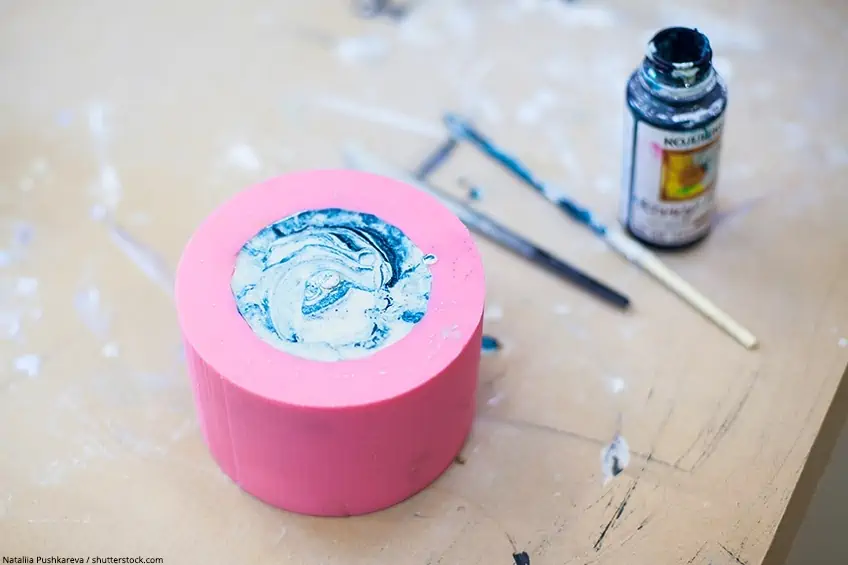
Negative Forms with Original Shape
If you would like to produce a duplicate of an object, the best way to do so is to make a negative mold with an original shape. For this purpose, you usually need a frame so that the silicone, which is later poured in for molding, cannot spread out uncontrollably. You can, but do not necessarily have to build a frame yourself. Empty plastic packaging is also suitable for this.
However, if you do want to do it yourself, you should build the frame according to the dimensions of the object to be duplicated so that you do not waste silicone unnecessarily. This is quite expensive and it is annoying if too much of it is lost. It is essential that the frame is tight so that the silicone cannot escape, or flow into cracks or under the edges. Now put the blank into the frame.
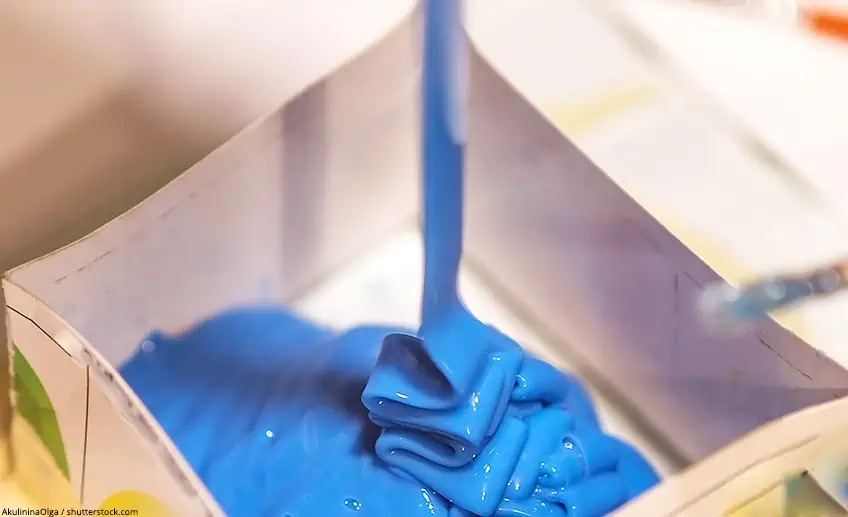
After preparing the silicone, following the manufacturer’s instructions, pour it into the frame. Make sure that the mass is evenly distributed everywhere. Now the silicone hardens and can be easily removed from the frame.
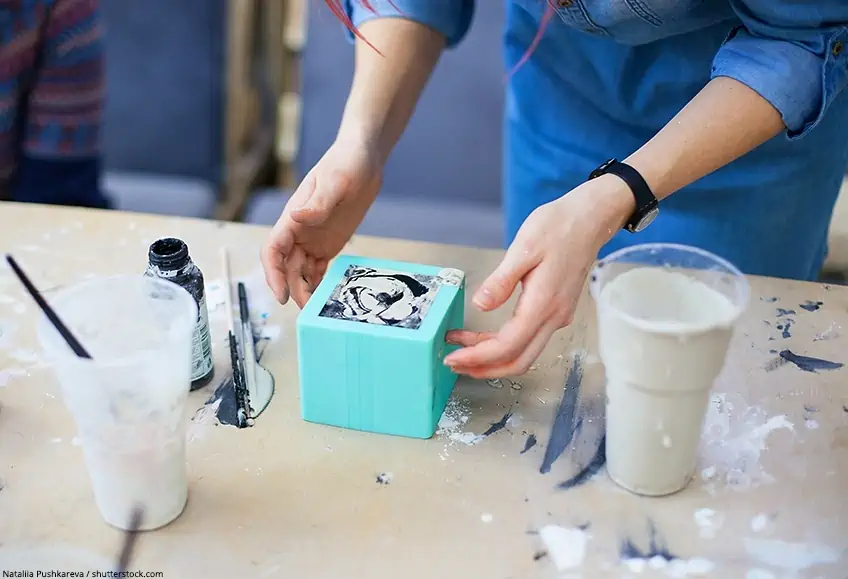
Negative Forms without Original Form
In this technique, the silicone is placed in a basin or bowl containing a mixture of detergent and water. There it becomes a malleable mass with which the blank is enclosed. The silicone mass should not be used too sparingly, otherwise the form becomes unstable and brittle.
Think of an opening to remove the object or a place that can be cut open after curing.
 Images: Van Rossen / JLORTIZ / shutterstock.com
DIY Silicone Mold – Preparations
Before you start with your DIY silicone mold, some preliminary considerations about your project are important. For example, you should take a close look at your blank before you choose the silicone material. Depending on the blank, the mold should have different characteristics:
- Is the blank smooth or does it have ornaments, grooves or many edges? In the latter case, the silicone should be soft so that you can later easily release the hardened resin from the mold. For simple blanks without large cracks and ornaments you can use a higher degree of hardness.
- Is the blank heavy or large? Or rather small, light and handy? And with which material do you want to pour the mold afterwards? Depending on the answer, you may have to consider that soft silicone is by far not as stable as hard silicone. If you use soft material, this could lead to problems with stability when the mold is poured later.
Tip: Silicone for making molds is not really cheap. If you like it simple, you can therefore also use cheaper bathroom silicone. For beginners this material is suitable to try out. However, it is not possible to produce a detailed mold. It is only suitable for casting simple forms and your first tries.
Best Duplicating Silicone for your Projects
There are great differences in the quality of the available silicone products for the production of silicone molds. In particular, stability combined with elasticity are the most important factors. These are the most proven duplicating silicones in comparison:
Our Recommendation: The SmoothOn Mold Star Silicone mold Making Kit
The smoothOn duplicating silicone is our favorite, as the material is extremely elastic and with Shore A 20 hardness is perfectly suited to reproduce even the most demanding shapes. The mixing ratio is kept very simple at 1:1, the components are two-colored for a better overview. The rubber silicone set has a very attractive price.

- High heat resistant up to 450° Fahrenheit and 232° Celsius
- Curing time around four hours
- Silicone with in high-quality from established brand SmoothOn
Other very good Silicone Mold Making Kits:

- Translucent liquid silicone makes mold-making easy
- The easy-to-mix formula requires a weighted 1:1 ratio
- No vacuum degassing is necessary as the bubbles dissapear

- Easy to mix: One on one scale
- Pot life: Around 30 minutes
- Demolding after around 6 hours;

- Convenient 1:1 mixing ratio
- Fast curing within two hours, self degassing
- Formulated for resin, wax and other materials
Other Materials Required for Making your own Silicone Mold
Which materials you need depends, of course, on your project and the type of mold production. Let us assume that you want to make a silicone mold with the help of a wooden frame, i.e. work with a master mold.
To make such a silicone mold, you generally need the following materials:
Mixing Molding Silicone

- Large capacity and accurate measurement
- Made from thick, high-quality materials
- The set includes 50 mixing cups and protective gloves
Prepare Shape and Object


Already in your Household
- The object to be duplicated
- toothpick or cotton swab
Use the modelling clay and cotton buds or toothpick to seal cracks and joints in the frame. It is important that no or very little silicone leaks.
How to make a Silicone Mold – our Step-by-Step Guide
Making molds from silicone is not as difficult as it may sound. With our step-by-step instructions you can make a great silicone mold, even if you are a beginner.
Make your own Silicone Mold – The Frame Construction
- Concentrate on building the frame first. This should completely enclose the object you want to duplicate and be as tight as possible to prevent silicone from passing through. Use a smooth base plate, but no glass. Silicone rubber does not repel glass, so removing it can be a real nuisance. It is therefore also advisable to use smooth wood for the base plate.
- The base plate is enclosed by four smooth side walls. For these you can also use smooth planed wood or MDF boards. The walls should be about ten millimeters higher than your object. Seal the joints of the mold as far as possible. You can use modelling clay for this. To smooth the joints, use a toothpick or cotton swab.
- Place your object in the frame with the side to be modelled facing upwards and fix it to the floor, ideally with hot glue, strong double-sided adhesive tape is also possible. The object must not slip under any circumstances when filling the silicone mass. Now the silicone mass is mixed.
Mixing the Silicone
- First the required amount of silicone is weighed and then both components are mixed in a ratio of 1:1. Use the plastic cup and the wooden stick for this purpose. Be careful not to waste too much silicone. You can determine the amount required either by calculating the volume or roughly by using a measuring stick.
- It is better to mix several small portions than one large one. Small portions are easier to mix together without clumping. In addition, it is hardly possible to stir large portions of silicone because the mass is very tough. It is therefore better to prepare several cups and divide the silicone.
- After you have stirred the mass in the cups, tap the bottom of the cups gently on the tabletop several times in a row to release air bubbles. Then wait a few minutes before pouring the silicone into the frame to allow any air to escape.
Pour in the Silicone
- If you have used wood for the frame construction, you must first spray it thoroughly with release agent or paint it with oil. You should follow the manufacturer’s instructions, as not all oils are suitable for silicone. There are certainly some which attack its surface.
- After the frame has been sprayed or oiled, the silicone mass is poured over the object.
If you want to duplicate a blank that only has large and smooth surfaces, pouring the material is relatively simple. Simply pour the liquid silicone mass slowly over it from a relatively large height. Make sure that the entire object is surrounded by the silicone. - If the object has many angles, corners and edges, first pour a thin stream of silicone mass over them and then pour the rest into the frame. This will ensure that every crack in the mold is also shown.
- Continue until the surface of the silicone mass is about five millimeters from the blank.
When you have filled in the silicone, gently tap each side of your frame with your fingers to allow any air bubbles that may be in the silicone to escape. From now on, it is important to be patient!
Remove the finished casting mold
- When the silicone mold is finished depends on its size and the silicone used. Some silicone molds take only one hour to harden, some up to 24 hours. To check if the process is complete, gently press into the mold with a finger. Now remove the mold from the frame. If you have greased it well beforehand, it will work by itself. Then you can still straighten the edge. Simply use a carpet knife, a scalpel or scissors.
- For maintenance, rub the silicone mold with talcum powder, which you should also do after each use. The powder maintains the shape and keeps the silicone supple.
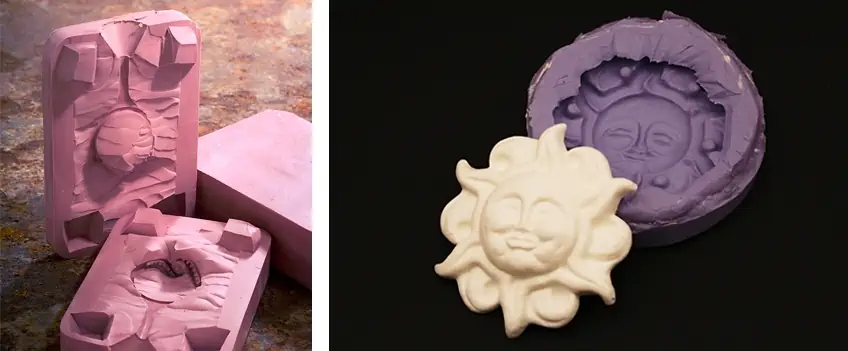
How to Mold Silicone – Two-Part Forms
With two-part molds, various objects can be produced that are of particular interest to model makers. This way you can not only cast works of art in epoxy resin, but also parts of different materials and of different sizes. The molds can be used, for example, for plaster and concrete - but of course also for resin. The concrete or gypsum parts can be painted and decorated afterwards, so that you get gates, bridge pillars or house facades in this way. If you work with epoxy resin, you can create beautiful voluminous objects with two-part molds, in which you can embed various objects, such as dried leaves and flowers.
In addition to the materials mentioned above, you will need some modelling clay. You press this into the frame so that it is half filled. Make sure that the corners are well lined and the surface smoothed.
Now press the blank halfway into the plasticine and fill the mold with the silicone rubber. Allow the material to harden and then remove both the silicone mold and the plasticine. However, the finished mold will immediately be put back into the frame, because it will be used a second time.
Place your blank exactly in the recess. Now coat the mold with Vaseline so that both halves of the mold can be easily separated later. In the last step, pour liquid silicone into the frame once more and let it harden again.
Making Silicone Molds – Blanks with Undercut
Forms with undercuts present a particular challenge. A blank with an undercut has corners or edges that protrude and can be in the way when it is removed from the mold. Since silicone is flexible, small undercuts are no problem, especially if the silicone is soft with a shore of 0 - 20. Large undercuts, however, are more difficult to handle.
For large undercuts it is best to make a two-part or even multi-part mold. When removing the blank, be careful not to overstretch the silicone and choose soft silicone rubber.
Tip: If removal does not work at all, you can cut open the mold at one edge and then remove the blank. Afterwards you attach several tight rubbers to the mold to close the crack that has been created. In this way you can also easily remove the finished work piece later.
Inspirations for making your own Molds
Advanced DIY-artists are welcome to try their hand at a chess game made of epoxy resin. This project means a lot of work, but the result is an absolutely brilliant gift idea for chess friends.
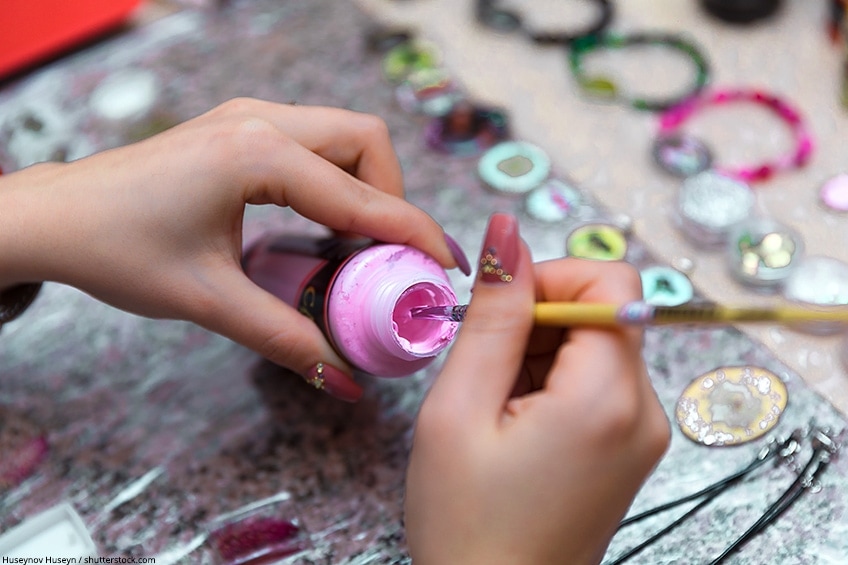
Jewelry made of epoxy resin looks noble and modern at the same time. Maybe your little daughter would like to wear mummy's or daddy's favourite piece of jewelry - but it is too expensive to simply put it in her hand? Duplicate it with epoxy resin and fill the resin with glitter particles or little stars. Your child's eyes will shine!
Even noble pendants with dried flowers can be made of epoxy resin. If you use a self-made casting mold made of silicone, you are completely free in your design possibilities.
Simple molds made of silicone are available everywhere in the trade. However, if you want to let off steam creatively, you can hardly get past your own silicone mold. However, with our instructions for mold production, hardly anything can go wrong. Just give it a try!
