Resin Crafting Projects – Best DIY Epoxy Resin Art Ideas
This post may contain affiliate links. We may earn a small commission from purchases made through them, at no additional cost to you. You help to support resin-expert.com
Have you noticed how interest in resin has recently boomed? It is not surprising, given how much time so many of us has had on our hands lately. Jewelry, toys, home decor, you name it, there are innumerable potential resin crafting projects that you can do. Today we will be discussing professional and beginner resin projects in detail. Irrespective of whether you have ever done anything with resin, or if you have some experience already, this is worth reading. For the novice, you will learn exactly how to make DIY resin, and which craft epoxy to use. For the more experienced resin artist, if you are at bit of a loss as to what to do for your next project, we have included some epoxy resin craft ideas, ranging all the way from large to small.
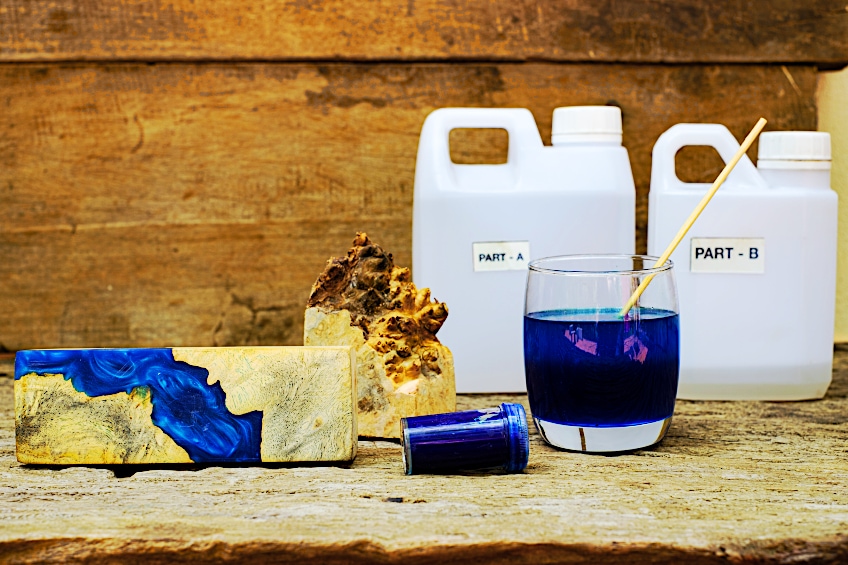
Table of Contents
Resin Crafting Explained
The two main components in resin crafting projects are, of course, the epoxy resin, and the mold you use to create the shape you desire. There is a lot more to the process, but that is essentially what is needed to make most epoxy resin crafts. You can literally make a mold of anything (with the right materials of course), or you can choose a pre-made one from a store, or even order one online. If it is not already in liquid form, the epoxy resin is melted, poured into the mold, and left to harden (also known as curing).
You could be making pendants from resin, where you have something like a heart or teardrop shaped mold. You could make little toy soldiers or a colorful resin inset that runs the entire length of a table. When it comes to epoxy for crafts, the options are endless. There is something for anyone to do, whether you are a seasoned resin worker, or learning beginner resin crafts, it is a unique craft that can be enjoyed by all, and your resin craft ideas can be appreciated by all.
Epoxy resin comes in variations ranging from transparent to opaque, with even tinted resins available. Some resins are naturally derived from the sap of trees, while others are synthetic, like conventional plastics, for enhanced durability. Depending on the type of resin you are using, any of a variety of DIY resin projects are possible. Considering the vast number of things that resin can do, and how we use it in almost every facet of modern life, the range of potential resin applications should be no surprise.
The History of Resin
Let us go back in time, all the way to the year 1909, which was the auspicious time where the first synthetic resin was first produced. Known as Bakelite, it proved to be very versatile material. Of course, there were many resins used before this, but they were derived from natural products, and were tricky to use. Modern synthetic resins are far easier to use, and are also significantly stronger than natural resins, making them a great option for industrial purposes.
Epoxy resin is, essentially, like plastic, which we all know at this point in our world’s timeline is not always good thing, because of the effect of plastic pollution on the planet. The fact that discarded plastic objects would not disintegrate and disappear over a period of a year, or even a decade, but would require centuries or even millennia, was not a consideration back in the 1950s when the plastic boom came about, and big corporations saw a gap in the market. The modern housewife was expected to have many plastic items, or she was not sufficient at her “job”. This saw a rise in the use of synthetics resin to create products such as Tupperware that could store anything you might think of. Now, at least, we have learnt how to recycle plastics.
The epoxy resins available to the crafter and DIY enthusiast are similar to most plastics, but can be manipulated by adding various reactive agents to the chemical reaction you get from mixing bisphenol-A with epichlorohydrin. Some modern synthetic resins are stronger than some metals and are employed in industrial settings. Others are ideally suited to a variety of epoxy resin crafts like jewelry making, toy building, and so on.
Adding Materials to Resin
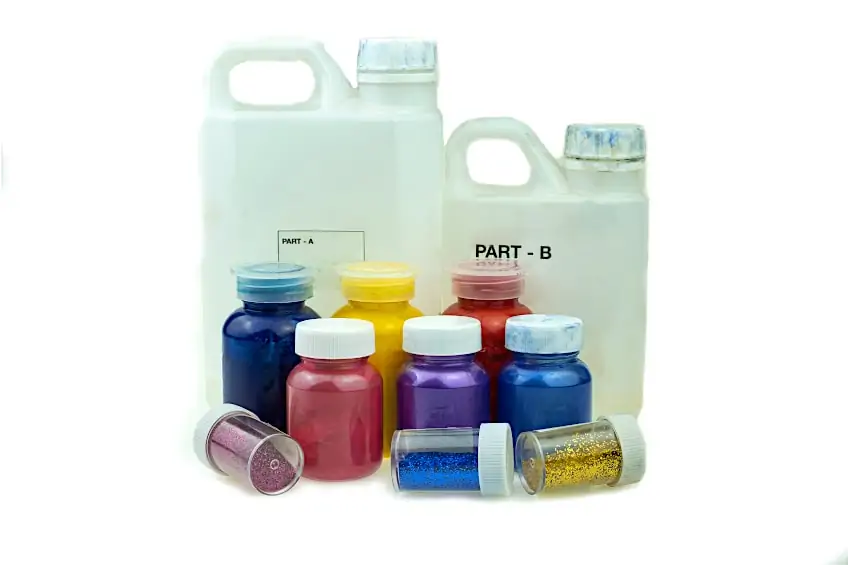
One amazing thing about resin crafts, even beginner resin crafts, is you can add other materials to the liquid resin. These will then be preserved within the resin as it sets. There are so many things you can add to your clear resin that will completely change its appearance. This can be a game-changer in your jewelry, and pretty much any resin craft idea. To give you a better idea of what we mean, here are some examples of the additional materials that you can set into resin:
- Dried or fresh flowers
- Glitter and sequins
- Shell shavings or sand
- Gemstones and shells
- Pictures of family and friends
- Dye or food coloring
- Beads
- Leaves or wood shavings
Compatible Materials for Resin
Resin crafting projects often extend beyond the mold and the resin, to include other surface materials. For example, you may wish to create a wooden tabletop with internal live edge seams abutting a central resin section. In such instances, it is important to remember that not all materials are easily compatible with resin. We have therefore provided a table of the various surface materials that will work with resin.
| Materials Resin Can Be Used On | Materials Resin Cannot Be Used On |
| Metal Surface | Wax |
| Wood Surfaces | Polyurethane (PU) Surfaces |
| Plastic Surfaces | Grease or Oil |
| Mortar Surfaces | Silicone |
| Canvas Backings | Polyethylene |
| Paper Surfaces | Polypropylene |
| Ceramic Surfaces | Painter’s Tape |
| Glass Surfaces | Parchment |
Molds for Resin Crafts
You can make your own mold by finding or creating a form from something like plasticine or air-drying clay that you wish to replicate. You then make a “shell” around this item from materials such as silicone, rubber, or plaster of Paris, which will be your mold. If you are just starting out with resin crafting and that whole process seems too complicated, you can start by purchasing a generic mold from resin crafting stores, or even plastic warehouse suppliers. There are quite a few different types of molds to choose from, and here are some examples.
Store-Bought Silicone Molds
Silicone molds are most commonly used and are readily available. As they are mass-produced, they are highly affordable, and easy to acquire, but their impact on the environment is not ideal because the most silicon-based objects are not recyclable.
One thing that makes them very easy to use, is that the resin will not get stuck inside the mold, because the plastic surface makes the mold smooth, allowing for an easy release from the mold. The amount flexibility in silicon also means you can preserve the mold longer for re-use because there is less risk of the mold breaking when trying to remove the solid resin inside.
Home-Made Silicone or Latex Molds
Like we have mentioned, you can take a mold from any shape or object that you want to replicate. Buying ready-made molds can be quite limiting because you are restricted to uninventive shapes, that could inhibit your artistic flow. There is a lot of fun, and ingenuity in creating your own molds, and some of the beast materials for home-made molds are rubber and latex.
If you have never made a mold before, you can buy a fully equipped kit for making molds in art supply or general crafting stores, which come complete with instructions to explain the process in detail. Once you have learnt to make your own molds, the possibilities of what you can make are endless. Let your imagination run wild, because the world of your resin craft will now be completely just open to you.
Resin Crafting Ideas
There are too many different resin crafting ideas to name in just this one tutorial because the list would be endless, but we have selected a few examples to give you an idea of just what is possible with resin.
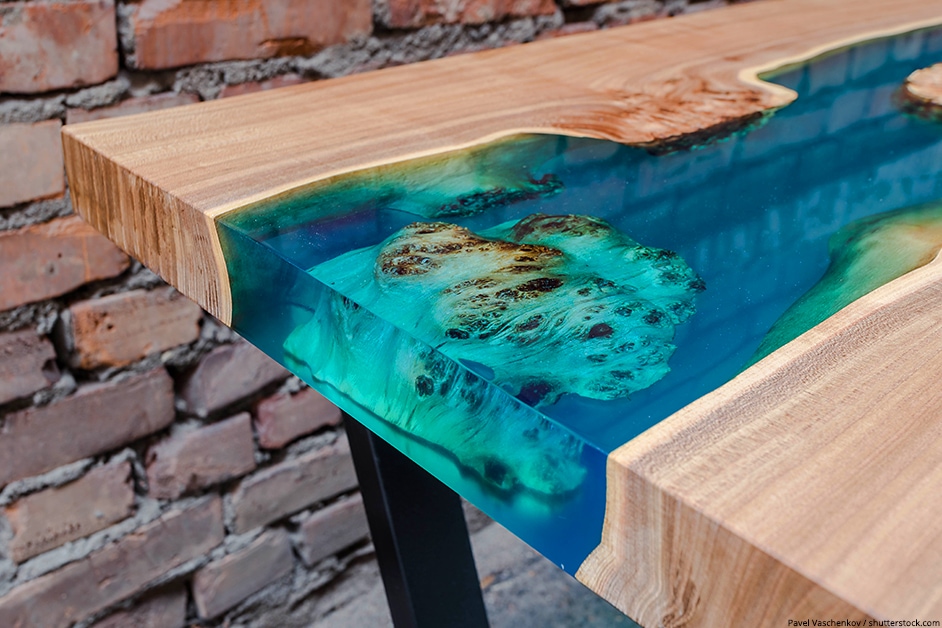
Resin Tabletop
This is a modern interior design favorite that adds a beautiful, minimal, and sleek appearance to your home. Many people have had counters made from concrete topped with resin, which is unique in style, but very desirable! This can be quite a fun project, and one that is open to innovation. For example, the counter base need not be concrete, but could also could be made from wood, or metal. And other materials could be set into the resin for decoration.
Start by selecting the material you wish to use for your base. This could range from wood to metal, provided it is strong and stable enough to ensure long-term structural durability. Next, choose the dyes or the various items that you want to incorporate into the resin, like flowers, beads, pictures, or even newspaper cuttings. Then equip yourself with a paintbrush, a blow torch, some cups for mixing the resin in, and a PVC pipe that is not too long.
The first step in the process is to paint the counter base with a base coat or resin using the paintbrush. Make sure that the base coat is smooth and even by working out the lumps and bumps with your brush. While it is drying, you might notice some bubbles forming. Use the blowtorch to get rid of them. The heat will also help the resin dry faster. When the base coat of resin is dry, you can get your cups out, and mix in the different colors you want to work with. This is up to your design, and there is no right or wrong combination. The PVC pipe is there to help apply the resin smoothly, with minimal mess. Tilt the pipe so that the one end is against the table surface, and pour the resin down the pipe, as if it is a slide, and let it gently spread out over the tabletop.
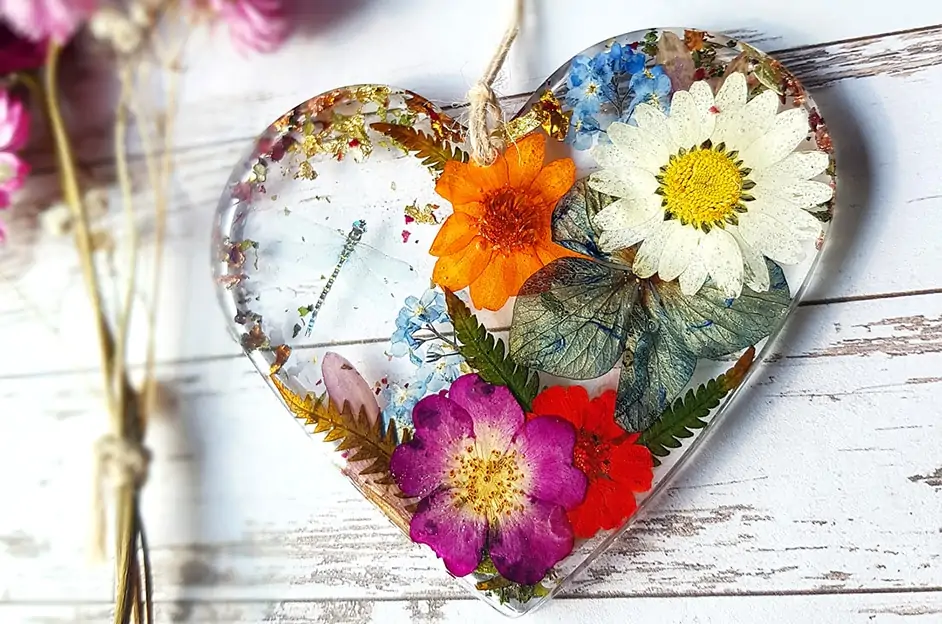
Resin Jewelry
Jewelry making is a great idea for those small epoxy resin projects. We will explain, in a nutshell, how it is done. This is perfect for those DIY resin beads and a great place to start for resin-working newbies. The casting of jewelry is a relatively simple process and the molds for jewelry castings are by far the easiest to acquire. You would probably find that if you were to purchase a jewelry resin mold you would get it in a set that includes multiple molds. This is mostly due to the fact that this type of product is mass produced allowing manufacturers to offer a variety of shapes for you to choose from and combine and customize.
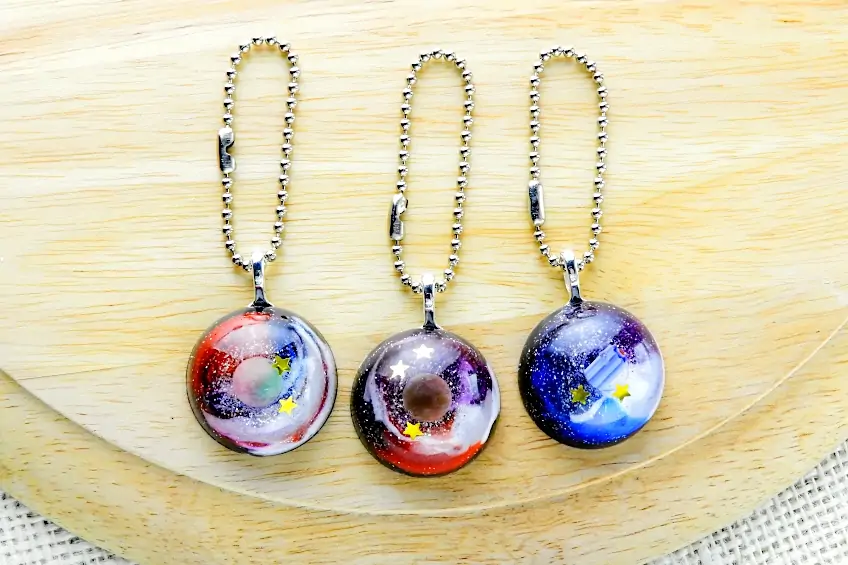
You can make earrings, necklace pendants, rings, hair accessories, and so much more. The skill needed to create these items is not of a professional level, so you can be a complete noob and you will most likely succeed, Mostly, you will have some fun!
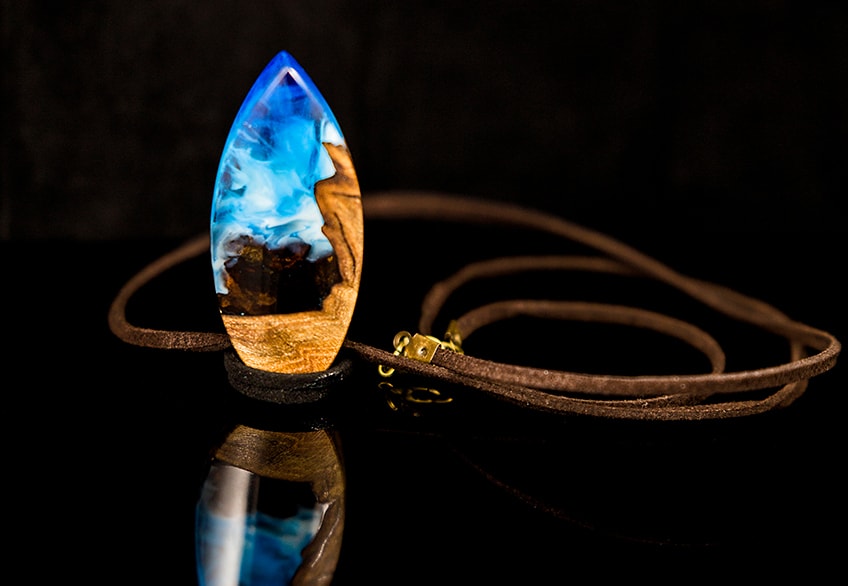
If you would like your casting to be more interesting, you can attach a pin or chain plug to it while the resin cures, or add precious items like leaves or flowers, letters from lovers, photos of family members, Your baby’s first painting, sparkling sequins, glitter, or dye for swirls of color. You can either mix these items in before you add the hardener, or you mix in the hardener for the resin. It is up to you and what you find to work best.
Resin Coasters and Place Mats
Crafting things is great and all, but what is better, is when those crafted items serve a purpose? Practicality is the thing of the modern world, which has adopted a minimal feel, so having less, eliminating useless trinkets, and ensuring that everything you own has a clear function is the prevailing design aesthetic. DIY resin coasters and placemats are great examples, because they not only make your dinner table or luncheon look the part, they also protect your beloved countertop from liquid spills from careless elbows.
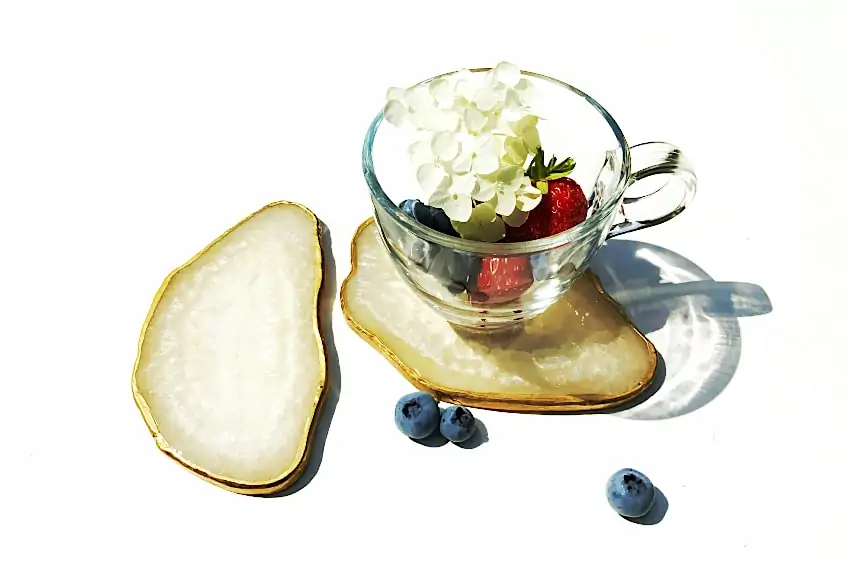
You make a set of coasters with resin protected family pictures, one for each member, using their favorite color. Or write inspiring quotes or messages on a set of coasters as housewarming gifts. These molds are made from a durable, reusable material, and are simple to use. These can also easy to reproduce on a large scale because all you need to do is pre-mix the resin and the hardener, and pour it into the waiting molds. Then just wait for them to dry before removing them from the mold, and sand them down around the edges to get a smooth finish.
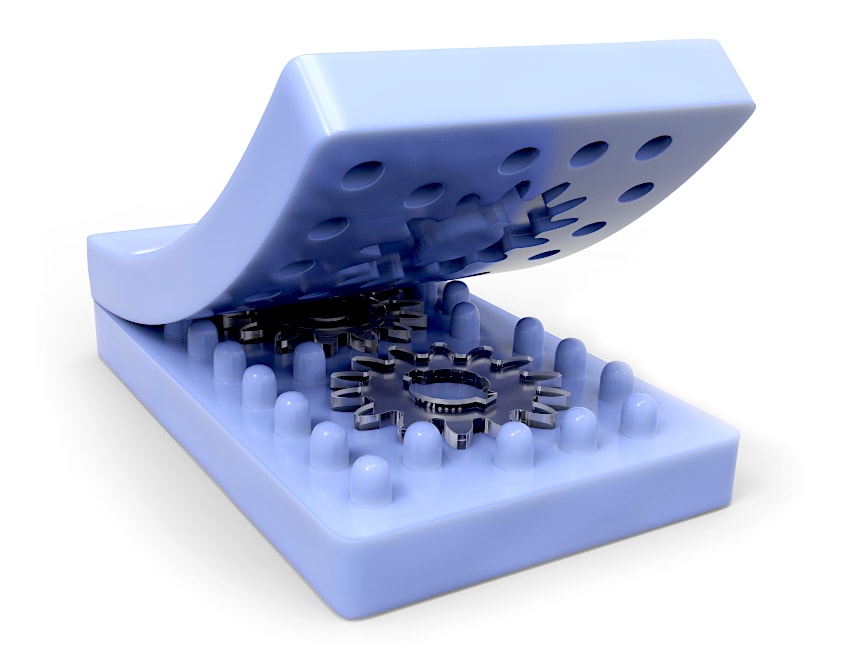
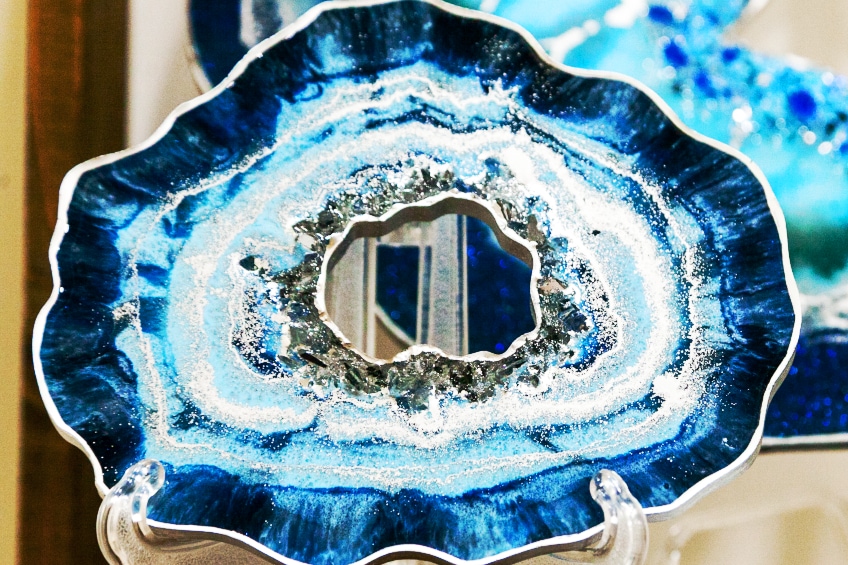
Resin Light Bulbs
This is probably the most unexpected item that can be made from resin, and it has the greatest uses – light bulbs! We would like to bet that most of you had no idea that some of the bulbs for our lights at home are made from resin. Well, it might seem less surprising when we remind you that manufacturers started making plastic bulbs because it was cheaper than the glass ones, and they also stood less chance of bursting, making them far safer. The plastic that they use to make those bulbs is epoxy resin plastic.

Crystal resin is a type of resin that is crystal clear when solid, and it is often used to make light bulbs that reflect light amazingly. This resin can be molded into any shape, including the shape of a lightbulb. LED lights can be set inside.
Using epoxy for crafts as an aesthetic project, is a global trend at the moment. It can have a rustic or vintage look, or you can modernize it any way you prefer. The skills involved in such resin casting projects as making lightbulbs, are not exactly the most difficult to learn. The more you practice, the more you develop your skillset.
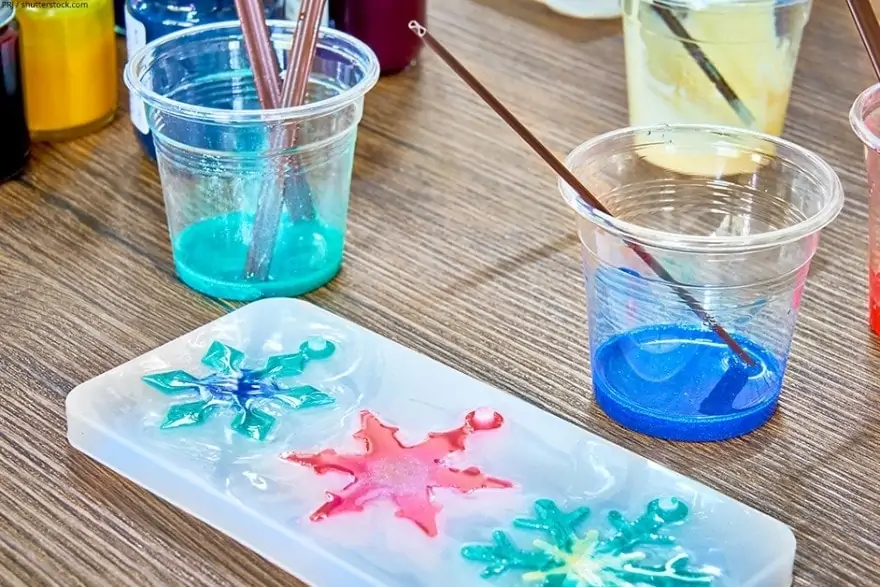
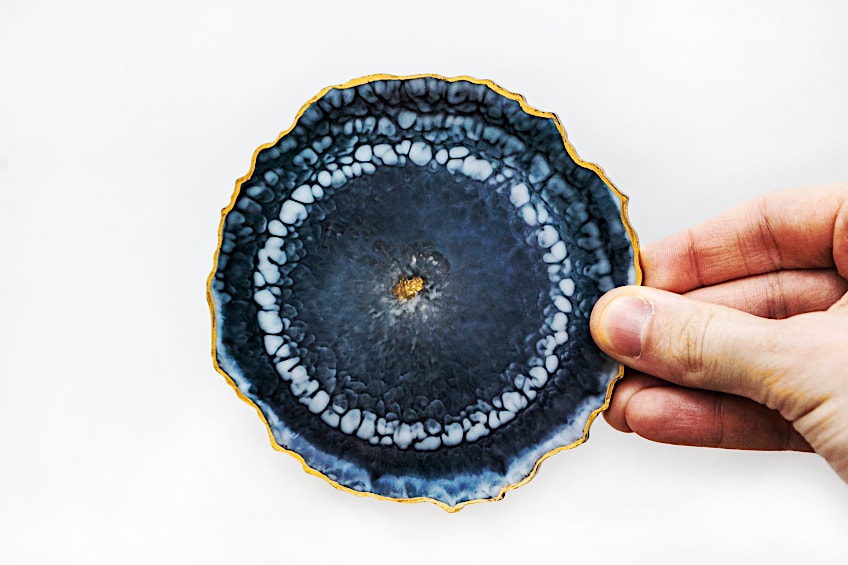
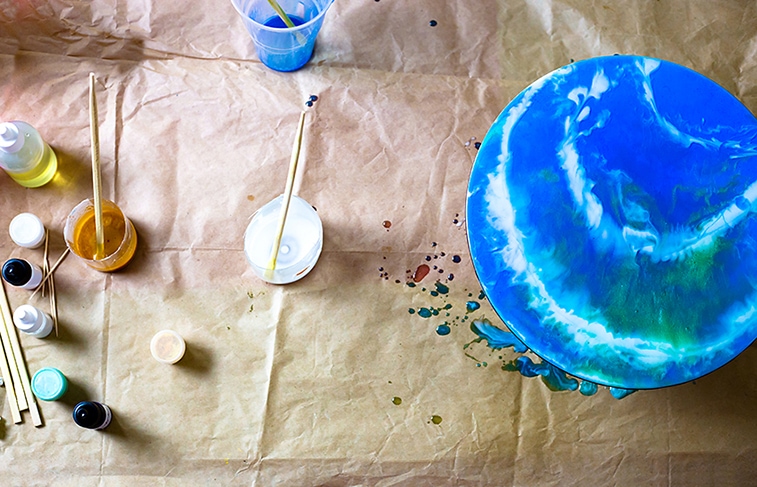
Alcohol Ink in Resin
You are not going to be short of ideas once you have learned how to work with resin, there is a world of molding and crafting opportunities awaiting your attention. Once the skill of mixing or melting down the resin and pouring it into the mold has been acquired, you can begin learning how to combine inks for colorful swirls within the resin.
If you are looking for a visual effect that is both easy and impressive, then adding alcohol ink to your resin casting may be the technique you are looking for. The ink we use in pens is not the same as alcohol ink. Standard inks are not as vibrant in color as alcohol-based inks, Especially when these have been set in resin. When you are working with crystal resin, alcohol ink is commonly used as it suits the overall glassy aesthetic of the resin. Food coloring and other coloring ingredients might tint the resin completely, whereas alcohol resin will allow certain areas of the resin to maintain their transparency, creating an easily achievable swirl of vivid color.
Transparent epoxy for crafts like this is much cheaper, so this is not only a aesthetic technique but the most affordable one. If you can imagine a stained-glass window or a marble effect, that is similar to what you can achieve.
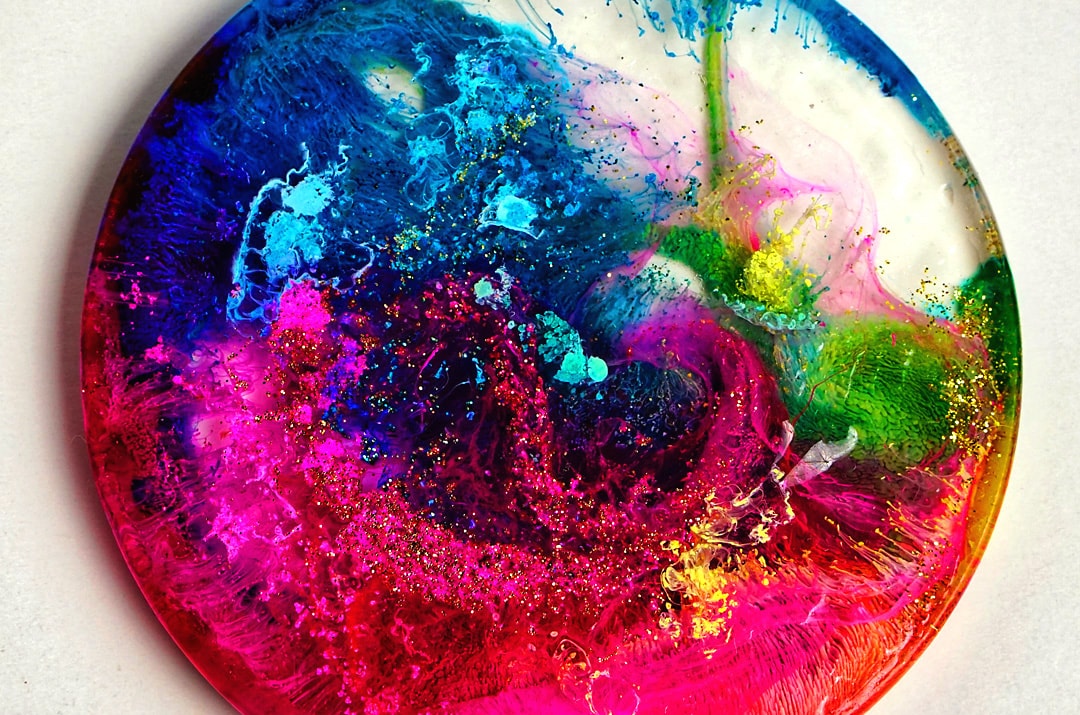
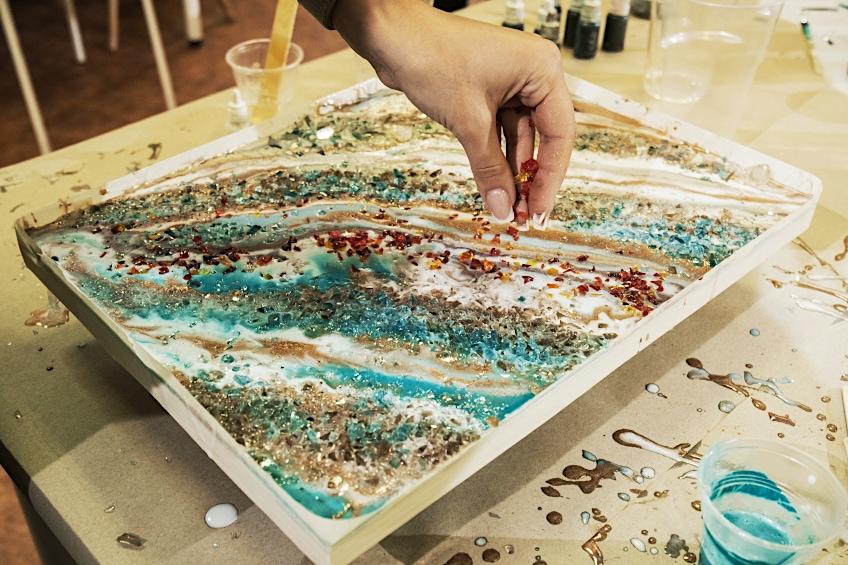
Resin Painting
Resin painting is not the easiest skill to learn, but that does not mean that it is impossible. It does mean that beginners with resin working might struggle, and for this, we suggest leaving learning this craft until after you have acquired a bit of experience in working with resin. The art of painting already requires a certain amount of skill and practice so it is easy to understand how painting with a resin is particularly tricky due to its unique consistency.

Be that as it may, we love the idea of resin painting, and it is worth including in our list of resin projects. Resin painting can be fun and a great way to express yourself, not to mention a great way to show the artist’s mood. All forms of art are therapeutic but getting down with resin and simply slapping it onto the canvas adds a whole different feeling to the painting process.

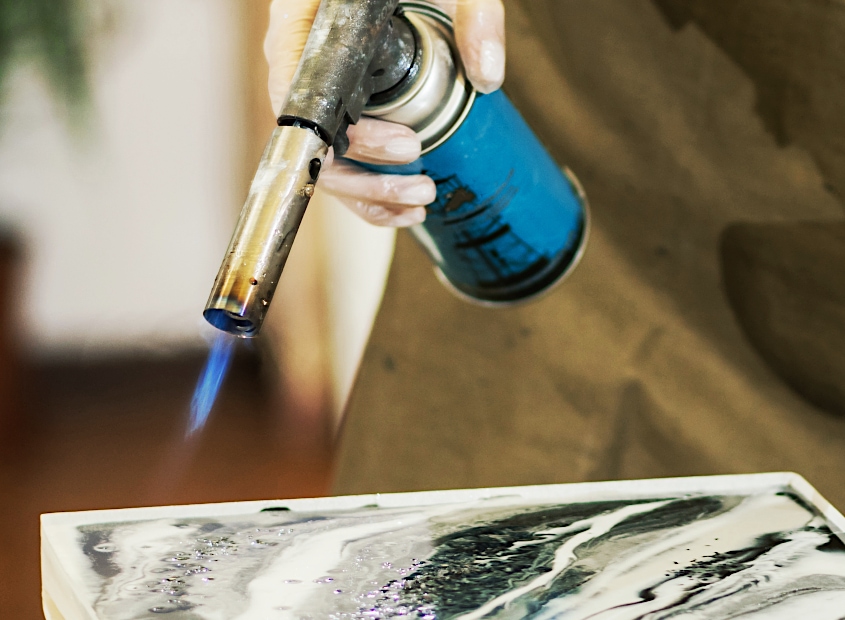
Another thing with painting with resin is the amount of resin required. It can be a bit expensive to finish a large painting because you will need a fair amount of resin to complete it. But, once you are sorted with all the tools and materials, you can sit back and enjoy the art of painting with resin. If those pesky bubbles start forming in your painting and are drying, use a blowtorch to get it up and dry it faster. That will also work the bubbles out, allowing for a smooth finish.
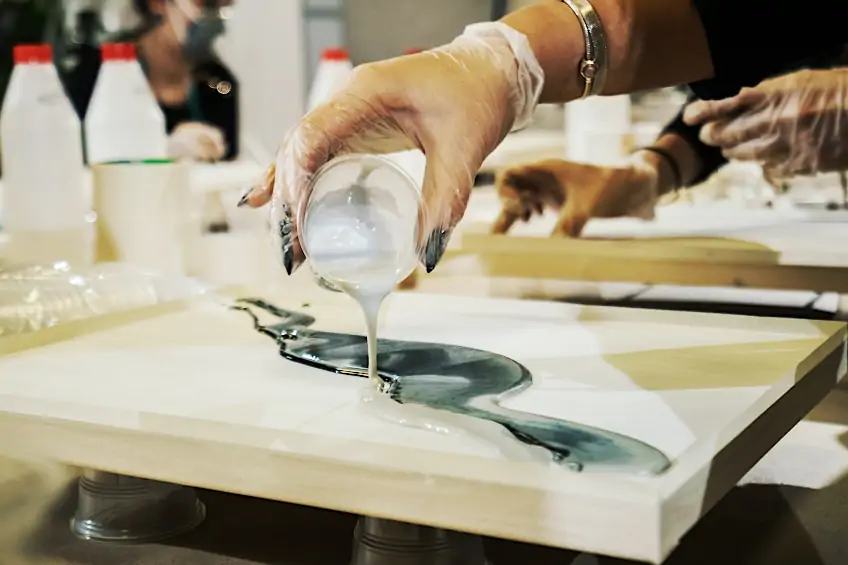
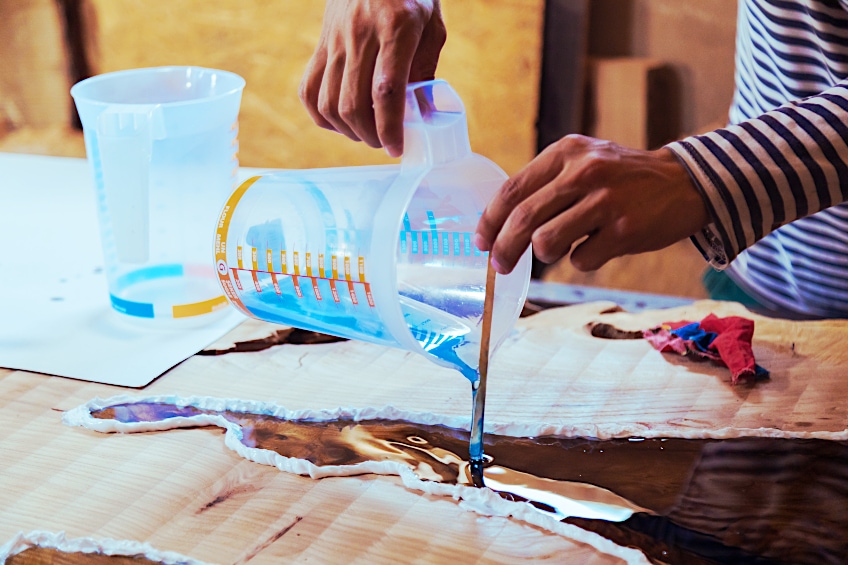
Filling Voids in Wood with Resin
In my opinion, this is one of the best resin crafts you could learn. If you are unsure what it involves, just be warned that it can be a significant undertaking. Assuming you have an account on Pinterest, there is a good chance that you have seen resin used in this way. Damaged wooden tables used to be sent to the garbage dump. That was before people discovered that you could fill any cracks and voids on a table’s surface with resin, and the result would actually enhance the beauty and value of the table.
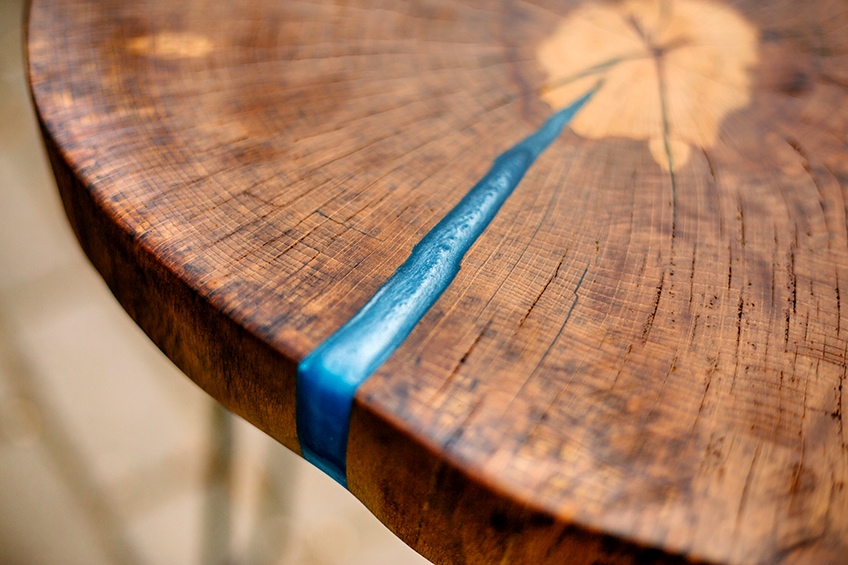
This style of resin art has become so popular that it has seen brand new tables getting chunks hacked out of their surface on purpose, just so that the artist can fill in the hole with resin. This has taken an imaginative turn because you can then choose what the holes should look like, and what pattern they can take.
The entire process might take a while longer than originally expected to get it right, possibly more than just a weekend. It is not as simple as simply pouring the resin into the holes of the table’s surface. The table first needs to be sanded down and leveled to make sure that the majority of the surface is level. Only once you have mixed the color in with the resin, and the hardener, can you start filling the holes.
There is quite a bit of resin required to complete this task, so we suggest that you start with a smaller table and work your way up to what we are describing here. With resin filling, you can refresh old items of furniture that are special to your family and it can often be a fun activity for the whole family.
| Resin Crafting Activity | Degree of difficulty |
| Resin Jewelry | Easy |
| Resin Light Bulb | Easy |
| Resin Coasters and Place Mats | Easy |
| Using Resin and Alcohol Ink | Medium |
| Resin Tabletop | Medium |
| Resin Paintings | Hard |
| Resin Void Filling | Hard |
Creating Resin Castings
Now that you have some idea of what you could create with resin, and the extensive range of large or small epoxy resin projects that you can still discover, it is time to learn how to use the epoxy resin, and by that, we mean making your own resin casting.
We have laid out a set of steps that you can follow. These are not absolute, that there are various methods for casting, but this is a guideline for what we think is the easiest method. Make sure that you have prepared your working environment, and that includes having good ventilation because some epoxy resins emit odors that can be toxic. Gather all the tools and materials needed before you start to prevent any disruptions in your workflow.
Workspace Preparation
Resin has a thick and sticky consistency that can be difficult to clean up when spilled. To make your life a bit easier, we recommend laying a plastic tarp on the ground to protect the floor. This will help in the event of a clean-up because you can simply scrape dried resin off the plastic when you are done. The next thing to do, as we mentioned above, is to get all the equipment needed for the task ready before you start. This will allow you to make sure that you have everything you will need, or if you should make a trip to the store to get whatever is missing. Here is a list of the tools and materials you will need for casting resin:
- Epoxy resin of your choice
- Alcohol ink or dye of your choice
- Additional trinkets or materials to set into the resin of your choice
- The mold
- Paper towels
- Ice cream sticks for mixing the resin, the hardener, and the dye
- Plastic cups or containers for mixing the resin in
- PVC pipe to distribute the resin onto a surface
- Non-stick spray or talcum powder to prevent the resin from getting stuck in the mold. It allows the easiest extraction.
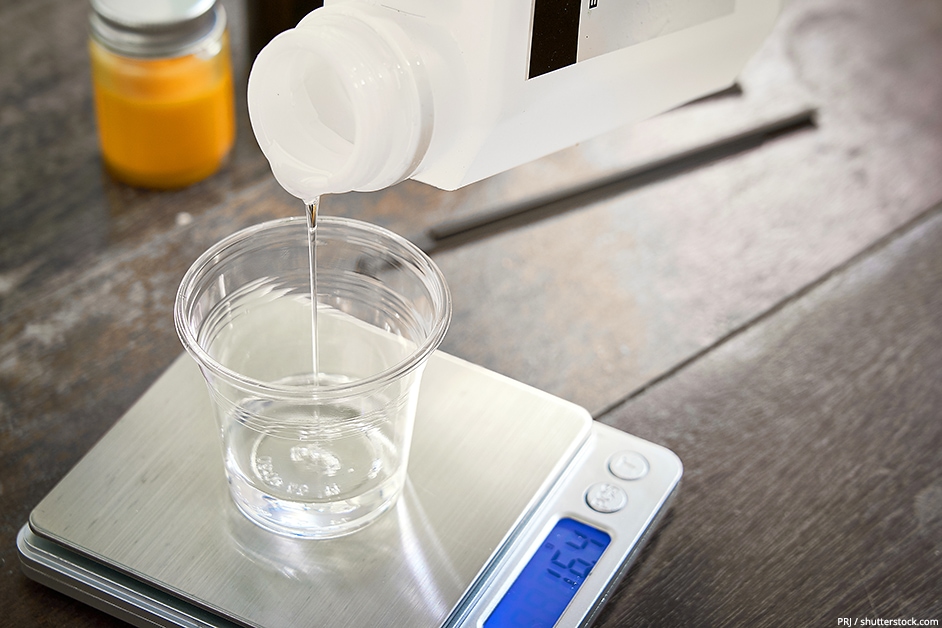
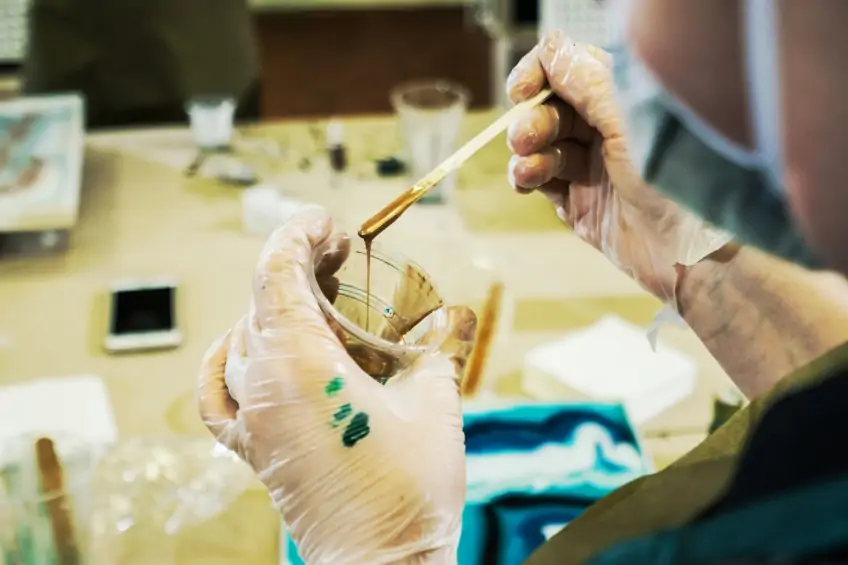
Mixing the Hardener With the Resin
Starting with small resin projects is not admitting that you cannot do the big things, it just shows your patience in learning a new skill, which is never a bad thing, but rather helpful in building a foundation for the skills to follow.
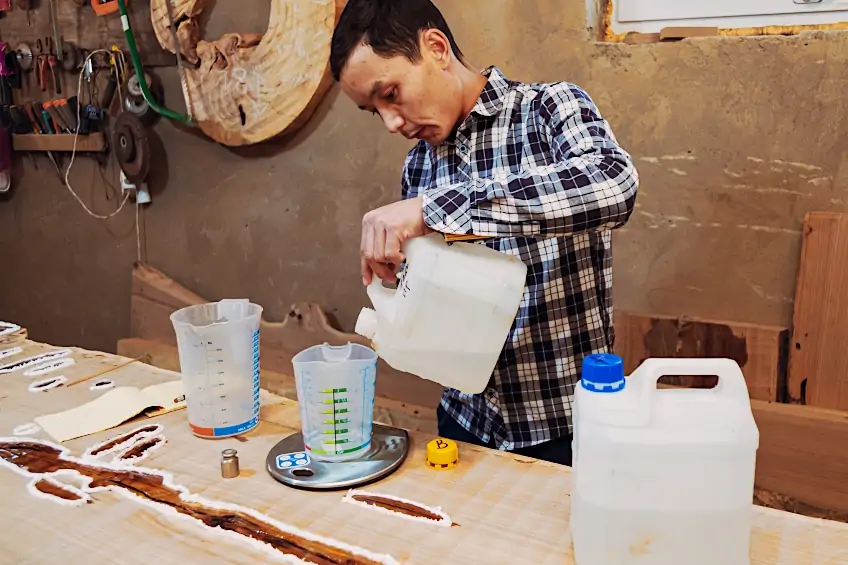
In order to gain a good understanding of how the substance works, we need to get comfortable with the consistency, like how long it stays in liquid form after you have added the hardener, and how much time you have to wait for it to dry and become solid once more. Ideally, you don’t want to rush when pouring the resin into your mold. If you do take great care with this part of the process your casting will stand the risk of bubbling, which you want to avoid. Start by adding a small quantity of the hardener to your resin to get an understanding of how fast it works, and then add more as you go.
When pouring the resin and hardener into the mold, you want to do that slowly as well. This is where you can avoid having those pesky bubbles form. If however, you find bubbles forming despite your best efforts to avoid them, you will be relieved to know that a blow torch can remove them.
The Resin Mold
If you are new to resin casting, you might want to take this next bit of advice into consideration. Most beginners who neglected this step only realized just how important it is after their resin has dried. To prevent the resin from getting stuck in the mold, you must prepare the mold, before you mix the hardener into the resin. Line the mold entirely using some type of release agent such as a non-stick spray, or even talcum powder. Once that is done, you can then mix in the hardener for the resin, and gently pour it into the mold, safe in the knowledge that extracting your set resin object will be easy. This can save you a lot of time and unnecessary effort, and it can prevent your from having to break your mold to get you resin cast out.
Filling the Mold with Resin
This a pretty simple process, but there are a few suggested guidelines you can follow to make sure your result is the best that it can be. Do not simply pour your resin and hardener into your mold all at the same time, but rather pour the resin in first and then follow with the hardener. It is important to keep in mind that some differences in surface tension can bubble up and form between the mold and the resin, which will result in imperfections in your cast.
Rather pour in a little bit at first, and then swirl the mold around so that the resin coats the entire surface area inside the mold. After that has been set, you can then gently fill the mold with the remaining resin. This is a sure method to prevent those bubbles from forming. If the mold you are using has two or more parts that need to be attached, make sure that they are connected securely whilst the resin dries and cures.
Taking the Casting Out
Extracting the cured resin casting from the mold should be easy enough, but only if you adhere to our suggestion to prepare the mold with a non-stick spray or release agent. If you choose to ignore that step, then you might find that certain molds are more prone to sticking to the resin, and the casting will pretty much refuse to come out. At this point you may have to resort to drastic measures, like breaking the mold apart.
If you choose to spray the non-stick products, or even just coat the inside of the mold with talcum powder, which is baby powder, then you will find extracting the casting much easier. Be that as it may, you must still extract the casting gently, so there is no risk of damage or dropping it. Dropping it can cause chipping, which would mean start again or having one casting less in a set or series, or scratching your object. With some resins even the simplest scratch which will ruin the aesthetic.
Ideally, the resin casting should not need any effort to extract from the mold, no peeling, or hacking away. It should simply fall out or pop out as some do. Your skill will develop the more you practice, so do not be disheartened when you lose a few molds and castings to the extraction process, we all have to start somewhere.
Completing Your Resin Item
Once your resin item is set and dry, it is time to remove it from your mold and finish it off! This will include sanding, shaping (if needed), and sometimes, sealing and polishing. This will depend on the item you have created, as the process for finishing a resin item can vary. It is always best to follow a tutorial specifically for finishing off the type of item you have created and the type of resin you have used.
Now that you have reached the end of the tutorial, we hope that you find yourself itching to try out a casting for yourself! What better way to get better at a skill than to work at it every day! In no time at all, you will be making all sorts of resin crafts to sell.
Frequently Asked Questions
What Are Good Resin Art Ideas for Beginners?
There are many resin art ideas that you can try out when crafting resin. while some require some level of skill, others are perfectly suited to beginners. You will learn as you go. As a novice, you may want to start with simple casts such as jewelry pieces like personalized beads or pendants. This will give you enough experience to move to casting figurines, toys, and more. Eventually, you will be able to paint with resin.
When Should I Extract the Casting From the Mold?
When it comes to extracting the resin casting from your mold, it is extremely important that you familiarize yourself with the drying and curing time of the specific type of resin you have used. You must wait for the full drying time period to have passed before making any attempt to de-mold your cast. Once the resin has set completely, it should be easy enough to get the casing from the mold. Provided of course, that you applied a non-stick spray or release agent to your mold before casting.
How do You Prevent Resin from Sticking to the Mold?
There are non-stick adhesive sprays and release agents that are great for keeping the mold nice and smooth, allowing for easy extraction of the casting from the mold. You can also use talcum powder, wax, or even masking tape.
