Best Pressure Pot for Resin Casting – Complete Buying Guide
This post may contain affiliate links. We may earn a small commission from purchases made through them, at no additional cost to you. You help to support resin-expert.com
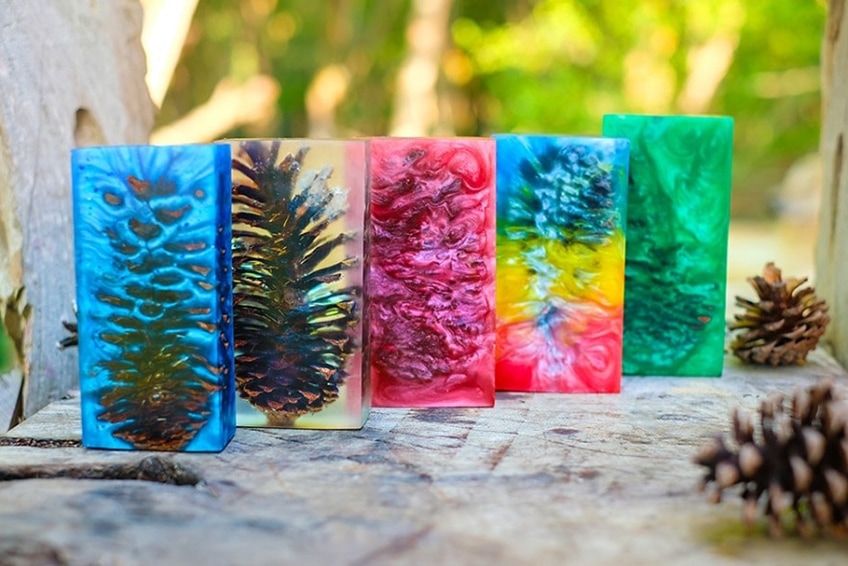
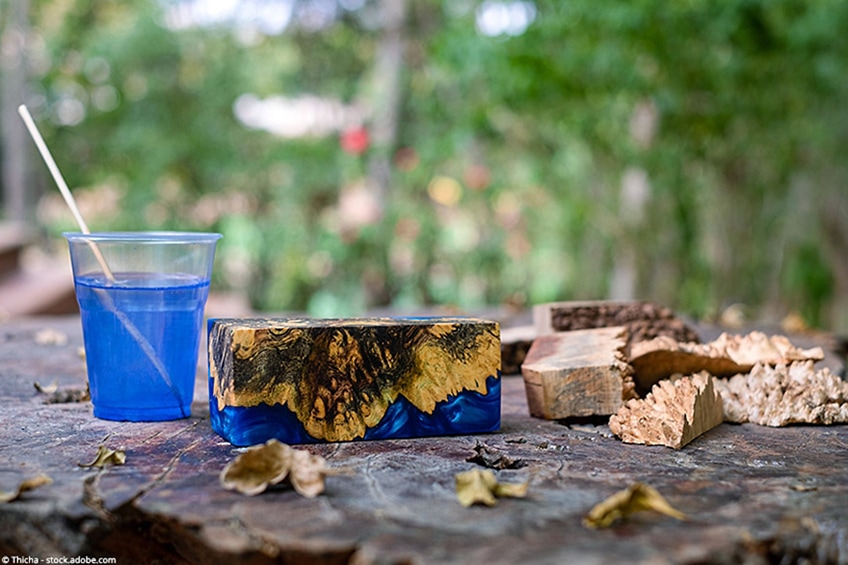
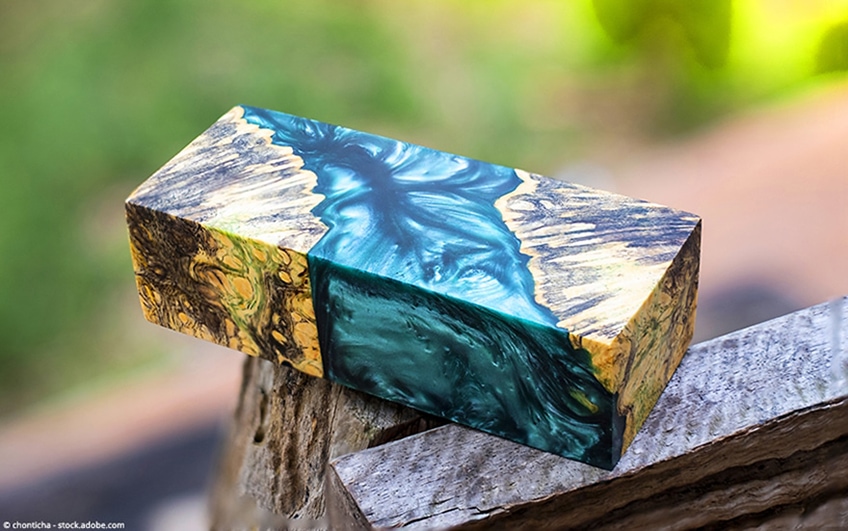
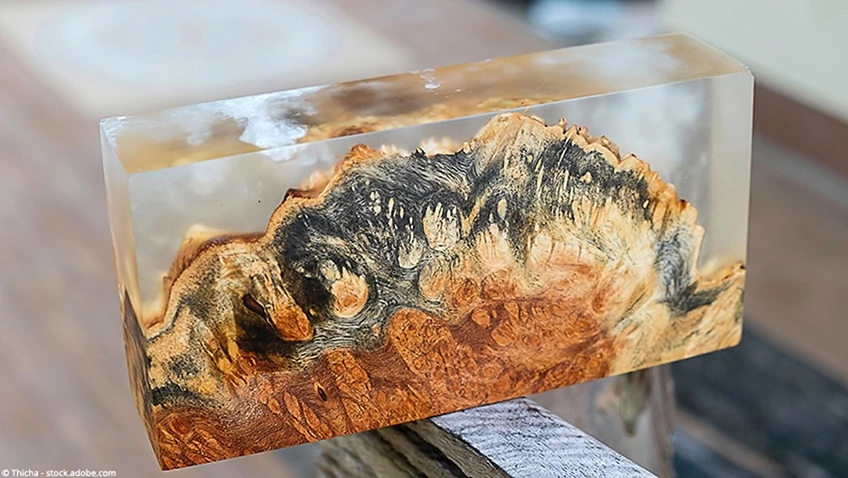
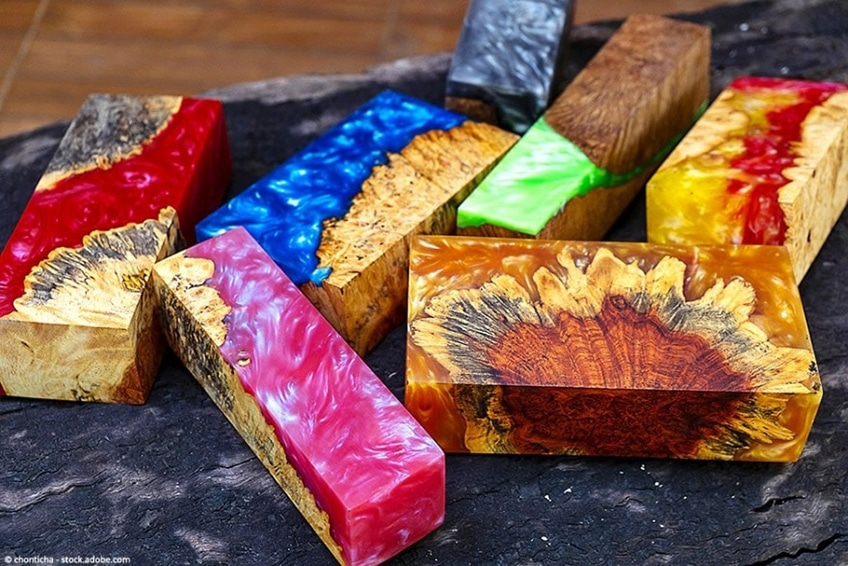
When you are involved with resin castings, whatever project it may be, you always want the results to be as perfect as it can be. This means that you try to make sure you end up with a bubble-free final product, leaving you with a crystal-clear casting. Whether you are an expert in this field or just a beginner, everyone is faced with the same problem. Placing your casting in a pressure pot is the only sure way to achieve a bubble-free casting every time.
Table of Contents
What is a Pressure Pot that is Used for Resin Casting?
You will need to use a pressure pot to create air-trap-free and bubble-free resin castings, something that is imperative to create clear resin casting. If you have air trapped in resin, and particular clear resin, it can create a cloudy color and you won’t be able to achieve crystal clear castings. You can purchase a pressure pot in a variety of sizes.
Pressure Pot – Do You Need to Put Resin in it?
Is it necessary to place your resin pieces in a pressure pot? Keep in mind when you mix your resin, it is inevitable that a certain amount of air will be introduced to the resin, this air is what leads to bubbles. If you are working with a small DIY resin casting, you should be able to get rid of any bubbles by simply gently knocking the sides of the mold, causing the bubbles to move to the surface and pop.
Should you be working with a larger and, or more complex resin piece, the only option you have to remove any bubbles is to use a pressure pot. The pressure pot allows the bubbles to be removed by using the pressure to crush the bubbles. It is important to ensure you leave your resin casting for the full curing time, in the pressure pot, to remove any air bubbles and give your resin a crystal-clear finish.
Another use for the pressure pot is to remove any air that may have been trapped between the mold and the resin. When you are casting and pour the resin into the mold, there may be parts of the mold that are thinner, or more complex that the resin does not flow into sufficiently, air will then become trapped between the sides of the mold and the resin.
The resin casting pressure pot will force the air out of these places and allow the resin to fill these areas, enabling you to get crystal-clear castings.
Using a Pressure Pot: Pros & Cons
Pros
- Should you have several small items that all require degassing, using a pressure pot is an affordable method
- You can achieve crystal-clear and bubble-free pieces while ensuring no air is trapped in your resin casting
- An easy and cheap way to degas your resin castings
Cons
- If you are using a soft rubber mold, once the pressure has been released from the pressure pot, the bubbles will simply return to the resin
- A soft rubber mold can also unfortunately collapse in any spaces where air has become trapped
Using a Pressure Pot – What You Need
If you are going to use a pressure pot, you need to gather the following items before beginning:
- The most important item is a compressor that comes equipped with a motor which can produce a pressure of 90 Psi or lower and has a minimum 3.5 H.P, also you will require a quarter-inch connection air hose
- To seal the lid, you will require a gasket
- Safety relief valve
- A quarter-inch inlet connection
- A pressure gauge that can withstand 60 Psi or more
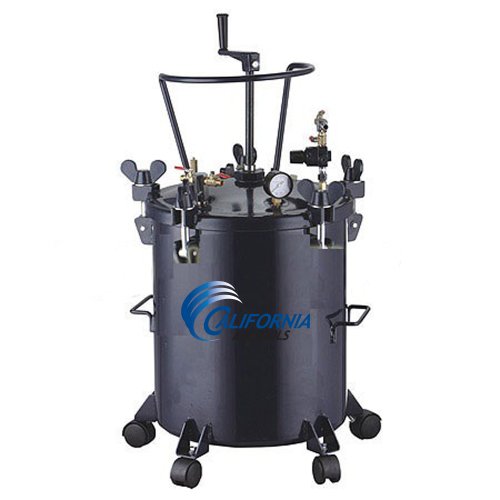
Best Pressure Pot For Resin Overview
Shop Fox Pressure Pot
A Shop Fox pressure pot (model number W1799) is the best price-performance pressure pot on the market, it offers you the following features:
- A steel tank (galvanized) that has a 2 and a quarter gallon capacity
- A safety or pressure valve
- The pressure of the pot should be able to get to between 25 and 30 Psi, with a maximum pressure of 45 Psi
- A double output regulator should be attached
- When you take the lid off, the lid gasket and clamps should stay fixed

- This Pressure Pot features a galvanized steel tank and double output regulator
- Including pressure relief/safety valve.
- Maximum pressure is 45 PSI. Normal operating tank pressure is 25 to 30 psi
The Shop Fox Pressure Pot was initially intended to be used as a paint pot and offers a 2 and a quarter Gallon capacity, that being said, it is easy to convert it to be utilized as a resin pressure pot. You can convert it using the following method:
Start by cutting the metal that feeds the paint into the tank, off (get it as short as you possibly can). You will then need to change the fitting to change it to a resin pressure pot, the new fitting required is a half-inch compression, as opposed to the quarter-inch NTP. Doing the necessary conversions allows it to become a resin pressure pot, and provides you with a good quality pressure pot option.
Pros
- The completed item, once the conversion is done, allows for you to create high-quality resin castings
- The completed conversion allows you to use the pressure pot for resin up to 80 Psi
- It is an affordable option
Cons
- The lid bolts can be difficult to tighten, and will leave dents in the lid when fastened
- You have to do the necessary conversions before you can use it as a resin pressure pot, it isn’t ready to use straight from the box
California Air Tools 10 Gallon Pressure Pot
- The vessel has a depth of 17 and 3 quarter inches and a diameter of 14 and 3 quarter inches
- It is made of steel which has been coated in Teflon, this makes it much easier to clean after use
- Offers working pressure between 20 and 30 Psi
- It comes with casters, which can be removed if you do not wish to use them. These casters allow the user to move the vessel around with ease
- It comes equipped with wing nut clamps and a sealing gasket on the lid
- Attached one will find a double output regulator
- It is equipped with an on/off ball valve
- You will receive a pressure relief valve
- There is a hand-operated agitator which is built-in
- Teflon coated steel tank for easy clean-up, including removable casters for stability
- Double output regulator, On/Off ball valve, pressure relief valve and built-in agitator
- Maximum pressure is 80 PSI and working pressure 20-30 PSI
This particular piece of equipment was initially designed to be used for spray painting; this explains why it comes equipped with a hand agitator. One can convert it into a pressure pot that you can then use for casting resin.
There are two possible options for you to make the relevant conversion
- You can remove the agitator by cutting it off at the point just below the safety regulator. Simply doing this will ensure the conversion you require. It may seem simple enough but many users have reported that is can be quite difficult.
- To the conversion, you will have to remove the agitator, once removed you will need to seal off the hole that is left in the lid. Your options to seal the lid include using a 5/8-11 x 3-inch hexagonal cap screw, or using a 5/8 x 3-inch bolt with two 5/8 x 2-inch steel washers. Finally, seal it all with a rubber washer
When you have finished the necessary conversion, you can now use the equipment like a pressure pot for resin.
Pros
- While we have advised that the pressure is between 20 and 30 Psi, it can go up to 60 Psi with ease
- It isn’t expensive to do the conversion, and is a simple process to do
- Overall, this is a very affordable option
- The Teflon coating allows for easy cleaning
- Using a wing nut to fasten the lid creates an effective seal which is easy to use
- As it such a large vessel, at 10 Gallons, it allows the user sufficient space to do all your casting in one go
Cons
- There have been a lot of reports that when you reach 25 Psi the safety bracket and pressure release valve might fail; it should probably not be used for mold making.
Using the Pressure Pot for Casting
Your desired goal when working with molds and resin products is to have a completed product that is bubble-free and crystal clear in appearance. To achieve this outcome is to utilize a pressure pot when you are doing the curing process.
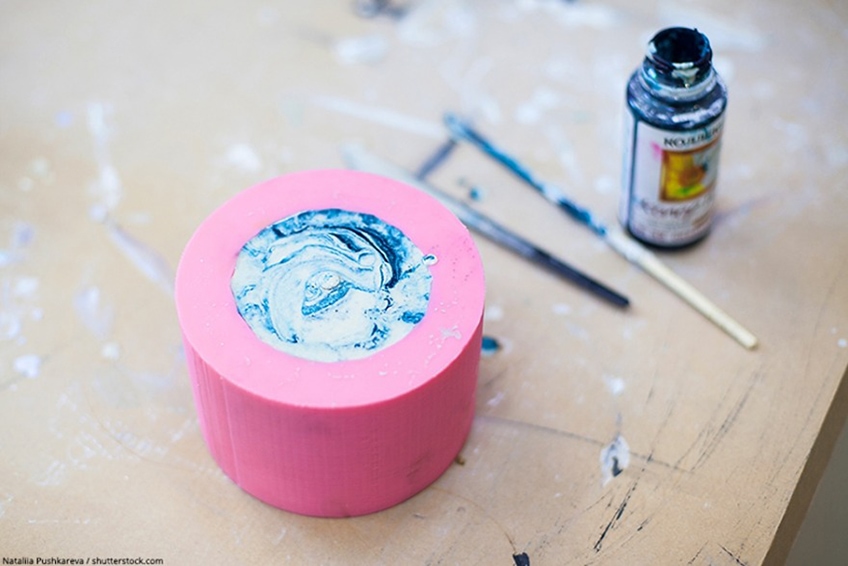
Prepare Your Casting or Mold
Should you have a mold already, you begin by combining your resin and hardener as per the necessary instructions and then pouring the relevant mixture into your mold. If you have chosen to make your mold, first mix the relevant parts of your mold making kit as instructed and pour over your original item (master item). Finally, if you wish to embed any item, combine your hardener and resin and then pour it over the item you have selected to embed.
Prepare Your Pressure Pot
To ensure you have a successful use of your pressure pot, you will need to consider the following:
- It is important to ensure you have the correct sized compressor that will allow you to achieve the Psi you require for casting. A compressor that can work up to 80 to 110 Psi is what you will require
- Make sure that your safety/pressure valve has been set to the necessary Psi
- You can purchase pressure pots in an assortment of sizes, try and buy one which will be large enough to take all your castings and molds
- You will need a necessary connecting hose for your pressure pot, ensure it is the correct size. You will require a quarter-inch fitting on your pressure pot to be able to connect the hose
- Place your mold or casting into the pressure pot and close the lid, using the securing bolts you can seal the lid by tightening them. Do not switch on your compressor until you are sure you have tightened the securing bolts sufficiently
- Turn the compressor on, and allow it to reach the necessary Psi. to check that you do not have any leaks, once you have reached the required pressure, turn the compressor off, if it is then able to hold the pressure, then you can be confident that there are no leaks. Once you have confirmed there are no leaks, you can turn the compressor on again and allow it to get to the necessary Psi once again
- It is imperative to ensure your mold or castings are left in the pressure pot for the full curing time, which is roughly 12 hours
- When the curing time has finished you can open the pressure release valve, this will allow the pressure to decrease
- Once the pressure has completely decreased, you can remove your mold or castings from the pressure pot
Finishing Touches
Congratulations, your casting has now completely set, all that is left to do is to de-mold the item, polish and clean it, and you will have a bubble-free, crystal clear casting you can be proud of!
Safety Notes
- It is imperative to leave your casting in the pressure pot until it has completely cured, to ensure you have a bubble-free product.
- Always ensure your correct Psi has been set with your pressure relief valve
- Once you have received the relevant Psi, always remove your pressure input pipe immediately
- Ensure that all the gauges you will be using, like the pressure regulator, and the pressure relief valve all have the relevant higher Psi values that will be needed
- Always ensure the lid of the pressure pot is fastened securely before you begin pressurizing the pot
A Pressure Pot or a Vacuum Chamber – Which is Better?
When using a vacuum chamber, you will be able to easily remove air bubbles from any flexible rubber items. If you are looking to do resin castings (which you need to set into a solid form) or making a mold then a Pressure pot is the way to go.
When degassing resin that cures to a solid form you can use a vacuum chamber, but it is not recommended, the reason for this is the vacuum chamber requires time for the relevant vacuum to build up, and as several resins are fast setting, they will begin to cure before the air bubbles have been successfully removed.
Pressure Pot
You can remove air bubbles by putting your resin item under pressure, in fact, this doesn’t remove the air bubbles, but makes them minuscule, that you aren’t able to view them with the naked eye.
As you have to leave the casting in the pressure pot, for the entire curing time, this can be seen as a disadvantage, due to the length of time it takes. Another negative is you can potentially create deformities if the pressure is too great.
Vacuum Degassing
Using the vacuum degassing, you are pulling the air bubbles with a vacuum suction out of the resin they are trapped in. this is a great option if you are working with any materials that possess a high viscosity and tension on the surface, like silicon rubber. To achieve the required results, you will need a vacuum of 26-inch Hg, it is also linked to the particular resin you will be using. As all the air bubbles have been removed, you can simply place the materials straight into the mold.
Should You Make Your Pressure Pot?
If you are looking to make your pressure pot, we recommend that this should rather be left to the likes of the professionals who have more experience. If you find yourself with an item that is too large to place in a pressure pot (t least any which are available on the market to purchase) you may decide to then build your pressure pot. As there are high levels of pressure, you need to take this task very seriously, any mistakes could potentially be very dangerous.
If you have decided to make your pressure pot, you can convert an old paint can, but be warned, do not attempt this unless you have a clear and logical understanding of the steps required.
You Will Require the Following Equipment:
- A paint pot
- Sealing tape (Teflon Thread)
- Pressure regulator
- 3/8 to a quarter-inch female NTP reducer
- Quarter-inch female to female NTP ball valve
- Pressure safety valve
- A quarter-inch NTP cap
- Pressure gauge
How to Assemble Your Pressure Pot
Start by removing everything on the paint pot, but leave the air diffuser (this is located on the inside of the lid, by the inlet hole). You can then install the pressure regulator, reducer, and safety release valve on the outlet side.
You can then cap off the right section of the regulator and then using the compressor hookups you can install the pressure gauge. It is very important that the Teflon tape is used on every thread you install.
Setting Up
Before you begin using your newly built pressure pot you need to ensure that a few things are in order. Start by lubricating the rubber seal that is fixed to the lid with some petroleum jelly, do this before putting the lid on, you can then put the lid on and fasten it.
Next, you will need to dial in your pressure regulator by moving it to the right should you wish to achieve the maximum pressure, and moving it to the left to turn the pressure down. To get the pressure you require, which is normally about 55 Psi, turn the regulator for a few rotations to the left, and then slowly turn it to the right until you achieve the required Psi level.
Next, you will need to set your safety release valve and pressure regulator, and then connect the compressor to the pressure pot. Ensure you adjust the compressor pressure regulator under the maximum level for your paint pot.
Now you can turn your compressor on, and set it to the pressure you require, using the regulator, this will also then activate the safety release valve.
View our Resin Pressure Pots web story here.
