Best Epoxy Wood Filler – Comprehensive Wood Epoxy Filler Guide
This post may contain affiliate links. We may earn a small commission from purchases made through them, at no additional cost to you. You help to support resin-expert.com
Epoxy is an amazing substance for any DIY enthusiast. This material has many different uses, including being a great product for fixing rotting wood. Using an epoxy wood filler is a great way of restoring old wood that could be too expensive to replace or difficult to remove. Epoxy can easily fill holes and cracks, epoxy putty can be molded into shapes, the substance is extremely strong and adhesive, and it can be sanded down to create the perfect finish. If you are considering using an epoxy wood filler, then you can easily do it yourself at home. Just follow our guide below on this liquid wood filler to get a solid understanding of how it can be used.
Table of Contents
What is Epoxy Wood Filler?
Epoxy comes in various forms that can be used to restore and maintain the structure of wood. When you use an epoxy wood filler, you will be using the epoxy in the form of putty or a pourable liquid. Most jobs will require you to use both. Basically, the epoxy is used to fill in the gaps, cracks, and holes in the wood in order to retain its original strength and structure. The epoxy wood filler also coats the surfaces of the wood which prevents further rot or decay.
Epoxy is an incredibly durable and versatile material. It sticks to just about any surface really easily and provides a super long-lasting bond. Epoxy can be waterproof, heat resistant, scratch-resistant, and resistant to chemicals. When used for restoring wood, epoxy filler dries really hard and provides a great base for the wood to be supported by.
The epoxy filler consists of two parts. This is the epoxy and the hardener. When these parts are mixed together, they will cause a reaction that allows the epoxy to dry. So once you mix the parts together, they need to be worked with pretty quickly. The two different forms of epoxy filler for wood are the liquid version and the putty version. Liquid epoxy is great for pouring into the wood with cracks and holes. This can seep into all of the internal holes or passages and fill them up. The putty is good for filling in any gaps or holes on the outer surface. Once cured, this can easily be sanded down again to match the shape of the wood.
When to Use a Wood Epoxy Resin Filler
There are a couple of different approaches that you can take when filling or replacing damaged wood. Many people are intimidated by using epoxy, and it is often not considered by people doing home DIY renovations. However, epoxy wood filler is actually incredibly easy to use, and it is simple to achieve a strong, perfect finish. It can also be a much cheaper alternative to replacing the wood or getting it filled in professionally. So, when should you use a liquid wood filler?
You should replace the piece of wood if more than half of it is damaged, if it is a standard cut of wood that is easily available, or if you have already done three epoxy fills on that piece of wood. If you are replacing up to half of the wood, if the wood needs to be clear finished, if the wood needs to be drilled or milled, then you can use a dutchman patch. This should also be considered if you need to maintain the original wood species and construction. Epoxy wood filler should be used under the following circumstances:
- If it would be very difficult to remove the piece of wood without damaging or removing other wooden structures
- If the piece of wood is specially designed and would be difficult to replace or replicate. This includes detailed turned wood or elements that have been hand made with lots of effort
- If about 80 percent of the wood is still in good shape, but there are holes, crack, or rot covering the rest of the wood
Advantages of Using Epoxy Wood Filler
As mentioned earlier, many people are intimidated by using epoxy. Why should they go against this feeling and choose epoxy filler? Here are a few benefits of filling holes in wood with clear epoxy:
- Epoxy cures to a seriously hard and durable substance that can support the wood and withstand plenty of pressure
- Epoxy filler works with any type of wood and will adhere strongly to all shapes and surfaces
- It is actually very easy to use epoxy wood filler yourself. It can be easily poured, molded, shaped, and processed
- It is easy to get epoxy into hard to reach places
- You don’t have to remove the piece of wood to apply the epoxy filler
- It can fit the shape of any detailed or sophisticated piece of wood
- Epoxy will fill all holes and internal passages with ease
- It offers a good external sealer to avoid future decay

The Best Epoxy Wood Filler
There are many different epoxy products available which can make finding the best liquid wood filler quite difficult. To make this easier, we have selected three of the best epoxy wood filler options below for all kinds of projects.
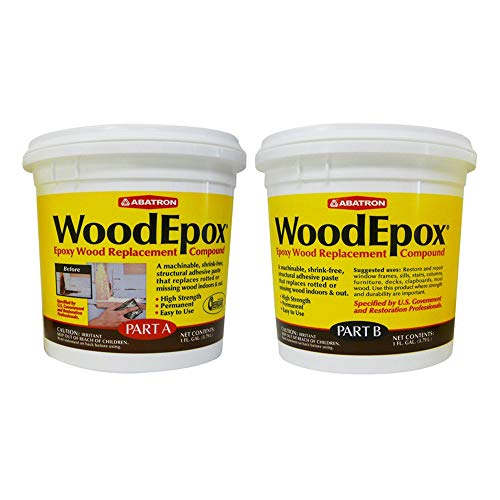
Overall Best Epoxy Wood Filler: ABATRON WoodEpox 2 Gallon Kit
This epoxy wood filler by Abatron is the ideal choice for repairing rotted wood in all kinds of scenarios. The wood filler can easily fill and rebuild missing sections of the wood to restore it back to its original glory. This high-performance compound is simple to apply and will bond permanently to the existing wood. Once applied, there is no need to worry about shrinkage, delamination, cracking, or crumbling. This wood filler is also lightweight and sag-resistant.
This two-part epoxy wood filler comes in gallon containers that mix to create a total of two gallons. Once mixed, the substance can be used for around 20 minutes before it starts to harden. Once cured, this filler completely mimics wood. It is easy to sand, saw, route, mill, nail, stain, and paint. The filler is thick and easy to mold and sculpt once it has been mixed.
Overall, this is an excellent resin kit for wood. It is permanent bonding and easy to use. Its high-strength formula has the ideal structural properties for replacing all types of wood. It also acts just like wood once it has cured.
- A two-part wood epoxy replacement compound
- High-performance, no shrinkage compound
- Once it hardens it mimics the properties of wood
Pros
- Mixes to create a large volume of epoxy wood filler
- Very easy to handle and work with
- No shrinkage formula
- Can repair all sorts of internal damage
- Mimics wood once it hardens
- Offers a strong and permanent solution
Cons
- A more expensive product
- Before it’s mixed, the texture can be tricky to get out of the container
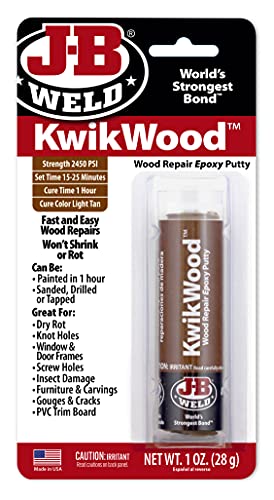
Best Epoxy Putty: JB-WELD KwikWood Epoxy Putty
JB-Weld is a brand known for its high-strength adhesives. This hand mixable two-part epoxy putty stick is the perfect solution for repairing and rebuilding wood. This putty is designed for use on all types of wood for varied household repairs. Once mixed, this putty bonds incredibly strong at 900 PSI. It won’t shrink or rot, and it will maintain the same properties as wood when you do things like saw, drill, sand, or stain it.
This is a really easy putty to use, and it is perfect for many smaller DIY jobs. You can fix cracks, holes, and dents in the wood, or replace small portions of missing wood. The putty also dries quickly which makes it even more convenient to work with. This is not a liquid epoxy filler, so it cannot be poured into holes or cracks. The thick putty is a very useful consistency for filling cracks and holes though and is the perfect choice for external wood filling.
- A hand mixable two-part epoxy putty stick
- Super high-strength, durable epoxy filler
- Fast curing time with no shrinkage
Pros
- Very easy to work with, mold, and shape
- The putty is incredibly strong bonding
- Adheres well to a wide range of surfaces
- Acts like wood once it has cured
- Quick cure and set time
- Delivers long-lasting quality results
Cons
- The putty is fairly small, so is only suitable for smaller jobs
- Works as an external wood filler, not a liquid epoxy for internal filling
Best General Epoxy Wood Filler: BONDO Home Solutions Wood Filler
This wood epoxy putty by Bondo is the perfect solution for a quick and easy wood fix for your DIY project. You can make speedy repairs on all types of rotted or decayed wood surfaces with this filler. It only takes about 15 minutes to dry before you can sand it, and 25 minutes before you can paint it. This is a two-part filler that needs to be mixed together before it can be used.
The solution does not shrink and offers a permanent, durable bond. It is water-resistant and suitable for both interior and exterior use. Once cured, it acts just like wood and can be sanded, painted, stained, and made to look as though it has always been a part of the wooden structure. With this wood filler, Bondo offers a permanent, user-friendly, high-performance product. This is perfect for a wide range of home DIY projects.

- Quick, durable repairs for damaged/rotted wood
- Cures fast for same-day repairs
- Stainable, paintable, and suitable for interior/exterior use
Pros
- Easy to work with
- A fast-drying formula
- Water-resistant formula
- Non-shrinking and durable
- Suitable for interior and exterior use
- Easy to sand, paint, and stain
- Blends in well with the woods coloring
Cons
- It can be quite tricky to mix the filler properly
- The quick-drying time also limits your time to work with the filler
How to Do an Epoxy Wood Repair
Now that you know what products are best, it’s time to get to work. We have put together a step-by-step guide below for filling holes in wood with clear epoxy and wood epoxy putty. Follow these simple steps and you will be sure to achieve great results in your project.
Prepare the Wood
Before applying any filler, you will need to get the wood cleaned up and prepared. This is done by removing any existing caulk and paint so that you can see exactly how damaged the wood is. You will need a fully exposed piece of wood to work with. This step could involve sanding or using a paint stripper to clean up the wood. Just make sure that the wood is clean and dust-free before you start to apply the epoxy wood filler. Any dust, dirt, or oil could affect the adhesion of the filler. Also, make sure that the piece of wood is not warped or bent. If this is the case, the epoxy will end up freezing the wood into this position.
Apply an Epoxy Consolidant
Once the wood is prepared, it’s time to start the process of applying the clear epoxy resin wood filler. Start by coating an epoxy consolidant over the entire surface you will be filling. This is a very thin type of epoxy that will coat all of the wood fibers with a hardening resin. The consolidant dries slowly, and it is recommended to use alongside a wood epoxy putty. This helps to improve adhesion and create a longer-lasting, stronger wood filler bond. Once the entire surface of the wood has been coated in the consolidant, you will need to leave it for a few hours to cure fully before moving on to the next step.
Apply the Exterior Epoxy Wood Filler
Make sure that the consolidant has cured fully. Then, before adding the liquid wood filler, there is one more step to make sure that you achieve long-lasting, durable results. This is to fill, or dam, up the cracks in the wood. This step is necessary because holes in the wood often extend much further than just the surface. If insects made the holes, they will form a long network of tunnels going right through the wood. Pouring a liquid wood filler straight into these holes would probably result in the epoxy dripping out of all the cracks and running through this tunnel network.
To prevent this from happening, you will need to use a wood epoxy putty. Mix together the two-part epoxy filler to form a kind of paste./ This can be applied to the cracks on the cracks and holes on the wood. Your exterior e[poxy wood filler can be smoothed out with a putty knife or plastic knife. Don’t worry about getting a perfect finish, as this can be sanded down and touched up once it has cured. Just make sure that you seal up the cracks properly.
Pouring in a Liquid Wood Filler
Leave the exterior wood epoxy filler to cure fully before moving onto the next step. This is when you add the clear epoxy resin wood filler in a more liquid form. Mix together the resin wood filler until you achieve a good pourable consistency. This is then poured all over the wood to flow into the fine cracks and insect tunnels. You have filled up the big cracks and crevices to stop this from escaping, but the finer cracks and holes will still remain open to let this resin wood filler in.
Slowly pour the liquid wood filler over all the cracks and holes in the wood. Be sure to take your time doing this. Once all of the cracks have been filled, wait a few minutes to let the filler soak in. You will notice that the epoxy will drop a little. Then you can pour over more. Slowly repeat this process until the epoxy has been completely absorbed into all holes. You want to make sure that the epoxy has completely penetrated into the wood so that all internal holes have been filled. This will provide the necessary support and structure to hold up the wood.
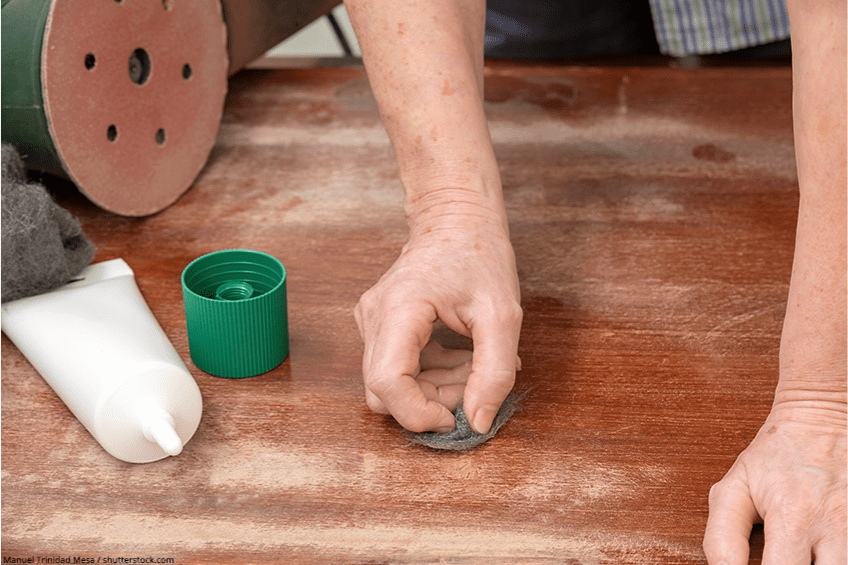
Finishing the Wood
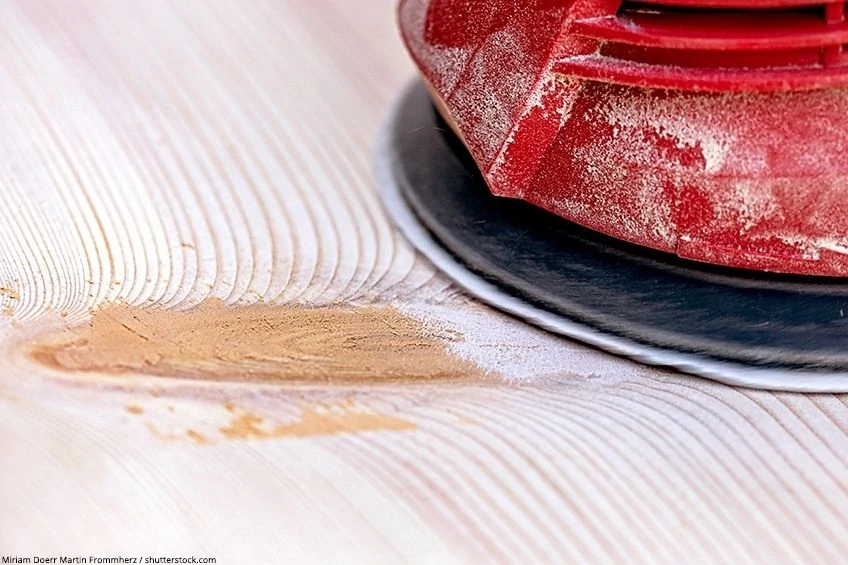
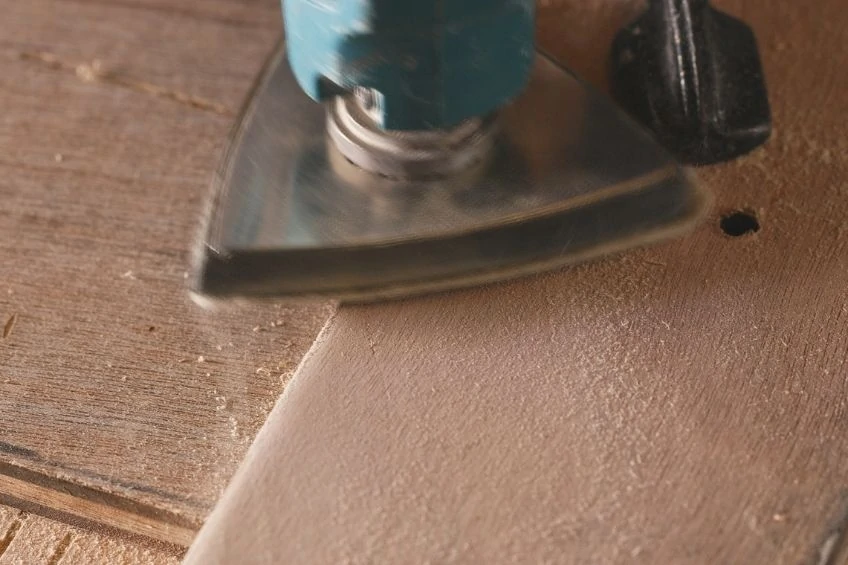
All of the wood epoxy filler has now been applied. Make sure that it cures completely before starting to finish the wood surface. This depends on the manufacturer and products used, but it is generally best to wait around 24 hours before touching the wood again. Once cured, you can sand down the surface of the wood filler until you reach the right level of smoothness and shape again. This can be done by hand or with an electric sander.
Once sanded, you can stain, or paint over the wood. When the wood filler has dried, it acts just like it was wood. This means that you can paint, drill, and saw the wood just like you could have done before.
Tips and Tricks for Using Wood Epoxy Resin Filler
The process of epoxy wood repair may differ slightly depending on the circumstances and type of wood used. While the guide above is a good step-by-step process to follow, you may come across a few unique scenarios in your project. Here are some helpful tips and tricks to get past these issues.
- Always be fully prepared and ready when you start the project. When you mix together the two parts of epoxy, you will have a limited time that you can use the substance before it dries. Only mix the epoxy when you are ready to use it, and work fairly quickly once it has been mixed. It is also important to only mix the amount of filler that you will need. If you have leftover epoxy that is unmixed, it can still last a long time if stored properly.
- Once the liquid wood filler has fully cured, you may find that there are still a few minor depressions in the wood. You can easily fix these up with a wood epoxy putty. Simply apply the exterior epoxy wood filler again over any dips, holes, or cracks that might still be exposed at the end of the project.
- The curing time of the epoxy depends on the temperature. For best results, try to work in a warmer environment. If you want to speed up the curing process, you can apply a gentle source of heat to the epoxy.
- Epoxy will take longer to sand than wood due to its plastic-like structure. This will require a very gentle sanding process that may go through many sheets of sandpaper. Be patient here.
- If possible, try to cover the wood, or move it indoors while the filler is curing. Otherwise, dust or dirt particles can stick to the still wet epoxy.
- Before starting the project, remove any rotted or decayed wood. If the wet is very wet or soft and crumbles apart, this will need to be removed. The gaps can then be filled in again with the wood filler.
Frequently Asked Questions
Do You Need to Prime Epoxy Wood Filler Before Painting?
Priming is not always necessary, but it is generally a good idea. Wood and filler may react slightly differently to the paint, so applying an even layer of primer across the surface will result in the same level of adhesion over the entire piece of wood.
How Long to Leave Epoxy Wood Filler Before Sanding?
This depends on the epoxy used and the temperature. Epoxy usually takes around 20 to 30 minutes to dry. However, it is best to leave it to fully cure before sanding. This can take around 24 hours.
Is Epoxy Wood Filler Waterproof?
Yes, epoxy wood filler offers a durable and waterproof solution. This filler can be used indoors or outdoors in all kinds of conditions.
Can You Screw Into Wood Filler?
Yes, once cured epoxy wood filler can be used just like wood. You can drill into it and add screws with no problem.
If you are restoring damaged wood, then epoxy wood filler is a fantastic solution. This is a versatile product that can save you from having to replace the entire piece of wood. We hope that our guide has taught you everything you needed to know about epoxy wood filler and how to use it.
