Epoxy Resin for Wood – Best Projects for Wood Epoxy
This post may contain affiliate links. We may earn a small commission from purchases made through them, at no additional cost to you. You help to support resin-expert.com
Epoxy resin offers a variety of possibilities that cannot be compared with any other material. In combination with wood, there are many design possibilities: Wood surfaces sealed with epoxy resin, molding in combination with wood, whole tables or table tops and of course repairs of wooden surfaces. We will show you the best application possibilities and give you instructions for implementation.
Table of Contents
- Short Introduction to Epoxy Resin
- Which Epoxy Resin is Suitable for Working with Wood?
- Best Epoxy for Wood
- Best Counter Top Resin for final coating and sealing surfaces
- Required Material for the Presented Projects
- Project 1: Sealing Wooden Surfaces
- Project 2: Filling and Repairing Wood with Epoxy Resin
- Project 3: Epoxy Resin Casting with Wood
- Sanding Work after Hardening
- Finish: Polishing, Oiling or Painting your Artwork
- Conclusion
Short Introduction to Epoxy Resin
Epoxy coatings are essentially thermosetting polymers consisting of two parts – a resin and a hardener. When these two components are mixed together in the correct ratio, a chemical reaction occurs, resulting in a very hard surface with high resistance to water, scratches, solvents and chemicals.
The secret to a high-quality surface is a mixture of good surface preparation, intensive mixing of the two components according to the manufacturer’s instructions and an optimal working environment.
After mixing epoxy resin and hardener an exothermic chemical reaction starts. In this process the mixture undergoes a transformation and hardens from liquid to gel and then solid form. The curing process takes some time. It depends on a number of factors, including the ambient temperature, the type of hardener, the amount of heat generated and the temperature of the substrate. The most important of these factors is the heat. The hotter the epoxy resin, the faster the curing process. However, too high an exothermic effect has negative effects: the high heat causes surrounding materials to melt and the curing process can vary.
Which Epoxy Resin is Suitable for Working with Wood?
Wood is a material that reacts to air humidity. That means it shrinks and grows to a small extent. This is one of the difficulties in the combined work of resin and wood. A general answer is therefore not possible, it is important that you know which application is to be made:
- Low viscosity resin for coating wooden surfaces
- Viscous resin for casting molds or for filling holes / recesses in wood
- Use indoors or exposed to the sun outdoors
UV Protection / Resistance to Yellowing
Epoxy resin is available in the crystal clear version. However, the material tends to yellow under UV radiation. Therefore, for outdoor applications, it is essential to purchase a UV-resistant resin for these projects. Depending on the product, there are also additives which can be added for better light resistance.
Shrink Fit
In contrast to polyester resin, epoxy resin tends to shrink less during curing, but there are still major differences. If the liquid shrinks during curing, areas that are supposed to be covered are suddenly only partially covered and another layer must be applied. On the one hand this costs time, but on the other hand it also costs money, as more material is needed. It is therefore worthwhile from the beginning to use a high quality product with a small shrinkage measure.
Maximum Layer Thickness per Casting
When casting from an epoxy resin table or molds, it is extremely important that you find out in advance which products can be cast up to what quantity and layer thickness. Normal, commercially available resin can usually be cast up to a maximum layer thickness of 2 cm and only up to a quantity of approx. 10 kg. If you try to pour a larger amount, the chemical reaction generates a lot of heat, which causes the resin to harden immediately and leaves unsightly spots.
Surface Hardness and Temperature Resistance
After curing there is a big difference in the hardness of the surface. Some products are rather soft and small scratches can be made with the fingernail. Other products are almost scratch resistant and can withstand temperatures up to higher temperatures. For everyday objects with high mechanical stress, such as cutting boards, table tops and other objects, it is worth buying a higher quality resin that also remains resistant.
Tip: Make sure that you adhere to the indicated mixing ratio so that the resin hardens optimally.
Best Epoxy for Wood
Incredible Solutions is a renowned company for all kinds of Epoxy Resin. Their casting resin works very well for any type of casting with wood.

- Thick pours up to 2" per application, low viscosity and long working time
- Super clear results, compatible with pigments and dyes
- 2 : 1 mix ratio by volume (100 A to 44 B by weight)
Best Counter Top Resin for final coating and sealing surfaces
ProMarine is a US company that is specialized in producing high-quality Resins for different kinds of marine applications, but also for end-customers. The ProMarine Crystal Clear TableTop Resin works great on all kind of wood surfaces.
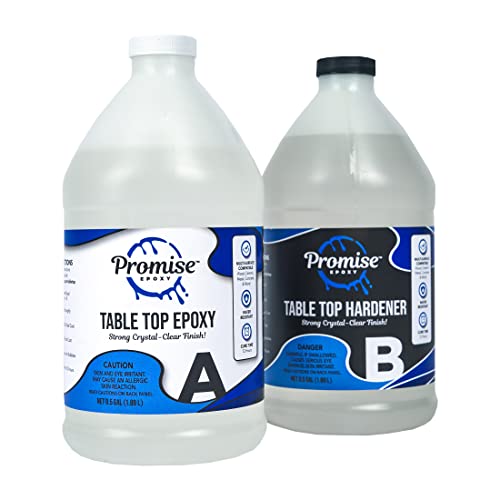
- High-quality crystal clear Table Top Epoxy
- 100% Solid Material with no VOC and solvent additives
- Easy 1:1 mixing ratio, once cured very hard surface
Required Material for the Presented Projects
Making the Mold yourself
- MDF boards
- Screws
- Screw clamps
- Silicone spray
- Sanitary silicone
- Caulking Gun
- Cordless Drill
- Jigsaw
Mix and pour Epoxy Resin in big quantities


Small quantity mixing and getting out air bubbles


Surface Sanding


Surface Polishing

Safety


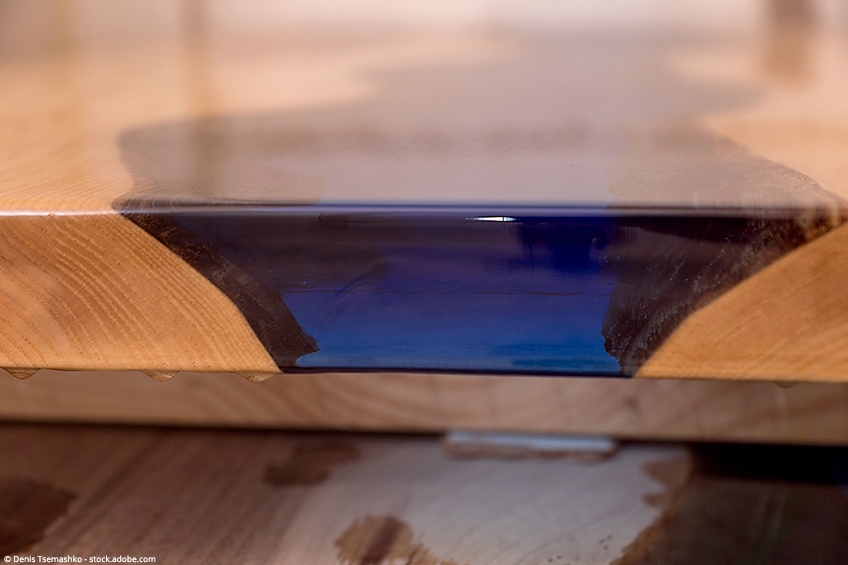
Project 1: Sealing Wooden Surfaces
Epoxy resin is very well suited to seal wood, making it insensitive to water and mechanical stress. Possible applications are:
- Table tops
- Cutting boards for the kitchen
- furniture
- Kitchen covers
- Floor coatings
Sealing Wood – Instructions for Sealing Wood with epoxy Resin
The working environment plays an important role in the quality of the epoxy coating. It is advisable to choose a dust-free, dry environment to achieve better results. The temperature of the wood, workplace and epoxy resin should be similar to avoid undesired reactions.
Tip: Suitable for sealing wood are so-called laminating resins, which are medium to highly viscous and produce a hard surface after hardening.
Preparation
- In order to achieve good adhesion, you should consider a number of factors. The first requirement is that the surface must be clean and dry. It should have a certain roughness so that the resin will adhere to the surface substrate. Any oil residues, grease, wax and other contaminants should be removed before application.
- The substrate must also be completely dry. To ensure this, you can use a heat gun to carefully heat and dry the surface. Once the surface is dry and clean, you can sand the surface by hand or with a random orbital sander using sandpaper. If you use oily woods such as olive wood or teak, you can also degrease the surface with a little acetone to improve adhesion.
- Then remove the dust with a brush or vacuum cleaner. Wipe the surface with a lint-free cotton cloth moistened with solvent. Do not touch the surface after cleaning, this can again contaminate the surface with body fat and prevent good adhesion of epoxy resin.
- To ensure that the resin does not run over the edge of the surface, you can attach a barrier around the surface. The best choice here is high-quality adhesive tape, which is relatively dimensionally stable and can withstand the pressure of the liquid. Before pouring, check that the surface is level in all directions to ensure an even layer is achieved.
- Calculate the required amount of epoxy resin in advance. For this purpose we have programmed a simple epoxy resin calculator for you to do complicated calculations for you. Tend to round up a little, as there is nothing more annoying than mixing too little liquid. This will put you under additional stress during an already time-critical work until the curing process.
- Mix the epoxy resin and the hardener thoroughly, but without mixing in too many air bubbles. This is now the right time to colour the epoxy resin. You can add a variety of materials to add colour to your epoxy resin. Each of these materials has its own advantages and limitations, which you should consider before making your choice. You will find all the information you need in our article Epoxy resin colour.
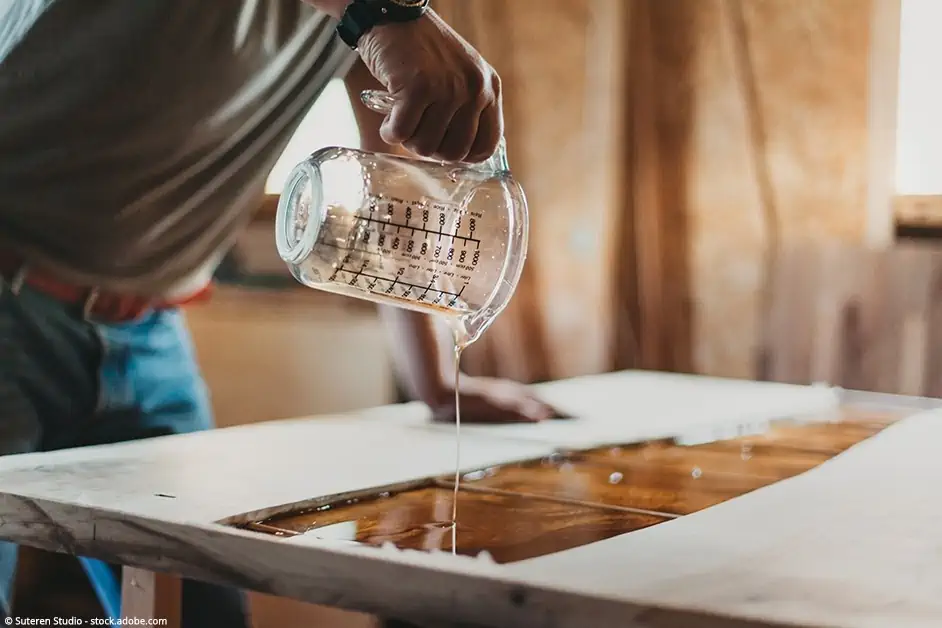
- Start pouring the mixture in the middle of the surface in a zigzag or spiral pattern to ensure even distribution of the epoxy resin. You may need to repeat the pouring process until the epoxy resin coalesces. It should be levelled further a few minutes after pouring.
- The mixture remains in liquid form for some time, depending on the product. During this so-called “open time” you can distribute and level the liquid. You can rework the material so that it reaches the desired thickness before the epoxy resin thickens and begins to take on gel form. As soon as the mixture moves towards the gel phase, it becomes rubbery solid and the epoxy resin should not be worked.
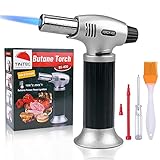
- As soon as the mixture is spread on the surface and starts levelling, bubbles start to form in the resin mixture. It is essential to remove these bubbles by heating the mixture with a Torch burner or heat gun. Be careful not to stay in one place for too long, so that the mixture does not become too hot. Air bubbles rise to the surface and burst as soon as heat is applied to the affected area.
- If the epoxy resin is already solid, but not yet fully cured, it is possible to apply a second coat without having to sand the surface first. You can do this up to 48 hours after coating. If another coating is applied during this phase, it will chemically bond with the first and adhesion is assured.
Tip: Epoxy resin reacts very positively to heat. To ensure that the liquid is well distributed, the resin can be warmed in a warm water bath before the actual casting, and the room can also be heated. Too cold temperatures have a negative effect on the flow properties.
Apply Epoxy to Stained Wood
Epoxy resins can be applied to stained wood surfaces. The best way to ensure that the resin is compatible with the stained surface is to test it in advance.
It is important that the stain is completely dry before the surface is further processed. Basically all colour stains are compatible with epoxy resins, but a test beforehand can do no harm to avoid ruining the piece. It is worth using stains that are as UV-stable as possible, as the epoxy coating means that no further staining is possible. Removing the epoxy resin is a back-breaking job and takes a very long time.
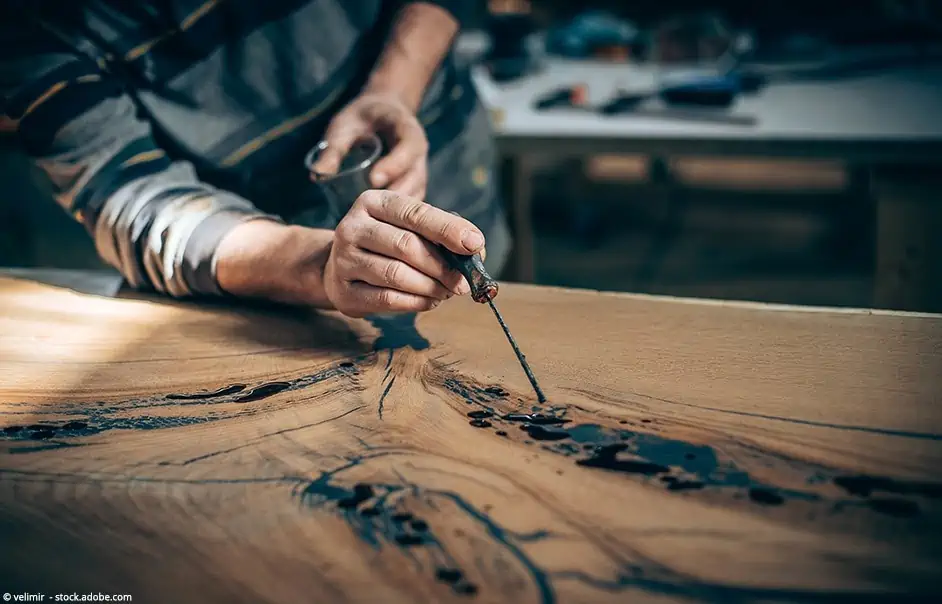
Project 2: Filling and Repairing Wood with Epoxy Resin
In woodworking, especially strongly grained or knotty pieces of wood with knots and cracks are very interesting and give your project the necessary character. In those cases where a surface needs to be flat and functional (like a table) but you want to keep its appearance, you can fill cracks or holes with epoxy resin. This guide will show you how easy it is to do this.
- Remove any wood dust or pieces of bark that do not sit well.
- Preparation is also the most important thing here. Every crack and hole should be taped all around with high-quality adhesive tape. Otherwise the resin will run everywhere, but not because you want it. The previous masking is also important, because after mixing the resin mixture there is no time left for careful preparations. Don’t forget to tape the back of the wood, because cracks often run right through the whole wood and thus prevent resin from leaking out on the back and having to be laboriously removed from the surface.
- Now you can already mix the epoxy resin well. Often it works very well if the holes are filled with a coloured resin. Black pigments are suitable for wooden table tops, for example. Also the colour must be mixed very carefully to get a uniform colour effect.
- After you have filled the desired areas to the surface, check again after five minutes to make sure that the resin mixture has not sunk in again. This happens quite often and it would be very annoying to have to mix extra resin again later. The shrinkage also plays a role here. The less the epoxy shrinks, the less it sinks in during curing.
- The timing is also very important here. If the curing time is 30 minutes, you have a maximum of 20 minutes for the actual application before the curing process starts. The advantage of filling cracks in the wood is that not all the liquid can be mixed away at the beginning, but several smaller quantities can be mixed.
- It is better to fill too much resin into the cracks and holes than too little. Any excess resin will stay where it is due to careful masking. Any hardened residue can be easily removed with an eccentric sander. Filling wood with epoxy resin is, if you follow these steps, no witchcraft.
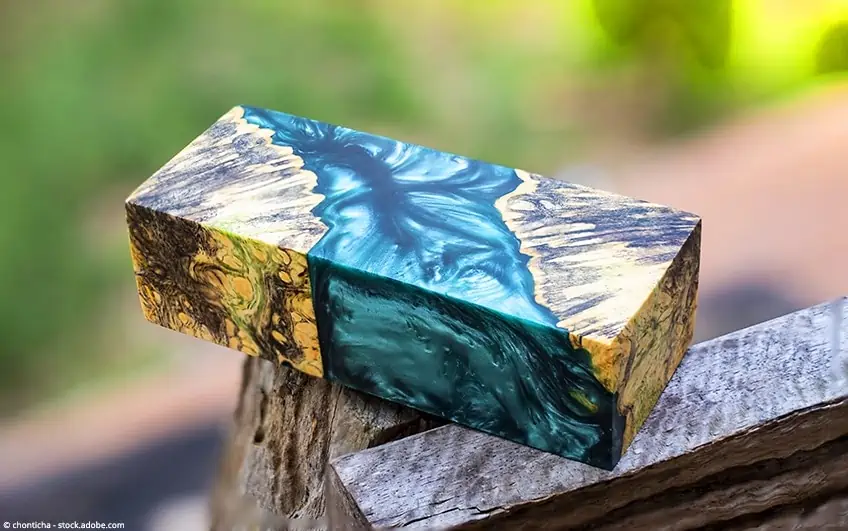
Project 3: Epoxy Resin Casting with Wood
Beautiful woods or pieces of wood can be cast in epoxy to make wooden squares for turning, knife handles or any other woodwork. Also pieces of jewellery can be made out of it or simply a decorative work of art.
To be able to cast molds, you need either
- Silicone molds, which are available in all imaginable shapes and sizes. This is the simplest variant, because basically you just put the wood into the silicone mold and then pour out the wood.
- Self-made silicone molds or angular casting molds made of synthetic resin-coated plates, which are screwed together and sealed with silicone. Here you need some more experience – the first attempts may not be quite so successful.
Tip: Make sure you pay attention to the thickness of the layer you can cast with your resin. If necessary, pour several layers of resin into the mold after the previous layer has hardened but not yet fully cured.
Sanding Work after Hardening
Unfortunately, the annoying sanding work cannot be completely avoided in any of the applications with wood presented here. However, the cleaner you have worked, the less effort is required.
The right time for epoxy resin sanding is between 48 and 72 hours, depending on the product used. When the resin is completely hardened, sanding becomes more difficult due to the high surface hardness, but it is also possible. The procedure looks like this:
- Sand from coarse grit (80 grit) to fine grit (2000 grit) and remove the previous sanding marks of the coarser grit.
- For small castings you can sand by hand, for larger surfaces it is recommended to use an eccentric sander.
- Wet sanding has proved to be a good method, as it produces a slightly finer sanding pattern and the sanding dust is bound by the water used.
Tip: Sanding dust, no matter from wood or epoxy should not get into the lungs. It is therefore essential to wear a respiratory mask when sanding.
Finish: Polishing, Oiling or Painting your Artwork
The cured resin surface is already robust without further treatment. However, a lot of gloss can still be obtained by sanding and especially by polishing. Also the wood is still untreated and needs treatment to avoid being exposed to liquids without protection.

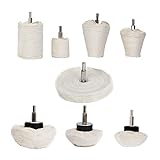
- A polishing paste and a cloth are sufficient for polishing the surface of smaller pieces. With circular movements the piece can be made to shine in a relatively short time.
- For larger surfaces, it is recommended to use a polishing machine. It does the polishing job in the shortest possible time and the degree of gloss is much higher than with simple polishing by hand and cloth.
- The wood surface can also be polished.


You get the perfect finish with high-quality polyurethane paint from a professional. The easiest alternative is to use hard wax oil, which is applied to both the wood and the resin surface. After drying (approx. two to three days) further coats can be applied until the oil does not absorb any more. Afterward, the surface can also be polished again to obtain a high-quality surface.
Last but not least, carnauba wax can be applied to provide optimum protection for both the epoxy resin and the wood. Carnauba wax is the hardest natural wax and can be applied evenly with a lambskin pad and a drill or polishing machine.
Conclusion
We hope to have given you a good insight into the possibilities of epoxy resin and wood. With this information, you should now be able to implement your individual project in the best possible informed and prepared way. Good luck!
