Should You Paint Trim or Walls First? – Easy DIY Tips and Tricks
This post may contain affiliate links. We may earn a small commission from purchases made through them, at no additional cost to you. You help to support resin-expert.com
Painting can be a tough task, regardless of what you are painting or what type of paint you are using. There are many decisions to make, including what type of paint to use, how to apply the paint, and what part of your workpiece to paint first. The latter is a common question when it comes to painting walls, which makes sense considering how difficult it can be to decide whether to paint your trim or your walls first. Should you paint trim or walls first, then? Is there a right answer to this question, and does it really matter? Let’s have a look at these questions and see if there really is a “correct” order in which to paint walls and trim.
Table of Contents
Why Is the Order Important?
There are many things to consider when painting and one of the most consistently pondered questions is whether you should paint your trim first or if you should paint your walls first. Now that begs the question, why is the order you paint your walls so important in the first place? Well, there are a number of factors to consider.
Let’s consider what you could encounter if you were to paint your walls first.
A lot of people tend to paint their walls first as it’s the most time-consuming and labor-intensive part of the process. You cover the largest surface area first which means you can focus on the more detail-oriented task of painting your trim afterward. There is a problem with this approach though. If you paint your primary surface first you run the risk of getting paint on your trim, and it can be difficult to manage how far up to apply your paint with your roller without contaminating your trim. It also means that once you paint your trim you will have to ensure that you don’t touch your wet wall.

On the other end of the spectrum, you could try painting your trim pieces first. This has its advantages as painting trim tends to be a really detail-oriented and time-consuming process compared to painting primary surfaces. This means that you can get the work that requires more concentration out of the way first and then get the less detailed work out of the way quickly.
Just like painting the primary surface first has its disadvantages too.
If your trim is painted before your primary surface, you run the possibility of ruining your trim once you paint the primary surface, which can be concerning if you spent a lot of time painting it. It also means that you will have to be extra careful and utilize your painter’s tape well when you get up close to your trim. As you can see there are some advantages and disadvantages to painting the primary surface first and trimming first.
When it comes down to it, most professional painters tend to agree that there isn’t a “correct” way to go about this, and it largely comes down to the nature of the space and surface you are painting, and what approach suits your personal preference.
Advantages of Painting Trim First
Since we’ve covered the pros and cons of painting trim first instead of the surface, we thought we’d walk through some of the finer points of attempting to paint the trim first before you paint your primary wall.
As we mentioned previously the advantages and disadvantages of this approach are largely subjective, so assess your space first before committing to painting your trim first.
It Allows You to Get Cleaner Lines Between Surfaces
When it comes to answering the question “Should you paint trim or walls first”, most professionals agree that the primary reason for painting the trim first is the degree of control that you have over the painting of your trim. This makes sense considering it takes more time to paint trim well compared to painting the primary surface of your wall.
Painting the trim first without having to contend with any paint on the wall means that you should be able to maintain a steady hand while you work. Since trim tends to draw the eye (especially if it’s intricately shaped) paying attention to detail is really important, which is why painting your trim first is a good idea in most instances.
Trim Is Easier to Touch Up Compared to Walls
When it comes to painting interior surfaces, one of the common things that painters tend to avoid is making a mess by spilling paint and getting paint on things it isn’t meant to be on. Another thing that can ruin the look of your walls is if you mess up your paint application, which can be a bit of trouble to clean up, especially on bigger surfaces. Thankfully, spot-repairing areas on trim can be significantly easier when compared to painting walls. Due to the painting of trim being more detail-oriented and therefore more time-consuming, it’s easier to spot mistakes earlier and it’s easier to repair them since they tend to be relatively small.
Yet another good reason to paint your trim first.
Trim Is Easier to Protect Compared to an Entire Wall Surface
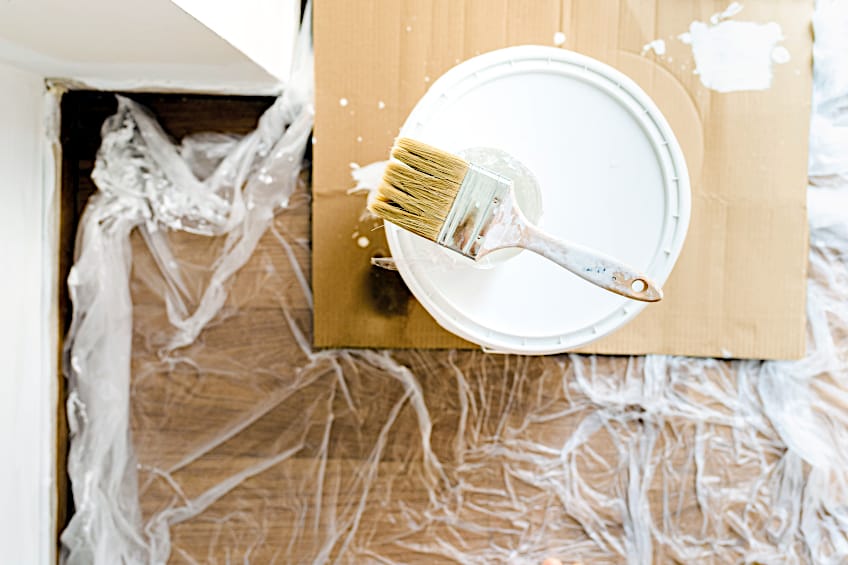
When painting virtually any surface one of the most important steps is preparation. Aside from cleaning and sanding the surface of your workpiece, protecting areas you don’t intend to paint using painter’s tape is another. Painter’s tape is far easier to apply to trim once it’s dried when compared to a wall that’s just dried.
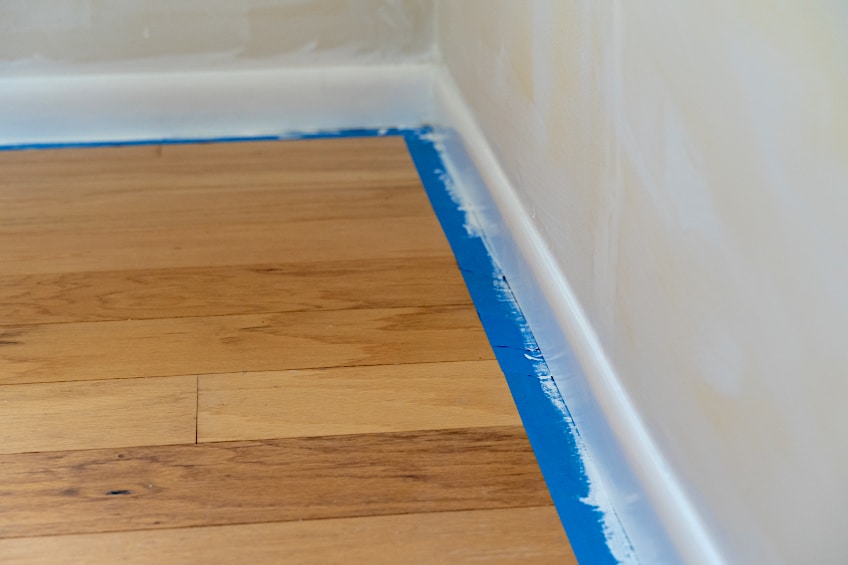
This is due to the density and volume of paint that is applied to a wall using a roller. This means that once your trim has been painted it will be a lot easier for you to protect it using some painter’s tape compared to you applying painter’s tape directly to the surface of your wall. With that being said, it’s also going to take you far less time to tape up your trim compared to taping up your wall.
There’s a Lot Less Trim Than There Is Wall
When it comes down to it, painting is about covering surface area. As you’re probably aware, there is a lot less surface area of trim than there is surface area of the wall. This should mean that painting trim goes much quicker compared to painting walls, but in reality, painting trim takes a lot longer because the work is far more detail-oriented. Does this mean that you should paint the trim last because it can take longer? No. Not everyone has the same level of proficiency, not everyone paints at the same speed, and not everyone is painting the same type of trim.
That being said, if you aren’t working with super intricate trim and are and are an experienced painter, you can save some time painting trim first.
How to Paint Trim
Painting trim is really easy. All that you need to do is prepare the surface of your trim and get to painting, which tends to be pretty much the same as preparing the surface of any other workpiece. Here are a few steps you can follow to ensure that your trim has the best finish possible regardless of whether you choose to paint it first or last.
Clean Your Trim
When preparing any surface for the painting process one of the most important steps is to ensure the surface is clean. Cleaning trim is simple, just get a bucket of soap and water and give the surface of your trim a good once over. When you’re sure your surface is as clean as it possibly can be, allow your trim to completely dry before moving on to the next step in the process.

Sand Your Trim
Sanding your trim is also important. This ensures that your primer and trim are able to adhere correctly all while ensuring that the surface is cleared of the existing paint. The best tools for sanding trim are sandpaper and an orbital sander. Sandpaper is always best for smaller pieces of trim and larger trim pieces are better sanded with an orbital sander. Sanding your trim is easy, just start at one end and carefully work your way to the other end. Be sure to tackle every edge of the trim and be careful not to miss a spot as you move along.
Once you are happy with your sanding job, clean the surface using a cleaning cloth or using some compressed air before moving on to the next step.
Repair Your Trim
Repairing your trim is a step that depends on whether your trim is damaged, to begin with. Repairing trim is done the same way repairing any wooden surface with imperfections is done, using wood filler or spackle! While these product names are sometimes used interchangeably, spackle is usually reserved for smaller imperfections, and filler is used for larger ones.
Once the surface has been cleaned and sanded, using your spackle or wood filler is easy. Using an applicator, simply pick some up and apply it to the affected areas of the surface and smooth it out at a 45-degree angle. Once all the affected areas have been filled allow the filler or spackle to solidify for the time period indicated on the packaging.
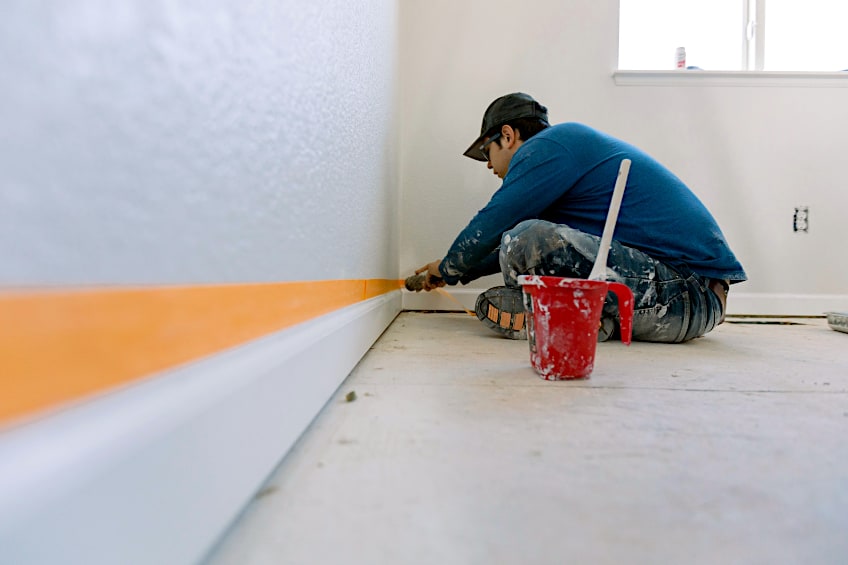
Paint Your Trim
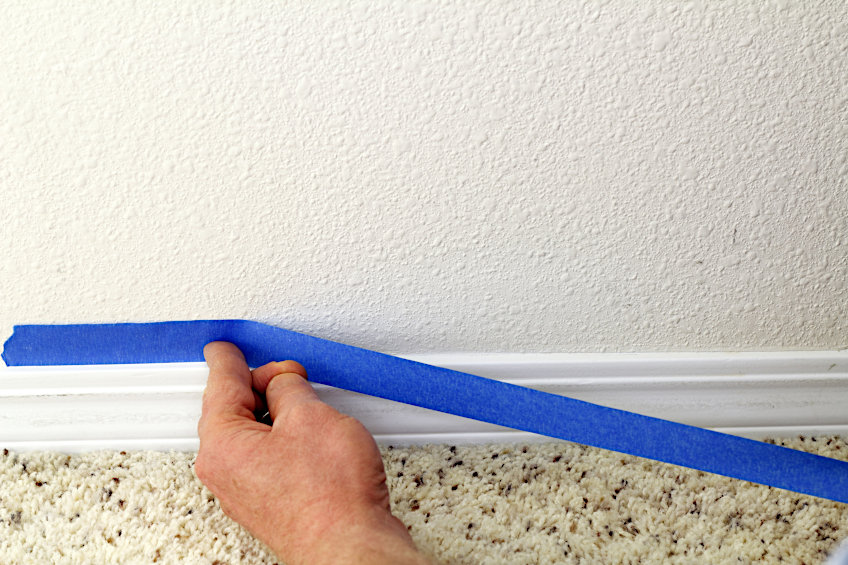
Before you begin painting your trim, you should ensure that the surface of your walls is protected. Apply painter’s tape to your wall where the trim meets it, and ensure that it is flattened by running over the tape with a flat, thin object like a gift card or putty knife. Once you have secured your tape, pour some paint into a smaller container and get some on your brush. Apply your paint to the surface of your trim, making sure that you work diligently and do not miss any areas of your trim. The best way to ensure that you don’t miss any spots is to paint your trim in sections, starting at one end and finishing at the other.
Repeat this process until all your trim has been painted, and allow it to dry for the time period indicated by the manufacturer.
Advantages of Painting Walls First
If you don’t have a ton of experience painting walls you might be wondering why you’d even bother to paint the trim first. While not everyone agrees with this approach there are some notable advantages to painting your walls before painting your trim, so let’s have a look at what they are and how they can improve your painting experience overall.
It Allows You to Get the Most Work Done First
It goes without saying that walls have far more surface area when compared to trim. This means that even though painting trim can be more time-consuming, painting walls can be more labor-intensive as there is far more space to cover, which means it is typically more labor intensive. If your project is time sensitive or you’re working alone, this might make you want to get the walls out of the way first.
This makes complete sense considering that the bulk of the work is concentrated on the painting of the primary surface. After all, you will have to mix your paint, pour it out into a painter’s tray, cut in your corners with a brush, tape up your trim, and then use your roller to paint (presumably) all four walls.
You Might Not Need to Paint Your Trim
These days, the distressed look seems to be all the rage. Whether it’s naturally distressed material, or engineered to look that way, it does add a rustic, minimalist feel to a space that is extremely popular at the moment. With that being said, if you’re aiming for this look, you might simply need to paint your walls and leave your trim as is. It can be challenging to decide between a well-finished aesthetic and a distressed one. Will it match the color tone and overall look of the room? Will it present as unfinished?
Well, there’s only one way to find out, so why not paint your walls first? You can always paint your trim later if the look doesn’t appeal to you immediately.
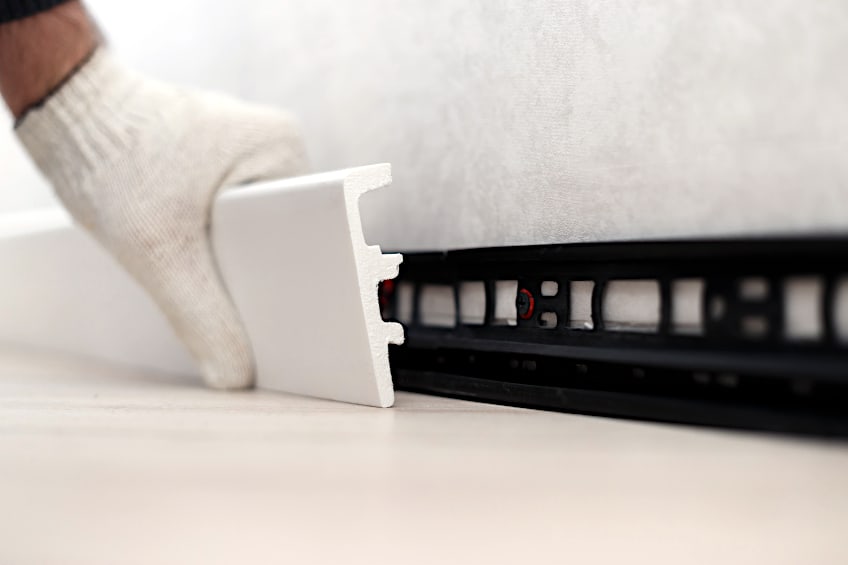
You Trim Might Need to Be Removed to Be Painted
Now, this might sound lazy at first, but considering that most spaces typically have trim at the top and bottom of the walls, this can be an extremely labor-intensive and tedious process. After all, the last thing you want is to break your trim while removing it, and if your trim is old, this is a real possibility.
Therefore, why not simply avoid this entirely, or save it for last? You’ll be able to paint all of your walls and judge whether or not you’d like to paint your trim afterward. If you do happen to damage your trim upon removal, all of your walls have already been painted, allowing you to devote all of your time and effort into fixing/replacing, and painting your trim.
Painting Walls Requires Less Concentration
Hear us out, while painting walls does require some amount of concentration (especially when blending sections together and creating uniformity), it requires far less attention to detail when compared to painting trim pieces. After all, instead of a dainty little paintbrush, you’ll be using a sturdy roller to get the job done. Painting trim can be intense, especially if you have intricately shaped trim with patterns and recesses that need to be tackled individually.
This is why it might make sense to simply get the bulk of your painting out of the way by coating your walls first and reserving all of your mental effort for painting your trim pieces later on.
How to Paint Walls
If you thought that painting your trim was easy, you’d be surprised at how easy painting walls can be. The painting of interior walls is one of the most common paint jobs to be regularly undertaken by both professionals and DIY enthusiasts alike, so there are many tips and tricks out there to ensure you get a good finish. Here are some steps you can follow when painting your wall surface to ensure the best results.
Clean Your Walls
As we mentioned previously, the first step in painting pretty much any surface is to ensure that it is nice and clean before the preparation process begins. Cleaning interior walls is super easy, just get some soap and water and begin thoroughly scrubbing the surface until it is as clean as you can possibly get it. Once you’re done, allow the walls to dry before you attempt to move on.

Sand the Surface of Your Walls
Sanding is an equally important part of the painting process. You will need to ensure that the surface of your walls is sanded down nicely so that primer and paint are able to adhere to the surface of the wall. Since walls are relatively large surfaces, we recommend using a random orbital sander to tackle the job of roughing up your wall’s surface. These sanders ensure a quick and even finish. How do you go about it? Simply pick a spot at one end of the wall to start at, and gradually work your way to the other end. Be careful not to miss any spots by working too quickly and ensure that you sand the surface evenly.
Once you are done, clean the surface of excess material using a clean cloth or some compressed air before attempting to move on to the next step.
Prime the Surface of Your Walls
For the purpose of this tutorial, we’re going to assume you’re using a brush and roller. Applying primer is much the same as applying paint. First off, give the container a good shake to reintroduce the heavier particles that might have sunk to the bottom of the container back into the mixture. Once you’re done, pour some primer out into a painter’s tray and a smaller container.
Next, apply painter’s tape to the edge of your trim that comes into contact with the wall.
Once your tape has been applied use a stiff, thin card or a plastic putty knife to secure the tape by running it along the taped sections at a 45-degree angle while applying moderate pressure. Next, get your small brush and a smaller container of paint ready. Start by cutting in the vertical lines on the left and right sides of your wall. Hold your brush horizontally and start off about one inch away from the edge. Apply pressure to the brush once it’s in contact with the surface of the wall until the bristles spread to fill the gap and begin painting. You can start at the top or bottom of the wall, cutting in your vertical lines of primer.
For the horizontal lines at the top and bottom of the wall, the same process can be applied, with the only difference being that you’ll be holding your brush vertically and applying your primer horizontally. Once your edges have been cut in, get your roller ready and get some paint on it from the tray you filled earlier. We recommend priming walls in sections and applying your primer in vertical stripes that overlap with one another. Apply even pressure to the roller while applying your primer, simply working from the left of the wall to the right or vice versa.
When you are done, leave the primer to set for the time period indicated by the manufacturer before attempting to apply paint to the surface.
Paint the Surface of Your Walls
Painting your surface is very similar to priming it. As you did with the primer, give the paint container a good shake and pour some into a painter’s tray and some more out into a smaller, separate container. Once again, you’ll need a small brush to cut in the edges of your walls before you begin. Dip your brush in the small container of paint.
When painting vertical lines, start an inch away from the edge and apply pressure to the brush until the bristles squash to fill the gap while holding your brush horizontally.
Begin painting up or down your vertical lines until the edges have been nicely filled in with paint. When painting the horizontal lines at the top and bottom of the wall, repeat this process while holding your brush vertically. Once your edges have been cut in you can begin painting your primary surface.
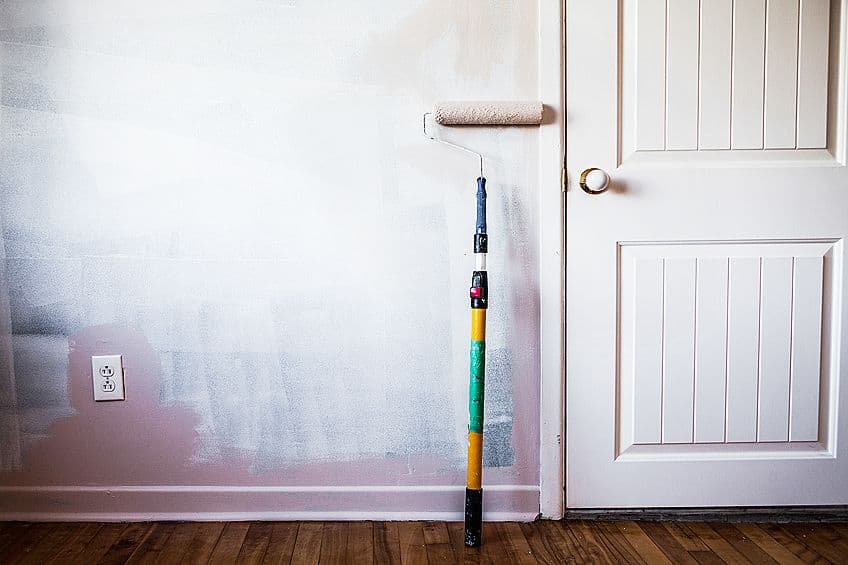
Pop on a fresh roller head and dip it into your painter’s tray. Begin painting by creating vertical stripes along the length of your wall that slightly overlap with one another. Repeat this process until the entire surface has been painted and allow the walls to dry for the time period indicated by the manufacturer of the paint.
Which to Paint First: Trim or Walls?
Choosing to paint walls or trim first can be a challenge, but as you can see there are some advantages and disadvantages to each approach. When it comes down to it, whether you choose to paint walls or trim first depends on a couple of factors, as well as your personal preference. What should you consider then?
Well, painting trim is more detail-oriented work that tends to take a bit longer to do.
If your trim is intricately or irregularly shaped this can take even longer. Therefore, if you don’t have an awful lot of time to spend painting, we recommend tackling your trim first, taping it up, and then painting your walls which tends to go far faster. On the other hand, painting your walls first means you’ll have the bulk of the work out of the way which should allow you to focus on the more detail-oriented task of painting your trim. The only trade-off is that you’ll have to tape off your trim, and even if you do, you risk accidentally ruining it. Painting walls also takes a lot more physical effort, which could leave you drained by the time you reach your trim.
What’s the answer then? It’s entirely subjective. Depending on the size of the space you are painting, how much trim you have to paint, whether there are repairs to do, and whether you are working alone or not. Choose the approach that best suits your immediate needs and ensure that you assess your scenario correctly before committing to either.
Now you know how to paint both trim and walls, and how painting each surface first affects your overall experience. Be sure to do a mental walkthrough of the process before committing to either approach, and make sure not to underestimate how much time and effort both of these options can take before jumping into things.
Frequently Asked Questions
Should You Paint Your Ceiling or Walls First?
Choosing to paint the ceiling or walls first can be challenging. They both require quite a bit of effort and planning, not to mention the need to move things around to cover things up. Choosing to paint the ceiling or walls first therefore largely depends on your personal preference and how much time you have available.
Does It Take Longer to Paint Trim or Walls?
Painting both trim and walls can take a considerable amount of time. Painting walls is labor-intensive, but less detail-oriented. Painting trim is more detail-oriented but there is less surface area to cover, so it’s entirely up to how much trim and walls you have to paint, and whether you are working alone or not.
Do You Need to Prime Trim Before Painting?
Trim is made of different materials these days, and while newer materials generally don’t need to be primed, older trim pieces made of wood do need to be primed. This is done by simply taping up your wall and applying your primer much in the same way you would when painting.