Resin Geode Art – How to make a Resin Geode [Tutorial]
This post may contain affiliate links. We may earn a small commission from purchases made through them, at no additional cost to you. You help to support resin-expert.com
This guide shows you how to make impressive, sparkling Free Form Goeden from epoxy resin yourself. We give you step-by-step instructions on how to easily cast extraordinary unique pieces yourself using silicone and show you which materials are best suited for this. You will receive important insider information and we will show you what you should pay attention to in order to make your first resin geode a success.
Table of Contents
What is a Geode?
Geodes in nature
The term “geode” (Greek: γεώδης, geōdēs for earthy) comes from geology or mineralogy. A geode is a roundish cavity in the rock, which is filled with minerals and crystals through geological processes. Mostly geodes are formed in volcanic lava rock, which after cooling encloses gas bubbles. If hot water with dissolved quartz penetrates these hollow spaces, crystals can grow. These take on different colours depending on the added trace elements (e.g. smoky quartz or amethyst). Geodes can also contain other types of minerals, such as quartz, agate or jade). Geodes are not so easy to find, as they are usually spherical or almond-shaped stones that can hardly be distinguished from the surrounding rock. Their sparkling inner life only becomes apparent after they have been broken open or in cross-section.
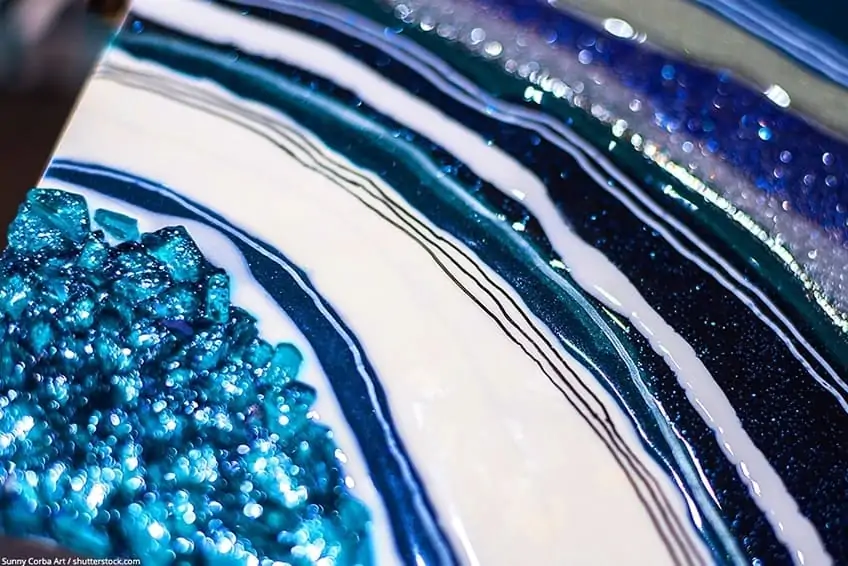
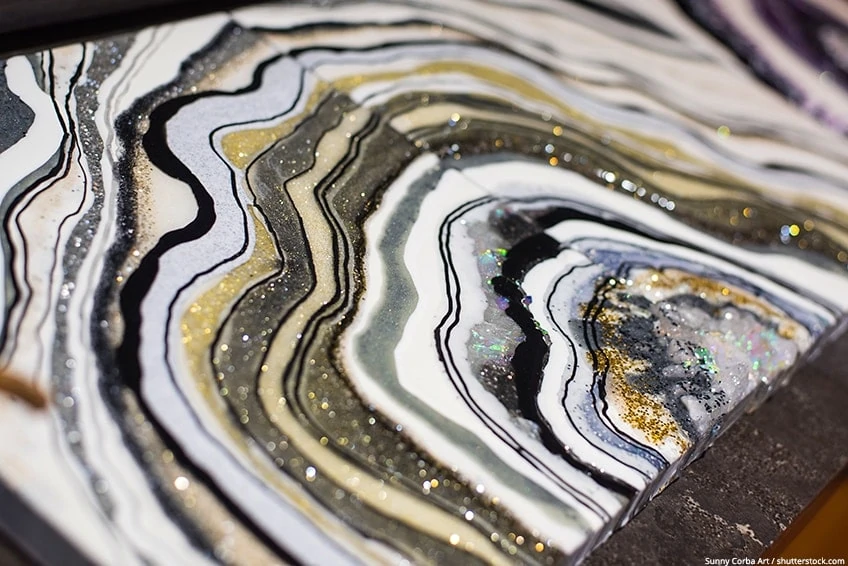
Resin Geode in art
In the style of natural geodes, you can also use resin, glitter, decorative stones and even real crystals and minerals to create enchanting resin geodes. You can let your imagination run free. With a little practice the Resin Geodes look very similar to the real minerals from nature. Of course you can also cast geodes in the form of a picture on a suitable painting surface or, as in this case, as a free form. These Free Form Geodes can also be processed very well, e.g. to an epoxy resin table. Or you can use them as extraordinary coasters.
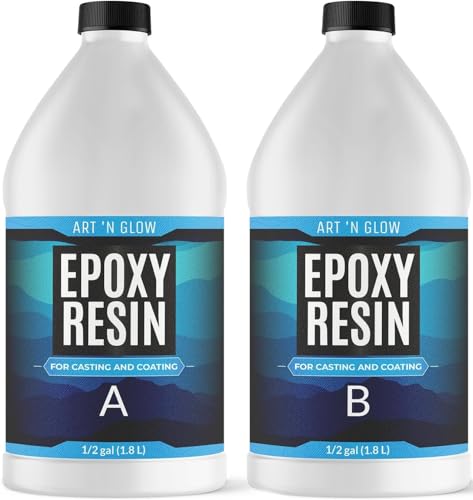
The best epoxy resin for your first resin geode
The choice of the best resin is the basic requirement for the success of your resin geodes. We can recommend the Dipon Epoxyplast, which has a very good price-performance ratio and with which we have had good experience ourselves.
- Cures crystal clear, resists yellowing, high gloss finish
- 1:1 Mixing Ratio, Self-leveling
- VOC and BPA free, FDA approved, low odor
How to make a Resin Geode?
The following step by step instructions show you how to create your own Free Form Geodes:

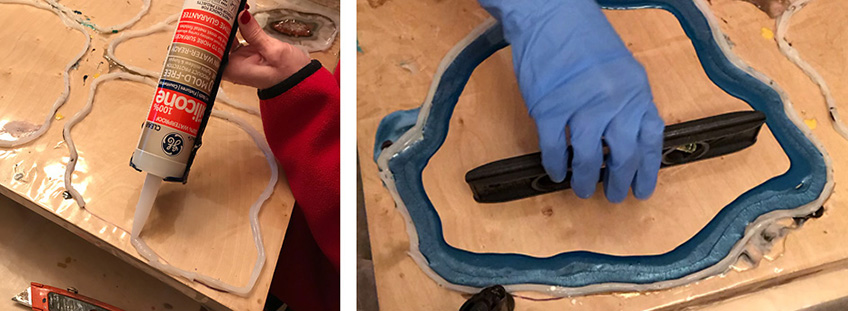
Surface preparation
Before you can start pouring your Free Form Geode, you must first prepare a suitable substrate. A transparent vinyl shower curtain, which you can apply to a hardboard, is suitable for this.
- Cut the curtain slightly larger than the hardboard and fix it to the underside of the board with adhesive tape. If the vinyl curtain is not completely smoothed out and still throws a few wrinkles, this is not too bad.
- Now you can record your desired geodetic shape using a reference image with a marker.
- Then you can spray the sanitary silicone along the pre-drawn shape using a silicone press. After about five minutes you can apply another layer of silicone on the first layer. If you want your geode to have a hollow space in the middle, you can use the silicone to apply a border in the middle that has the same shape as the geode, but is smaller. In our example the geode has no cavity.


- Now moisten one finger with some soapy water and smooth the inside of the silicone mould with your finger. This will give your geode an even edge without sharp edges.
- Two layers of silicone are usually sufficient if you do not want to cast a very large or thick geode, such as an epoxy table. In this case several silicone edge layers are necessary to ensure that the geode has the required thickness and stability. Depending on the silicone, the mould is ready for use after about 45 minutes.
Mixing and coloring resin
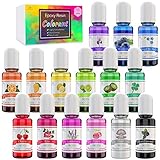
Mix the resin according to the manufacturer’s instructions. Then fill the resin into individual plastic cups according to the number of colors chosen and mix the color pigments into the resin. We can recommend the pigments of the following brands: Resintint, Hemway and Jacquard, which give best results.
You can create exciting textures and effects in your geodes by adding glitter or so-called mica flakes to the resin.


To calculate the required amount of epoxy resin, you can use our resin calculator.
Casting the Free Form Geode
It is important that your worktop is 100% straight, otherwise the resin will be uneven. You can check this with a spirit level before pouring, even diagonally. If the surface is not completely straight, you can level the hardboard with wooden spatulas, for example.
- Always work from the outside in. Pour each color separately and one after the other in a ring along the geodesic form up to the center. If you add color afterwards, you will get great color gradients with different light transmission.
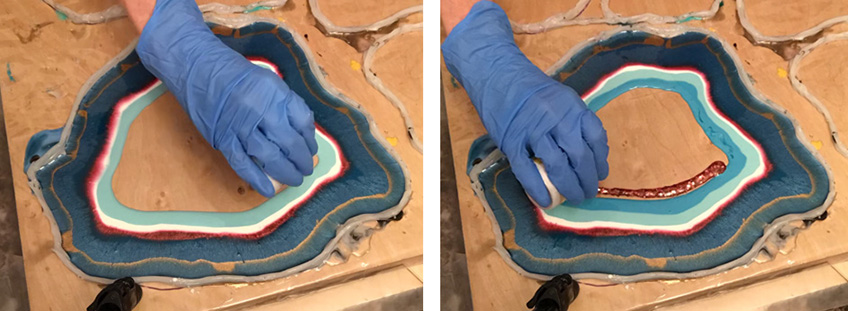
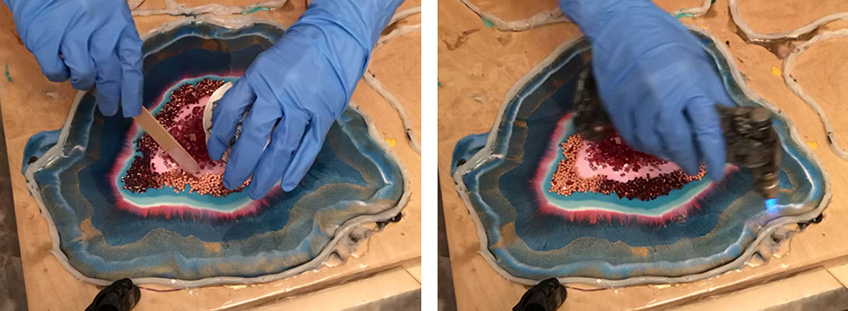
- Heat the resin again and again briefly with a hot air dryer or a Bunsen burner to avoid air bubbles. As a great side effect, interesting patterns and color gradients can be created. Be careful not to heat the resin too much, as the epoxy resin will burn and deform.
- If the first layer of resin is not quite as you imagined it or if it still has irregularities, you don’t need to worry because another layer of resin will be poured over it later. Irregular areas are thus evened out.
- Now you can sprinkle decorative stones, mirror nuggets or crystals into the resin in the middle of the geodes to create the typical and unmistakable look of the geodes.


- Once the first layer of resin has hardened, which can take between 4 and 24 hours depending on the manufacturer and type of resin, you can cast the second layer of colored resin. This allows you to correct unevenness and optical defects.
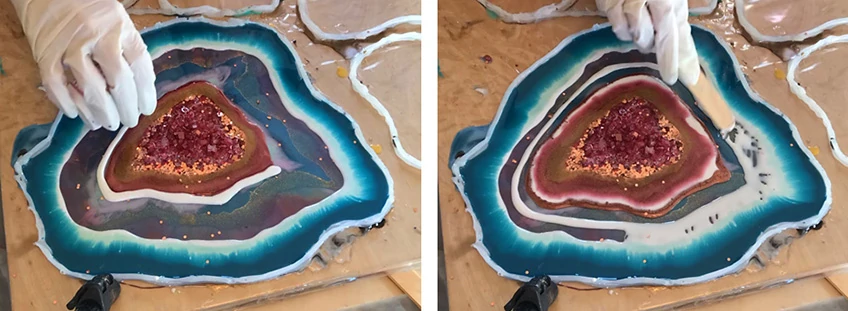
- If you are already satisfied with the first layer of resin or with certain areas in terms of appearance, you can use the second layer instead of the dyed, clear resin as a finish, as this enhances the color intensity and depth effect of your geodes.
- You can now add other 3D elements such as decorative stones and crystals.
- To ensure that the geode hardens as dust-free as possible, it is best to put a sufficiently large cardboard box over it. Your first Free Form Geode is now ready.

Remove the geode from the silicone mold
To ensure that your geode is fully cured, you should wait 24 hours. Once the resin has cured, remove the tape from one edge so that you can put one hand behind the vinyl. This will push the geode out from the back. Now carefully release the geode from the silicone edge, if possible without removing the silicone from the vinyl.
Look out: The edges of the geode could be sharp, so be careful not to cut yourself. Once the geode is completely dry, you can sand the sharp edges slightly with sandpaper. If you like, you can also draw accents on your finished geode with a special marker pen.
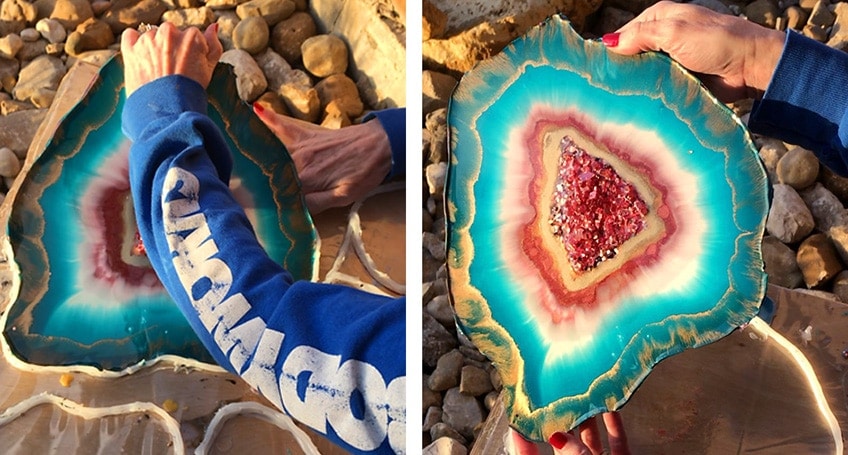
Picture tutorial: © by Christi and Madison Ninemire / FlatLand Artistry
As long as the silicone sticks to the vinyl, you can use the silicone mold again and again. If a part of the silicone edge has come loose, you can simply cut this part out and reapply the silicone sealant.
Video Tutorial Free Form Resin Geodes
To make the whole thing even more vivid, we recommend the following video tutorial:
Always have your safety in mind: Wear a respirator and Nitrile gloves when working with liquid resin:


We wish you lots of fun and success casting your first, breathtaking Free Form Geode!
