Painting Bathroom Tiles – Step-by-Step Guide for a Refreshed Look
This post may contain affiliate links. We may earn a small commission from purchases made through them, at no additional cost to you. You help to support resin-expert.com
Transform your bathroom easily and affordably by painting the tiles. This guide covers everything you need—from preparing your tiles by cleaning and repairing any damage, to selecting the right primer and paint for a durable, moisture-resistant finish. Follow our straightforward steps for a weekend project that will refresh your space without the need for a full remodel.
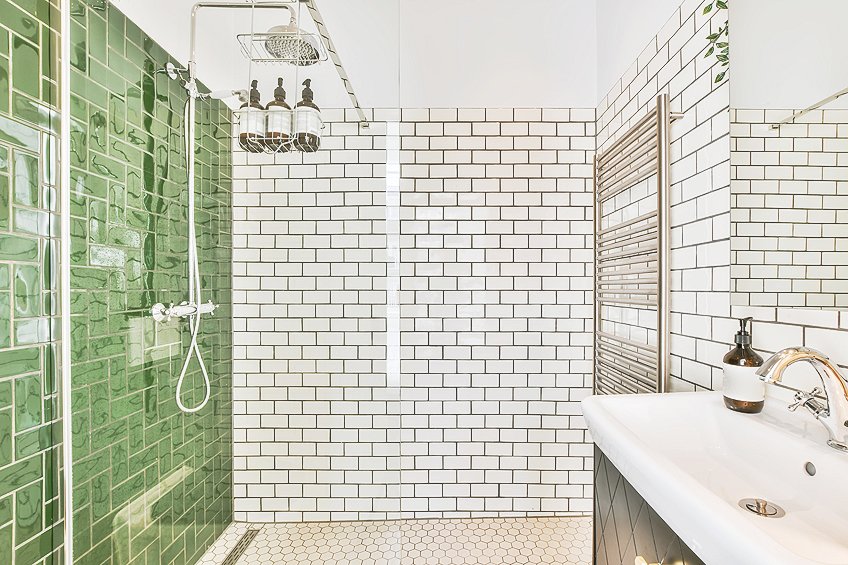
Table of Contents
Key Takeaways
- Painting bathroom tiles is an economical alternative to a full renovation.
- Proper tile preparation and repair are essential for paint adhesion.
- Selection of the right primer and paint ensures durability and moisture resistance.
Preparing Your Bathroom for Tile Painting
Proper preparation is vital for a successful paint job on your bathroom tiles. It involves assessing tile condition, gathering materials, and meticulously cleaning and sanding the tiles to ensure the paint adheres well and lasts long.
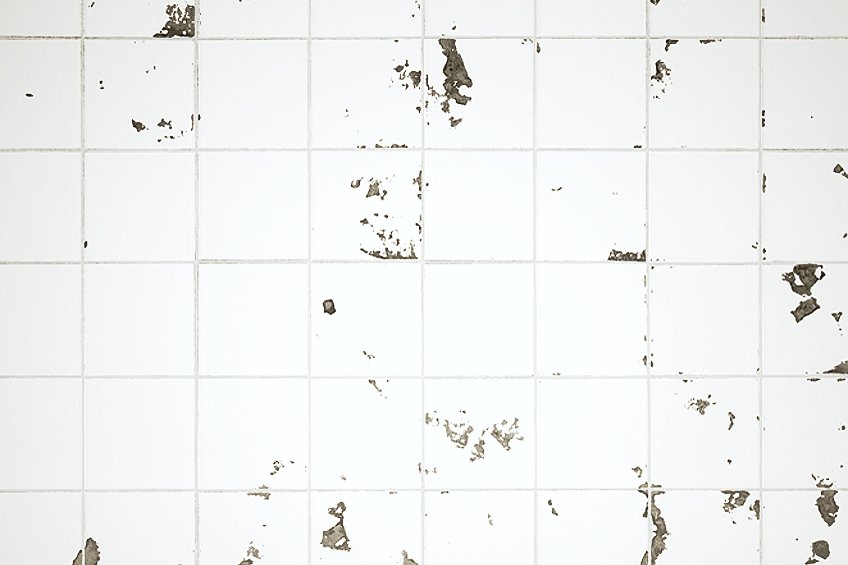
Assessing Bathroom Tile Condition
Evaluate the tiles for any signs of damage such as chips or cracks. Your tiles must be in good condition before you begin painting. Repair any damages by filling the cracks and chips with a suitable caulk or tile filler. Pay special attention to the grout lines; they should be intact. If you notice any loose tiles, reattach them with tile adhesive to create a stable surface.
Gathering Necessary Materials
Prepare the following materials for your prep work:
- Cleaning solution: ideally, a mild detergent or a specialized tile cleaner.
- Sanding tools: fine-grit sandpaper or a sanding block.
- Safety gear: gloves, and a dust mask for sanding.
- Repair materials: caulk or filler for cracks and chips.
| Materials Needed | Purpose |
|---|---|
| Mild detergent or tile cleaner | To clean the tiles |
| Fine-grit sandpaper | For sanding the tiles |
| Safety gear | Protection while working |
| Caulk or tile filler | To repair damages |
Cleaning and Sanding Tiles
Cleaning: Start with a thorough clean to remove any dirt, grime, or soap scum using your chosen cleaner. For the best results, consider using a cleaning solution with trisodium phosphate (TSP) to effectively degrease and prepare the surface. Rinse the tiles well and allow them to dry completely.
Sanding: After cleaning, lightly sand the tile surfaces with fine-grit sandpaper. The goal is to create a slightly rough texture that the paint can adhere to. Ensure to sand evenly and to wipe away any dust that results from the sanding process.
Priming Bathroom Tiles
Before painting your bathroom tiles, priming is essential to ensure the paint adheres well and lasts longer. This step can prevent peeling and flaking, setting a strong foundation for your topcoat.
Choosing the Right Primer
You’ll need to select a primer that provides good adhesion for tile surfaces. Typically, a bonding primer is the best option for ceramic, porcelain, and most tile types. These primers are specially formulated to grip to slick surfaces.
When choosing a primer, look for labels that mention “high adhesion” or “bonding” properties to make sure they are compatible with tile.
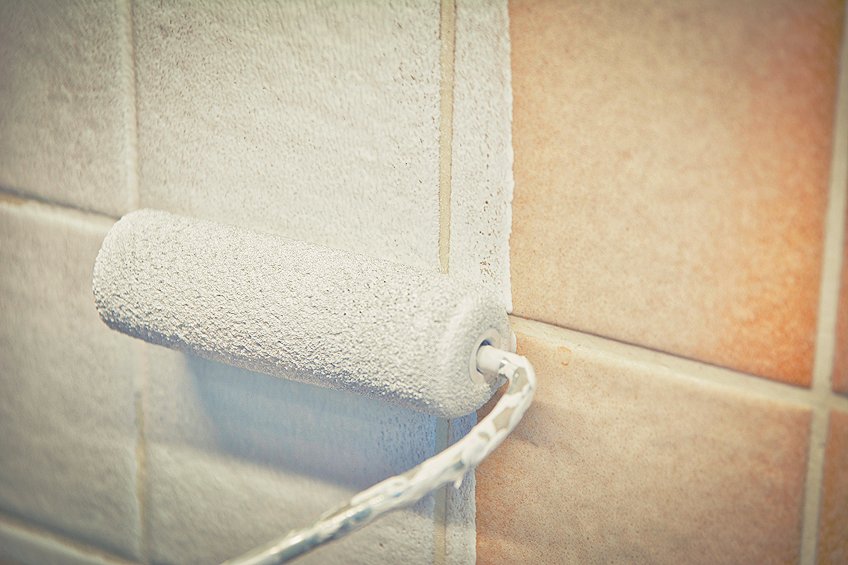
Applying Primer Properly
To effectively apply primer:
- Clean: Ensure your tiles are clean and dry. Any mold, soap scum, or oils can prevent primer from bonding properly.
- Equipment: Use a paint tray and a small roller designed for smooth surfaces for an even application. For tight areas and corners, a brush can provide better precision.
- Application: Apply the primer in thin, even coats. Avoid heavy application to prevent drips.
- Drying: Allow the primer to dry thoroughly as per the manufacturer’s instructions, usually at least 24 hours, before applying paint.
By following these steps, your bathroom tiles will be well-prepared for a fresh coat of paint.
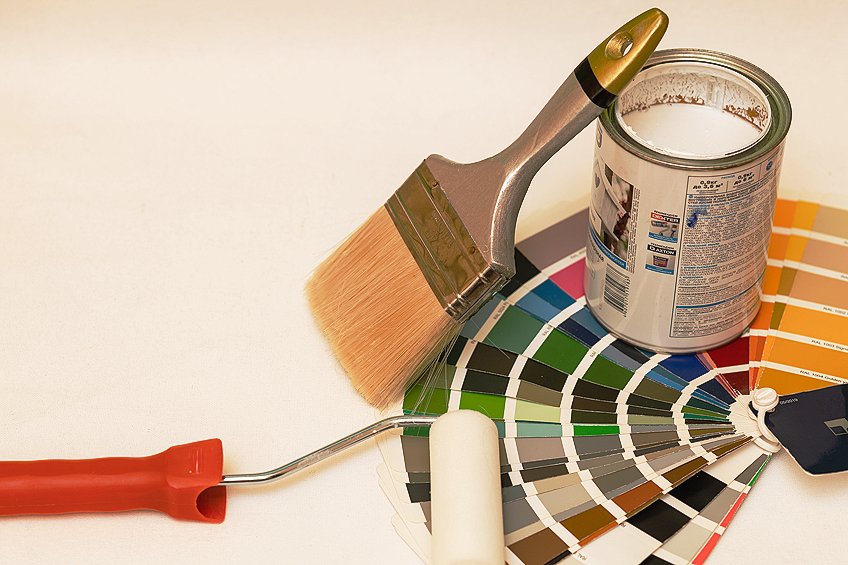
Selecting the Appropriate Paint
Choosing the right paint for your bathroom tiles involves understanding the types available and how they stand up to the bathroom’s humid environment.
Understanding Paint Types for Tiles
Epoxy paint and latex paint are two common types for tile. Epoxy paint, known for its durability and resistance to moisture, is a two-part paint that combines a resin and hardener for a hard, glossy finish ideal for tile surfaces. It’s often used in high-moisture areas like bathrooms due to its waterproof traits. Latex paint, typically used for its quick-drying properties and ease of cleaning, might need additional protection like a urethane or polyurethane sealer to extend its longevity in a bathroom setting.
| Type of Paint | Description | Application Tips | Finish & Durability |
|---|---|---|---|
| Epoxy Paint | A two-part paint system consisting of an epoxy resin and a hardener. Known for its durability and resistance to moisture. | Requires thorough mixing before application. Apply in a well-ventilated area and use a respirator mask. Work quickly due to limited working time. | High-gloss finish, extremely durable, water-resistant, and easy to clean. |
| Acrylic Latex Paint | A water-based paint that’s easier to handle, with a quicker drying time. Suitable for bathroom tiles when used with a high-quality primer. | Ensure tiles are clean and apply a high-adhesion primer. Easier application and cleanup. | Range of finishes from matte to glossy, durable with correct primer and topcoat. |
| Urethane-Based Paint | A highly durable paint that’s resistant to moisture and scuffing. | Requires careful application and ventilation. Primer may not be necessary, but check manufacturer’s recommendations. | Hard, durable finish, moisture and fade-resistant. |
| Tile-Specific Paint | Formulated specifically for painting tiles, adheres well to ceramic and porcelain surfaces without a separate primer. | Comes in kits with everything needed. Follow manufacturer’s instructions closely. | Adheres well, providing a durable finish that withstands moisture and wear. |
| Chalk Paint | Known for its matte finish and ease of application. Can be sealed with a water-resistant sealer for use in low-moisture areas. | Best used on tiles with minimal water exposure. Must be sealed with a water-resistant topcoat. | Matte finish. Durability depends on the sealer used. |
Tile Type Compatibility
- Ceramic and Porcelain Tiles: Can be painted with either epoxy or latex paints.
- Unglazed Quarry Tiles: Best suited for epoxy paints for a lasting finish.
Paint Finishes
- Epoxy Paint: Glossy and highly durable.
- Latex Paint: Available in various finishes from gloss to matte.
Considering Moisture and Durability
Your bathroom endures constant shifts in temperature and humidity. When selecting paint, consider the type that can withstand this environment. Epoxy paint is inherently moisture-resistant and forms a protective, waterproof layer over your tiles.
If opting for latex paint, securing it with a urethane sealer or polyurethane sealer is crucial to protect against peeling and ensure durability.
Factors for Durability
- High moisture-resistance to combat steam and dampness.
- Resistance to frequent cleaning and scrubbing.
- Ability to adhere to tile surfaces without cracking or flaking.
By taking into account these characteristics, you’ll ensure a more reliable and lasting tile paint job in your bathroom.
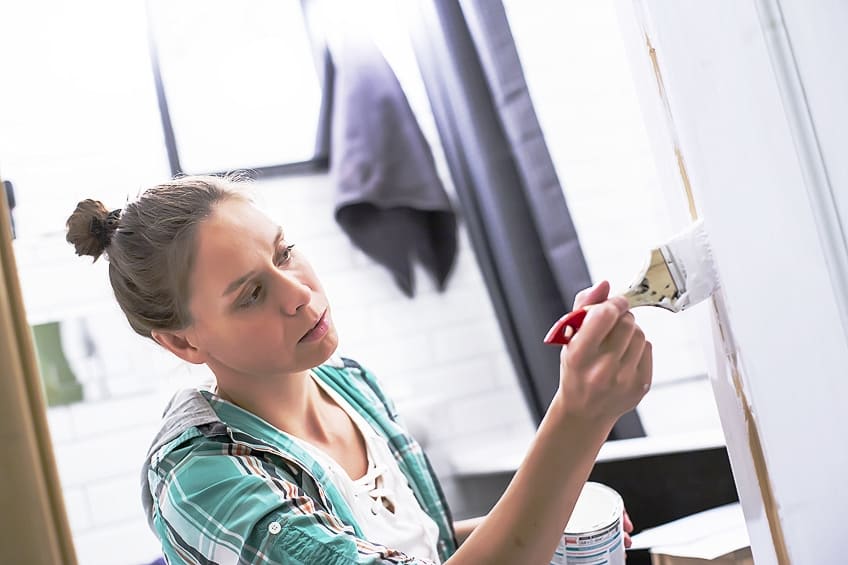
Painting Techniques for Bathroom Tile
When painting your bathroom tile, the right techniques can make all the difference in achieving a professional and long-lasting finish. Careful prep work along with proper tool selection and application methods are essential to ensure the best results.

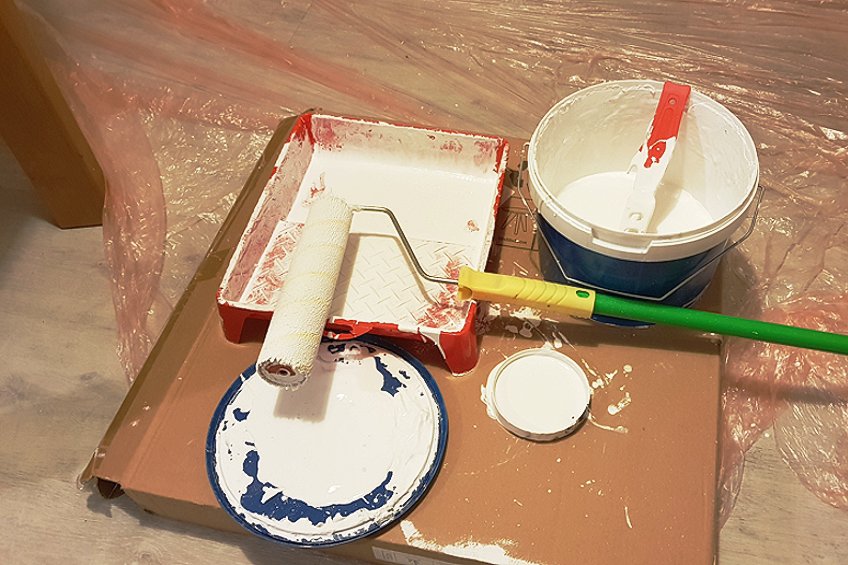
Using Rollers and Brushes
To start, apply primer specifically designed for tile to create a foundation that helps paint adhere better and last longer. Opt for a high-quality angled brush for cutting in around the edges and tight spaces where rollers cannot reach with precision. When choosing a roller, a small foam roller is ideal for painting bathroom tile as it provides a smooth finish without leaving lint behind.
Dip the roller lightly into the paint, rolling it backward on the tray’s ribbed area to remove excess paint and avoid drips.
Achieving Even Coats
When using a paint roller, start from one end and work systematically toward the other end to maintain consistency and avoid missed spots. Apply thin coats rather than one thick coat to prevent running and sagging. Allow sufficient drying time as recommended by the paint manufacturer before applying a second or third coat. Between coats, lightly sand the surface with fine-grit sandpaper to ensure a smooth surface for subsequent coats.

Always clean off the sanding dust with a damp cloth. When selecting paint, choose a formula that caters to high-moisture areas. Waterborne epoxy paints are commonly recommended for their durability in bathroom environments. Apply paint in well-ventilated conditions and use water to clean tools when using latex-based products.
Final Touches and Maintenance
Ensuring the longevity and attractiveness of your painted bathroom tile involves careful caulking, sealing, and a dedicated cleaning regimen.
Caulking and Sealing Edges
After the paint has dried, it’s crucial to apply caulk to edges and joints. This seals the gaps and prevents moisture from undermining the paint. Use a silicone-based caulk to create a waterproof barrier that enhances durability and counters the potential for paint to peel off over time.
- Steps for Caulking:
- Clean and dry the area to be caulked.
- Apply caulk smoothly along the seam.
- Wipe any excess with a damp cloth immediately.
It’s essential to seal the edges of your painted tiles, especially if they are frequently exposed to water. This can prevent the future accumulation of grime and also help to maintain traction in areas that might become slippery when wet.
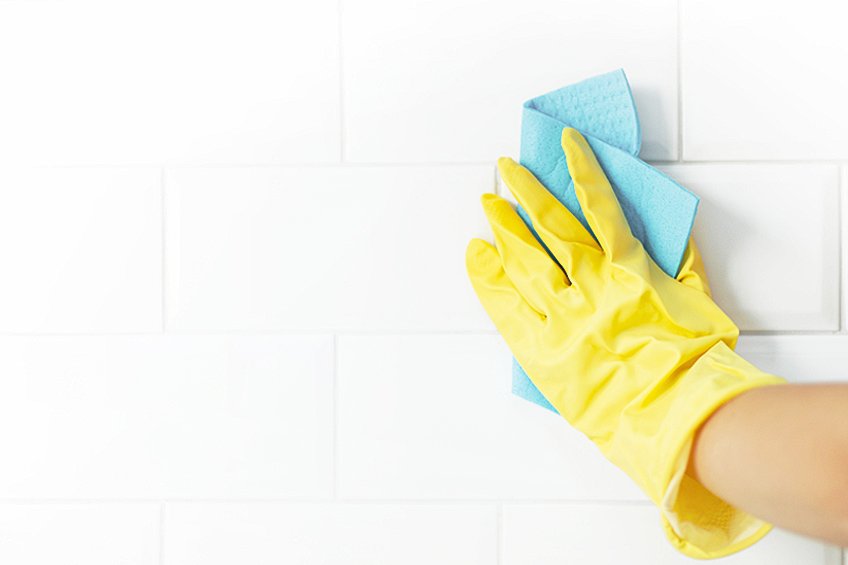
Cleaning and Upkeep
Regular cleaning is necessary to preserve the fresh look of your painted tiles. However, be gentle to avoid scratching or wearing away the paint surface.
- Maintenance Tips:
- Clean painted tiles with a soft cloth or sponge.
- Avoid abrasive cleaners that could scratch or damage the paint.
During cleaning, it’s important to avoid harsh chemicals that can deteriorate the sealant or caulking. Instead, opt for mild cleaning solutions. Replace caulk when it shows signs of wear to ensure continuous protection. Also, lay down drop cloths during painting and maintenance to protect surrounding areas from drips or spills.
Painting bathroom tiles offers a cost-effective and transformative approach to refreshing a bathroom’s appearance without the need for extensive renovations. This process not only allows homeowners to customize their space according to their aesthetic preferences but also extends the life of existing tiles by providing a protective layer against moisture and wear. With the right materials and techniques, painting bathroom tiles can result in a durable and visually appealing finish, making it an excellent option for those looking to update their bathroom on a budget.
Frequently Asked Questions
Do I Need to Prepare the Tiles Before Painting?
Yes, preparing the tiles before painting is crucial for achieving long-lasting results. Personally, I start by thoroughly cleaning the tiles to remove any dirt, grease, or soap residue using a mild detergent and water solution. Then, I lightly sand the surface to create a better bonding surface for the paint. After sanding, I wipe down the tiles with a damp cloth to remove any dust or debris. Finally, I apply a high-quality tile primer to ensure proper adhesion and durability of the paint.
How Do I Ensure a Smooth Finish When Painting Bathroom Tiles?
Achieving a smooth finish when painting bathroom tiles requires attention to detail and proper technique. I prefer using a high-quality brush or roller specifically designed for smooth surfaces to apply the paint evenly. Before painting, I ensure the tiles are clean and dry, and I apply multiple thin coats of paint rather than one thick coat to avoid drips or streaks. Between coats, I lightly sand the surface to smooth out any imperfections and ensure proper adhesion. Additionally, working in small sections and maintaining a consistent stroke pattern helps achieve a uniform finish.
Can Painted Tiles Be Cleaned Like Regular Tiles?
Yes, painted tiles can generally be cleaned similarly to regular tiles, but it’s essential to use gentle cleaning methods to preserve the paint finish. Personally, I use a mild detergent and water solution or a non-abrasive household cleaner to clean painted tiles. Avoid harsh chemicals, abrasive scrubbers, or excessive scrubbing, as these can damage the painted surface. Additionally, it’s a good idea to avoid soaking the tiles or allowing standing water to remain on the surface for prolonged periods, as this can affect the paint’s durability over time. Regular gentle cleaning helps maintain the appearance and longevity of painted bathroom tiles.