
How to Paint Chrome – The Best Methods for Painting Over Chrome
This post may contain affiliate links. We may earn a small commission from purchases made through them, at no additional cost to you. You help to support resin-expert.com
Chrome is a wonderful way of bringing modern-day simplicity into your home. But you might find that sooner or later it starts to peel, or perhaps you become bored of it and want to create a new look. Whatever your reason, you are considering the possibility of painting it and need to know how to go about doing that. This article is here to give you the information you need to tackle this project but beware, painting over chrome is not as easy as it looks!
Table of Contents
Can You Paint Over Chrome?
An obvious solution to your desire to get rid of the chrome item in question is to replace it, which would of course be a reasonable solution. But there is a good reason why many people opt for painting old chrome instead: it is, quite simply, cheaper! And, if you like to get your hands dirty experimenting with improving your home in true DIY-style as we do, then painting over chrome would probably be your preferred choice!
But before we start talking about how you can do it, we are going to myth-bust a common misconception that leads people to the illusion that painting chrome is easy: the idea that chrome is immune to corrosion. In reality, this modern finish is highly susceptible to oxidizing, which means that as soon as it leaves the factory floor it is being affected by oxygen and forming a clear, shiny layer over the nickel that lies beneath.
What does this mean for you and your zealous endeavors to nonchalantly slap a layer of paint over it? It means you have to make the concerted effort to remove this shiny layer before you paint over it, and you will be wanting to do it properly otherwise your paint will start peeling. If this happens due to a poorly prepared surface, a long process of sanding, cleaning, and repeating the entire process awaits you.
Like anyone who wants to minimize the amount of work in DIY home improvement projects, we always suggest doing the appropriate research beforehand and getting it right the first time, even if the process looks daunting at first which, in the case of painting chrome, it is! So, in summary, can you paint over chrome? The short answer is yes, the long answer is only if you are a brave soul with a lot of time on your hands.
In this tutorial, we will give you a user-friendly, step-by-step account of how you can do it at home based on expert advice, and give you our top three chrome paint products.
How to Paint Over Chrome Plastic
The best way to approach the process of painting chrome is thorough and methodical. When preparing your surface, you do not want to be creating an uneven surface as this will compromise the integrity and durability of your project in the long run. It is best to do the job properly the first time so that you are not disappointed and disheartened.
Surface Preparation
When you are painting something, it is usually necessary to put in a bit of time and effort to prepare the surface you would like to paint on, otherwise the paint will not adhere and you will be sorely disappointed. In the case of chrome, this is where most of the work is involved. We recommend putting those extra few hours in so that you get right the first time!
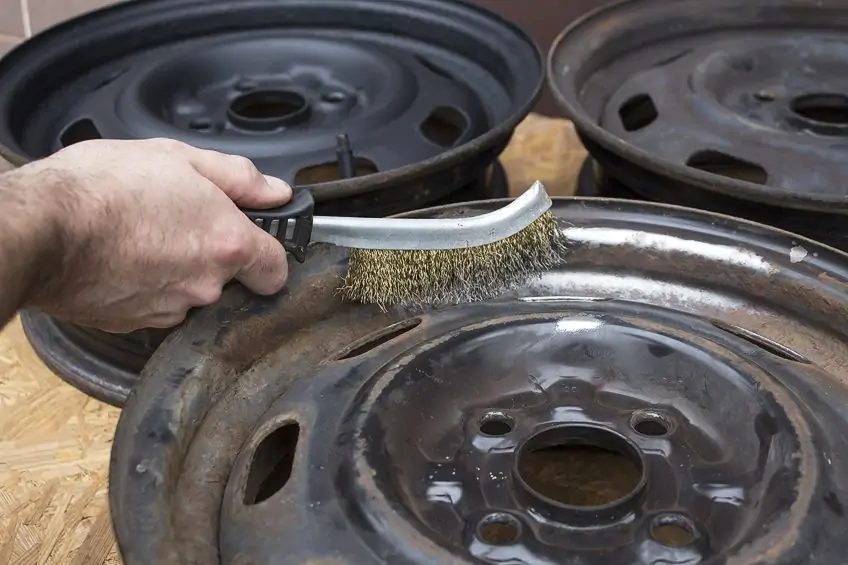
Cleaning Your Chrome
The first thing you need to do is to clean the surface properly with dish liquid and warm water. And when we say clean, we mean using all of the tools (toothbrushes, for example) you need to access all the tight spots and other parts of your item that are difficult to access, leaving no stone unturned as the saying goes.
For larger areas use a clean cloth with dishwater.
Sanding
Next, you will need to sand the chrome. Start by using heavy grit sandpaper, such as 120-grit. At this point in the process, you can either use side-to-side sandpaper action or circular motion. You may want to use finer sandpaper (e.g. 240-grit) after you are done with the heavier 120-grit. Wiping the surface with a clean cloth will help you to determine if there is any remaining chrome. If you can still see it (i.e. parts of the surface are still shiny), then keep sanding with the 240-grit sandpaper. Once you are happy with the outcome produced by this grain of sandpaper, start using a 320-grit in a circular motion. This is a finer variety that will ensure that the surface is completely smooth.

Throughout this process, wipe the surface intermittently to establish whether all the scuff marks produced by the heavier sandpapers have been entirely removed. The goal of using the finer sandpaper is to remove any marks made by the 120-grit and 240-grit sandpapers used earlier. It may seem counter-productive to use the heavier grit first, but the point of doing this is to get under the oxidized layer.
Filling Damaged Areas on Your Chrome
If there are any holes on the item you are painting, or damaged areas on the surface now is a good time to fill them with a metal filler. Instructions on how to do this will vary from brand to brand, but we can tell you that you should at least clean and allow the surface to dry before applying it and smoothing it out.
Before the priming and painting begin, give your item a final wipe-down with a damp cloth to remove excess particles created by the sanding process and allow it to dry.
Priming and Painting
At this point, you can think about how you are going to protect the sections of the chrome item that will not need painting if there are any. For smaller areas, you can use painter’s tape. A newspaper will do the job for larger areas. Also take some time to cover up the surface you are painting on, whether it is a table or the floor. This will prevent the paint from creating a mess on your work surface, which will ultimately save you time.
Priming
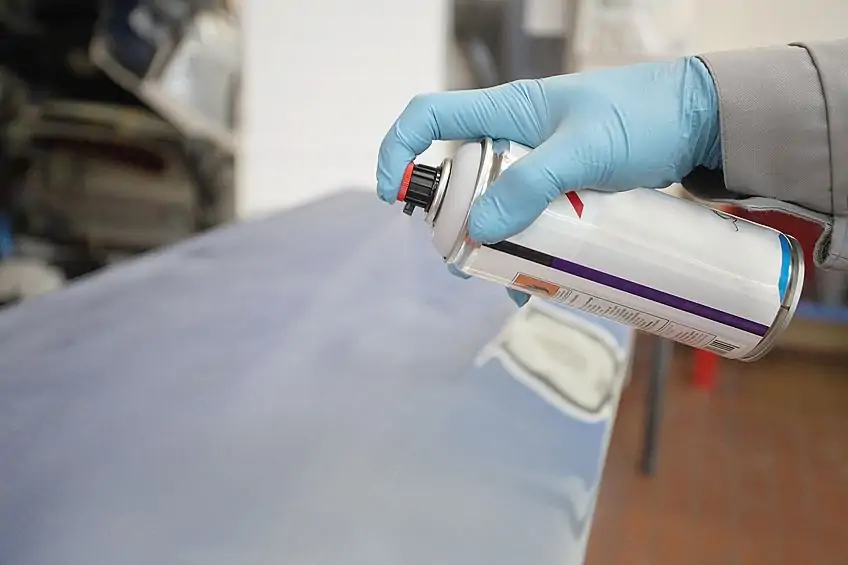
Prior to applying the paint, you will need to apply a primer. Faucets and other objects that will be exposed to water need to be coated with a specialty primer that is designed for automotive metal, as these primers can withstand exposure to the elements. For any other object, a primer that is not susceptible to rust, such as RUST-OLEUM, will do the trick.
The instructions for using your primer of choice will be described in detail on the packaging of your chosen brand. Available options include spray cans and liquids that you apply with a brush or sponge.
Regardless of which application method you prefer, it is a good idea to be attentive to any drips that might be forming as a result of applying the paint too thickly, or because you are holding the spray can too close to the item you are painting. Stopping drips from happening in the first place will save you from sanding them off later. Also ensure that the primer has had ample time to dry before applying a second or third coat, or before applying your paint. Drying time will be indicated on the packaging, and it is weather-dependent.
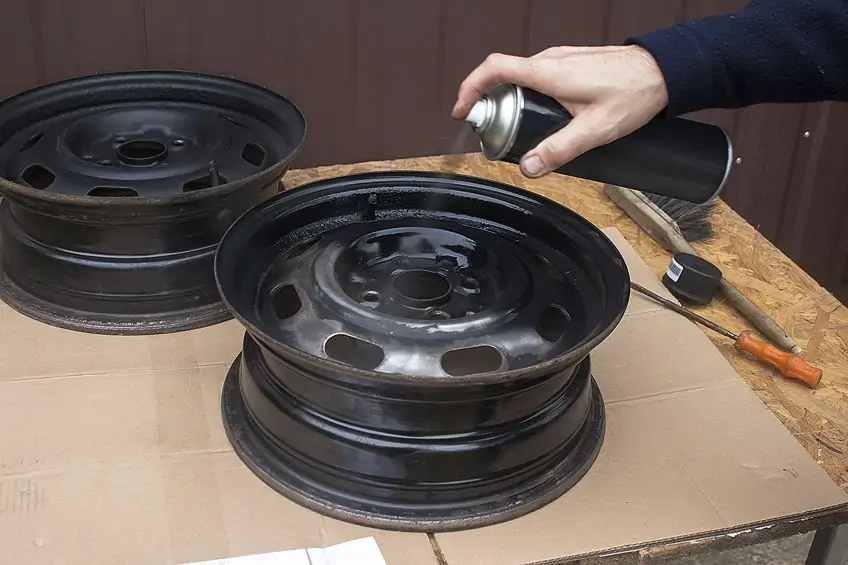
Painting
Now that the surface preparation is complete, it is time to paint. Automotive paint will work for surfaces exposed to water; latex and acrylic paint for metal will work on any other surface type. Later on in this tutorial, we will give our opinions on the top three paints that work well for painting over chrome.
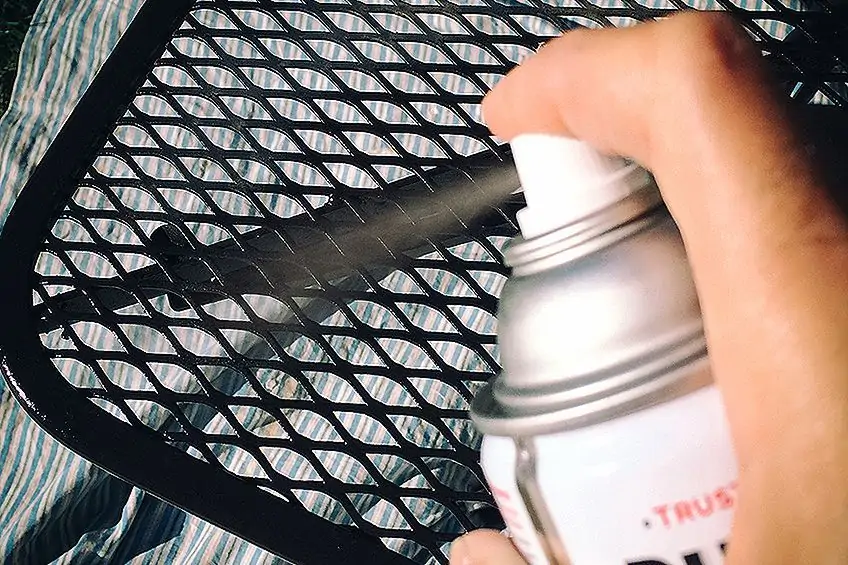
As was the case of the primer, paint is available in spray cans or liquid form that you apply with a bristle or foam brush. And like primer, the primary pressure points include watching out for those drips and ensuring an even spread of paint.
If you are applying your paint with chrome spray paint be sure to apply it evenly in steady left-right or up-down motions. Likewise, use your brush by making horizontal or vertical strokes. It is better to create light coats of paint rather than thicker ones and allow each coat to dry thoroughly before you apply the next layer of paint. Make sure you check all the corners and crevices to ensure there is no sneaky dripping and running.
If you have used tape to prevent paint from getting onto certain areas, score along the edge that is adjacent to the painted surface and peel it off as slowly as you can to stop the tape from lifting paint off with it. The above method is described by Bob Vila, a DIY expert extraordinaire, who has been helping people to improve their homes for decades. He has run a series of TV shows on the topic as well.
If you look online, you will find other approaches to painting chrome. Other sources have additional steps that include rubbing the surface lightly with thinners after sanding.
Painting Over Chrome: Helpful Hints
When buying your paint, you should be aware that it is often the case that the color indicated on the lid or packaging sometimes does not appear the same on the surface on which you are applying it. The best way to avoid being disappointed is to test the color before you buy it, but we know that sometimes this is not possible.
The other option, if you are buying your paint for chrome online, is to read the reviews which will reveal to what extent other people have found that the advertised color is deceiving. Also note that different brands may advertise the same name of paint color (for example, rose gold), but they will not be the same for each brand. Our advice is to stick with the same brand if you are using more than one can of paint.
Inhaling the fine dust particles that emerge during the sanding process can be harmful. Remember to use goggles and a dust mask when sanding to prevent fine particles from getting into your eyes and lungs.
You should also work in an area that is well ventilated, or work outdoors.
Best Paint for Chrome: Our Top Three Recommendations
If you scour the internet or peruse your local hardware store, you will see that many products and brands will work on chrome. We will give you our “top three” to minimize your workload (you already have enough to do if you are thinking of painting chrome!).

Best Overall: RUST-OLEUM High Performance Enamel Spray Paint
Our first and most obvious choice is RUST-OLEUM’s high performance enamel spray paint. This industrial strength outdoor spray paint will not let you down if you are looking for improved durability and color retention. It works on both ferrous and non-ferrous metals where it provides a tough semi-gloss corrosion and abrasion resistant surface. It is available in 15 colors. Having a new-and-improved nozzle design, with this spray paint, you can spray from any angle no matter how long you are spending on it, without fatigue.

- Industrial formula for ferrous and non-ferrous metal and other surfaces
- Protects against corrosion, abrasion, fading, chipping, and dulling
- Dries to the touch in 15 minutes and covers up to 14 sq. ft.
PROS
- Industrial strength commercial grade paint
- Choose from matte, gloss, and semi-gloss finishes
- Suitable for outdoor use
- User-friendly
- Fast-drying
CONS
- Limited color range
- Expensive
- May require multiple coats
- Will remain tacky if recoated too soon
Premium Pick: RUST-OLEUM Painter’s Touch Latex Paint
RUST-OLEUM is a giant in the paint industry. In 2021, this supplier of quality paint has been in existence for 100 years! It is no secret as to why they have become a household name – they have been providing good quality, durable paint for a century. This is why more than one of their products features high up on our wish-list for painting chrome.
Introducing RUST-OLEUM Painter’s Touch Latex Paint. Suitable for use indoors and outdoors, this versatile acrylic paint is one of our favorites. Painting over chrome with Rust-Oleum requires you to prepare your surface thoroughly and apply this gorgeously smooth paint with a brush to achieve a long-lasting, durable finish in no time. Although it can be argued that spray paint creates a more even finish if used properly, we wanted to describe a liquid paint that you can apply with your brush as well, as liquid paints have their share of benefits as well.

- Suitable for a wide range of surfaces, including wood and metal
- Available in matte, semi-gloss, and gloss finishes
- Provides a beautiful and durable finish that is chip-resistant
PROS
- Durable
- Can be effectively applied to several surfaces, including metal and wood
- Suitable for interior and exterior use
- Good coverage
CONS
- Color on packaging can be misleading
- May require more than one coat of paint
Budget-Friendly: KRYLON All-in-One Spray Paint
If you had thought you had seen it all from RUST-OLEUM, think again! The KRYLON All-in-One Spray Paint contains a primer as well as paint, which means less work for you (we still think that a bit of sanding would not go amiss, however). This miracle paint is sold in a variety of interesting colors, such as Popsicle Orange and Pink Blush.
This paint has a super-fast drying time: it is dry enough to touch within 20 minutes and dry enough to handle in an hour after application, as indicated by the manufacturers. Follow instructions carefully when using this product, to derive maximum benefit. It is one of the most popular metal paints sold online, with more than 12000 reviews and an average rating of 4.7 out of a possible 5 stars.

- Delivers superior adhesion, durability, and rust protection
- Suitable for use on interior and exterior surfaces like wood
- The paint does not require sanding or priming before use
PROS
- Good coverage
- Quick-drying
- No surface preparation required
- Suitable for indoor and outdoor use
- Rust-protection
- Wide range of colors and finishes, including gloss, satin, matte, textured, hammered, and metallic
CONS
- Expensive
- Color advertised on the packaging may be misleading
How to Paint Chrome on Your Bumper
It is less a question of how to paint chrome on your bumper and more “is it a good idea to paint chrome on your bumper?”. According to the guys at Throttle Down Kustoms, although it is possible, it is not advisable. We have already established that painting chrome surfaces requires a lot of elbow grease and that chrome can be a temperamental beast if it is exposed to the slightest amount of oxygen through a crack or hole in the paint. Being exposed to the elements on your vehicle adds insult to injury and makes it even less likely that it will endure harsh conditions for very long.
If you nevertheless want to take up the challenge, there are a few steps that you need to follow, as described by the team at Throttle Down Kustoms. It may be a slightly more complicated process than the method described earlier for ordinary chrome items:
- Clean your bumper thoroughly.
- Sandblast the bumper until there is less of a shiny finish. Remember that more shine equals more chrome rust.
- Apply a layer of self-etching primer to your bumper. This primer is essential to maximizing the adhesive properties of the surface, so this step should not be avoided.
- Paint or spray a layer of automotive primer onto the bumper you are working on.
- Once the primers are dry, wet sand the surface.
- Apply the paint to your bumper, following the instructions on the packaging regarding drying time and the number of coats of paint that should be applied.
Painting chrome is not for the faint-hearted, but this does not mean that it should not be done. If you are up for the challenge and want to know how to paint chrome plastic, try your hand at giving your chrome items a facelift, equip yourself with the right tools and paint and follow instructions carefully. You may just be surprised at the results!
View our Can You Paint Chrome web story here.
Frequently Asked Questions
How Do You Paint Over Polished Chrome?
The first thing you need to do when painting chrome, is to clean the surface. Next, you have to sand the surface evenly and thoroughly to get rid of any bubbles and to remove any of the thin, clear rust that may have accumulated since chrome reacts with the oxygen that it is exposed to. If you leave this shiny layer on the item you are wanting to paint, it exposes your paint job to the possibility of peeling sooner rather than later.
Can You Paint Over Chrome Bumpers?
It is possible to paint chrome bumpers, but it is not guaranteed that the paint will stick. Painting your chrome bumper requires a lot of surface preparation before you apply the paint, including cleaning, sanding, and applying primer. As an alternative to painting your chrome bumper, you can buy a steel bumper that you can paint. This may be slightly more expensive, but is a much easier and quicker option as you will not have to do as much surface preparation, not to mention that paint will adhere better to a steel surface.
What Paint Will Stick to Chrome?
A good metal paint, such as a few products manufactured by RUST-OLEUM, should adhere to chrome, provided you do the correct surface preparation before you paint, which involves cleaning the surface, sanding it, and painting it with a good-quality primer. You should be able to buy appropriate paint at your local hardware store, and they are accessible through online stores such as Amazon.
Can You Paint Over Chrome?
It is technically possible to paint chrome, but it is quite difficult. You will need to prepare the surface thoroughly before you paint it, to avoid peeling and cracking, and results cannot be guaranteed. Surface preparation includes sanding the surface, cleaning it, and using a primer underneath the paint you are using.
How Do You Prepare Chrome for Painting?
Because chrome reacts with oxygen to form rust, you will have to, in the first place, clean your surface to remove any dirt and grime. Do this with a damp cloth. You will then have to sand it with rough sandpaper, such as 120-grit sandpaper. Wipe the surface down again, then use 240-grit and finally 320-grit sandpaper to remove any scratches or marks the heavier sandpaper has made. The goal is to produce the smoothest and most even surface possible. Wipe your surface with a damp cloth again. Finally, paint with a primer and allow to dry.