How to Finish Drywall – Guide to Drywall Finishing at Home
This post may contain affiliate links. We may earn a small commission from purchases made through them, at no additional cost to you. You help to support resin-expert.com
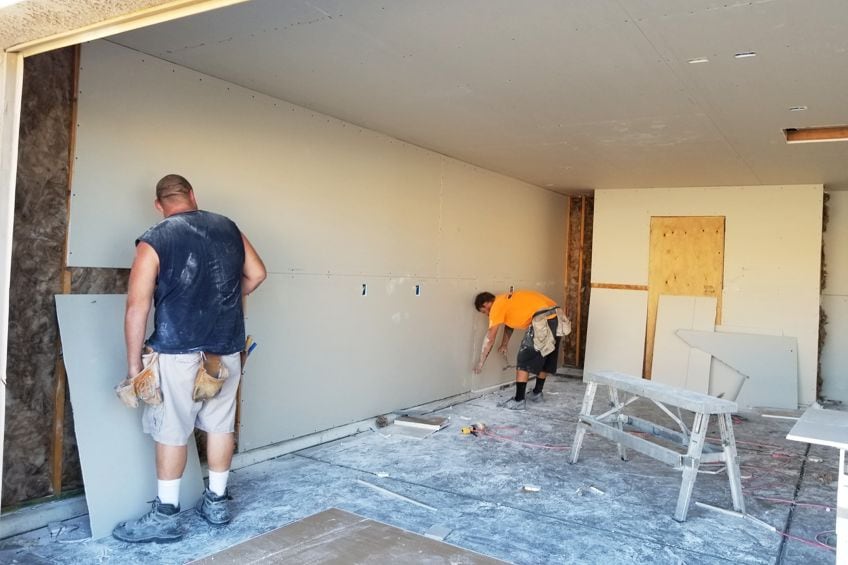
Installing drywall can be a nightmare, especially if you are doing it on your own. This being said, many people choose to hire professionals to install their drywall and might often choose to finish and paint said drywall themselves. If you are one of these individuals or are thinking about finishing your newly installed drywall on your own there are a few things you should look out for when working with this material. Finishing drywall can be a tedious process, and you should know that finishing drywall does not refer to simply completing a paint job. Let’s have a look at what it means to finish drywall including what it means, what you will need, how it is done, and whether it’s worth doing on your own.
Table of Contents
Is Finishing Drywall Doable for Beginners?
Drywall finishing can be a labor-intensive practice especially if this will be your first time, but if you are up to the challenge it is important that you understand what drywall finishing means, the tools you will need, and how much work it entails.
Unlike painting or installing things into drywall there is a right and wrong way to go about this process, therefore below you will find an introduction into what drywall finishing means and what you will need before you get started. This should allow you to gauge for yourself whether you have the skills and/or willpower to complete the process on its own.
What Is Drywall Finishing?
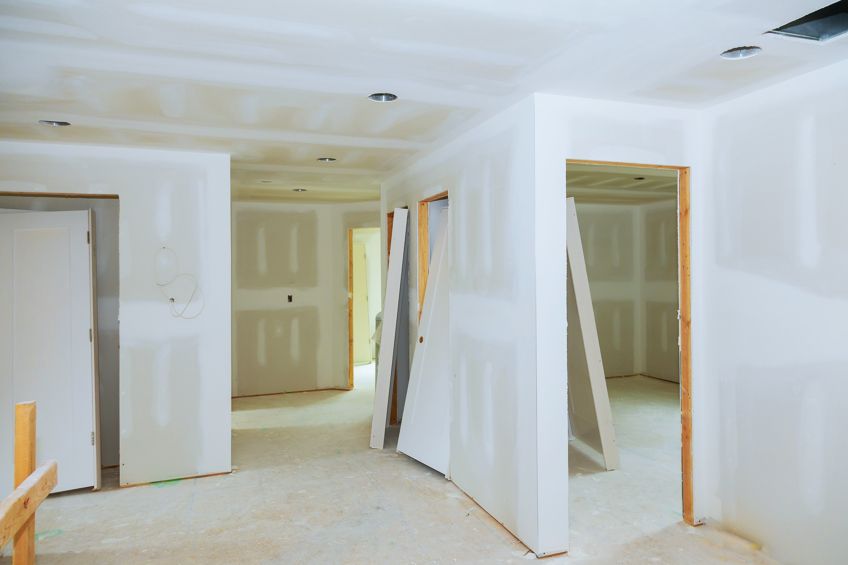
When one installs drywall, you will find that there are seams or gaps where the boards meet up. Since there are flat boards and they do not connect like pieces of a puzzle the total surface of the wall you have constructed is not completely flush. This is not really a problem if you don’t intend to paint the surfaces of the drywall and want to simply leave it exposed, but in most cases, people use drywall in their homes and the look of exposed drywall can be a bit unsightly.
The question is then, how do you paint a surface that inherently does not like being painted?
The answer is to finish your drywall of course! The process of finishing drywall is simply using some fiberglass tape (or paper tape) to cover up the gaps between the drywall sheets, and then using drywall compound to fill in the little screw/nail holes in said boards. It does require some patience and considerable effort, but the finish is worth it, not to mention the insulation benefits and the opportunity to paint your drywall.
What are Drywall Mud and Drywall Mudding?
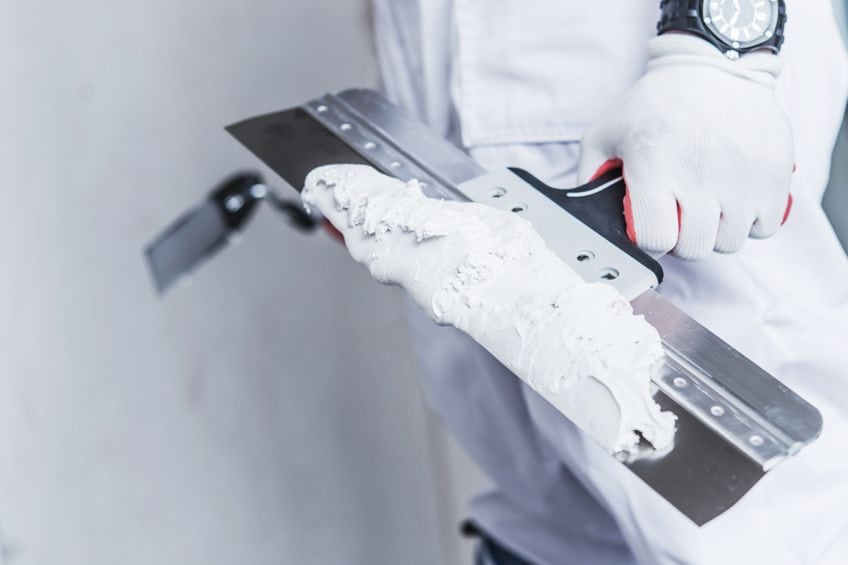
What is drywall mud? Well, drywall mud is not the official name of the substance used to finish your drywall, its official name is joint compound. This compound resembles putty or cement, this is applied to drywall joints and/or corner seams in order to smooth them so they can be painted. There are various types of drywall mud that are used on certain types of drywall or simply exist to provide you with different textures for your drywall before painting begins. Drywall also provides a bit more insulation than just raw drywall, and even though you can go ahead and paint raw drywall your finish will be poor in comparison.
Mudding drywall is the process of applying joint compound to your newly sealed edges. The point of drywall mudding is much the same as the overall process of finishing drywall, to make the surface flush enough for you to paint, this means that you will be able to paint your drywall unimpeded by the gaps that were previously present. In order to do this, you will need a substantial amount of joint compound, essentially a bucket full, in order to complete around four walls.
You should also make use of both hand and mouth protection when you are working with this type of material as inhaling it can cause serious discomfort. Mudding drywall is a long process, therefore the more patience you have when executing the finish, the better your overall paint finish will look once completed.
Why Should You Finish Drywall?
Drywall on its own is a versatile and effective construction material that has allowed millions of Americans to construct and renovate their homes in a simple and cost-effective way.
However, the dry wall’s natural appearance is unrefined; the edges of these boards can be weak, therefore joint compound and tape are applied to these edges to reinforce the edges and give them the rigidity they need.
There are two types of joint compound you will use to finish your drywall, namely the base coat which will be a more robust joint compound to seal up the gaps and screw holes, and then a topping compound which is significantly lighter and will be used to cover the face of the drywall. If you would like to know a little bit more about the variations of the joint compound out there, below is some information you might find useful.
| Type of Joint Compound | Characteristics | Applications |
| “Hot Mud” Joint Compound | ● Sets quickly
● Available in 5, 20, 45, 90-minute dry times ● Changes from grey to white when dry. ● Only paint when the compound is completely white ● Sold in powder and turns into mud when moisture is present |
● Mesh face drywall
● Patching up cracks in existing drywall ● Used as the first coat for drywall corners ● Perfect for time-sensitive projects |
| “Pre-mix” Joint Compound | ● Most commonly used
● Sold in 4.5 gallons and 3.5 tubs/boxes ● Pre-mixed and ready to use ● Consistency differs by moisture content ● Will shrink if mixed too thin |
● Base coatings
● Filling holes ● Final coatings ● Corner finishing ● Filling gaps between boards |
| “All purpose” joint compound | ● Used for a variety of applications
● Increases structural integrity of the tape ● Hard to sand down ● Thick consistency |
● Used for bedding in seams
● Used for base coats ● Used to reinforce the strength of drywall tape ● Can be used for light finishing work |
There are other niche variations of joint compound which are used for finishing purposes such as topping compound. Topping compound is used much less than all-purpose compound because its color is all white, however is often used for texturing purposes. Another variation is a lightweight joint compound which is, as the name suggests, lighter in weight than an all-purpose or pre-mixed joint compound. Many in the industry suspect that this is because less bonding agent is used in the formula, but this is up for debate, it is typically used for first and second coatings and the seam of corner beads.
Types of Drywall Tape
Drywall tape might seem like a mundane tool, straightforward even, but if you look a bit deeper you might find that there are intricacies behind these tapes that could benefit you in the long run. Here are a few of the more commonly used tapes, their characteristics as well as their applications.
Paper Tape
Paper tape is a great option for finishing drywall and can be used for butt joints, corner seams, and main joints.
- Inexpensive
- Has a middle seam
- Easy to work with
- Must be wet before use
- Versatile
- Good value for money
Fiberglass Tape
Fiberglass tape is another great option for finishing drywall installations. It is perfect for use on butt joints and is particularly great for time-sensitive installations and instances where strong tape is needed.
- Thin
- Reduces bulges
- No thread
- Sticks on its own
- Easy to work with
- Can be expensive but worth it
Fiberglass Mesh Tape
Fiberglass mesh tape is a great option for a range of different seams, including straight, tapered, and load-bearing seams.
- Strong
- Woven with mesh for extra strength
- Very thick
- Sticks independently
- Great for beginners
- Rigid and sharp
Metal Tape
While other types of tape have a range of applications, metal tape is exclusively made for use on corners.
- Made from paper
- Contains metal strips inside
- Has a middle seam
- Very strong and durable
- Expensive but good value for money
Fire Resistant Tape
Just as the metal tape is designed exclusively for use on corners, so is fire-resistant tape designed for areas that are high fire risks.
- Expensive but worth it
- Strong and durable
- Made from paper
- Great at resisting fire
There are other specialty drywall tapes such as mold-resistant and perforated tapes which are good for their intended purposes. There are also drywall tapes of varying lengths and widths which work extremely well in unconventional applications. There are even tools that can help with mudding and taping drywall, so the next time you are looking around your local hardware store be sure to peruse all of your options before walking past something that could save you some time and money later.
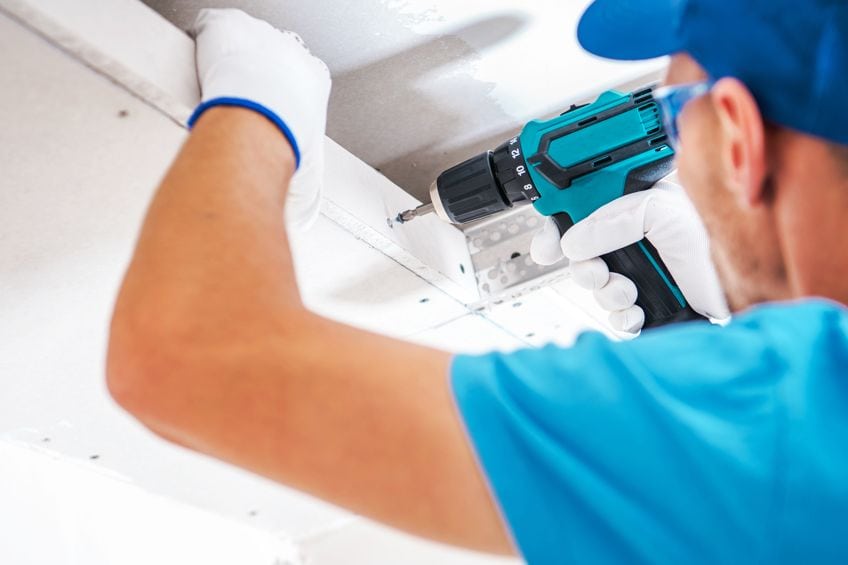
How to Finish Drywall
Okay, now that you know what is available to you it is time for you to learn how to finish drywall. On the off chance you missed something, here are a few of the things you might need during the course of your project. Remember that there is a good chance you will be getting your hands/gloves dirty so the last thing you want is to be looking around for your equipment. Ensure that everything you need is close by and easy to grab when needed.
Tools for The Job
Here are some of the tools you might need for the job. Remember, if you are doing an entire room to buy in bulk and go for decent quality products. Nothing is worse than having to do the same job twice, especially one on this scale.
- Drywall sandpaper (preferably 120 grit)
- Drywall sanding sponge (preferably 120 grit)
- Some Drywall tape (the choice is yours)
- Lightweight joint compound
- Topping joint compound
Prepare Your Surface
Just like you would when painting or priming a surface, you should consider ensuring your surface is ready for taping, and more importantly to receive the joint compound. Once you are sure that your surface is clean make sure that there are no exposed screw/nail heads on the surface. These should be countersunk below the surface of the wall, just slightly off the surface so as to not interfere when you are mudding and taping drywall.
You can check your surface by running a knife flat over these areas, and if you feel no resistance your last action should be to check for tears or loose drywall before moving on to the next step.
Appling Your First Coat
You are officially starting to finish your drywall. Some steps do overlap with one another so it is not as much of a clear-cut process compared to, let’s say, painting a wall. You will need your lightweight joint compound and your drywall tape for this step, start by applying a relatively light amount of joint compound to the edges of the joint and the recess you will be filling.
Once it has been applied simply take your drywall tape and stick it over the recess allowing it to partially fill the joint. Once the tape has been applied, take your mud, and lather another layer over the length of the tape, slightly exceeding the borders of the edge of the tape. At this stage, you should still be able to see the drywall tape underneath your freshly applied joint compound. Run your applicator over the center of the tape and don’t worry if some mud comes out either end, this actually means that you are doing a good job! Apply another thin layer of mud compound over the tape before you move on to the next step.
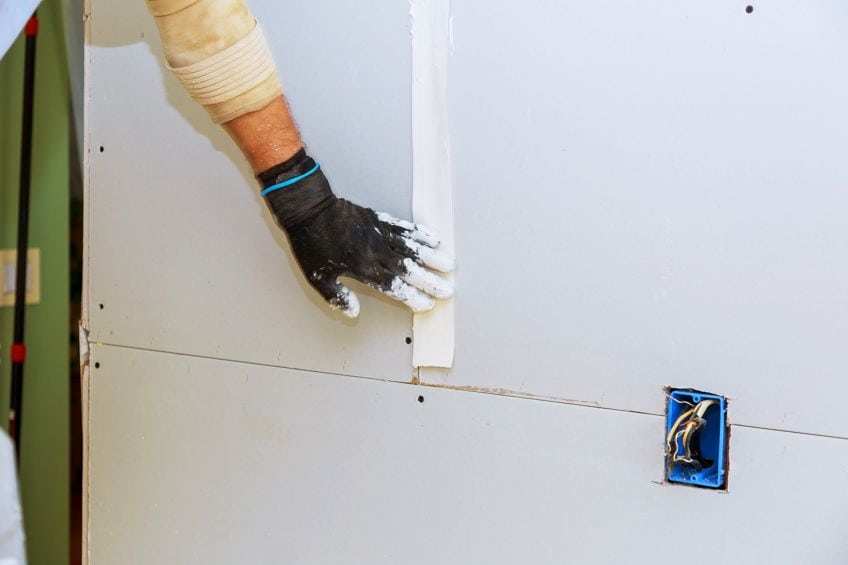
Filling Your Corners
This might seem a bit tricky at first glance and it might be a slight learning curve, but we have faith in you (if this is your first time of course). If you are using some paper drywall tape apply a light layer of the joint compound where the two walls meet. Once your compound has been applied you can go ahead and apply your tape. This step will differ depending on what type of tape you are using, but generally speaking, most paper tapes do come ready to use with a middle seam.
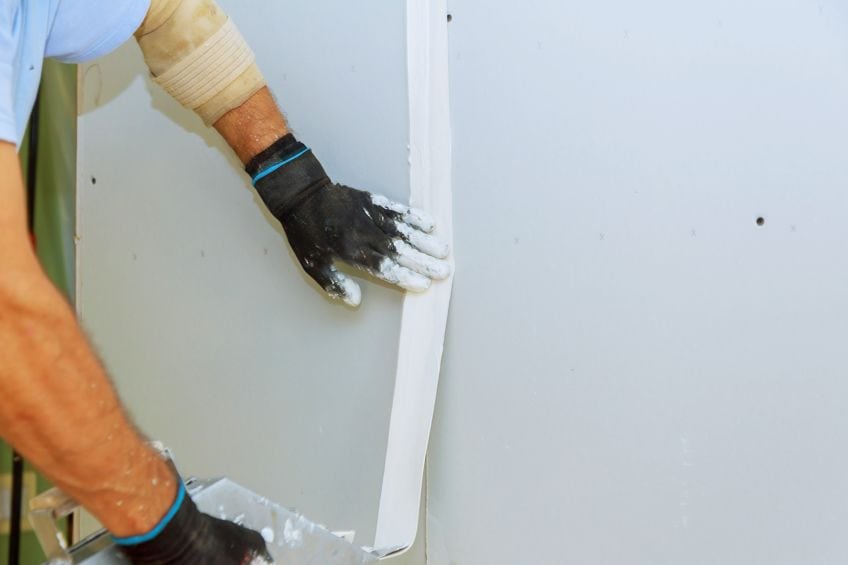
You should wet paper tape (other tapes are self-adhering and do not require this) and apply it either incrementally or in sections to the corner of your walls, using the middle seam to assist you in adhering it to both walls. Use an applicator or blade to ensure that your tape has properly adhered to and that there are no bubbles underneath it. Once again if some mud/joint compound seeps out underneath the said tape don’t be surprised, next apply another layer of joint compound on the tape you have applied and smooth it over with your applicator or a knife that won’t cause any damage to your handy work.
If you have a corner bead available it will make your life considerably easier, not to mention the fact that it will save you some time ensuring your corner work is just right.
Finishing Off Your Edges
This step is pretty straightforward and won’t require much skill on your part. Once you have completely filled the main vertical, horizontal, and corner joints you can move on to the edges of your drywall. If you have beading already installed, tap it up before you get going. Take your applicator and apply a decent amount of joint compound and apply it to the edges of your drywall.
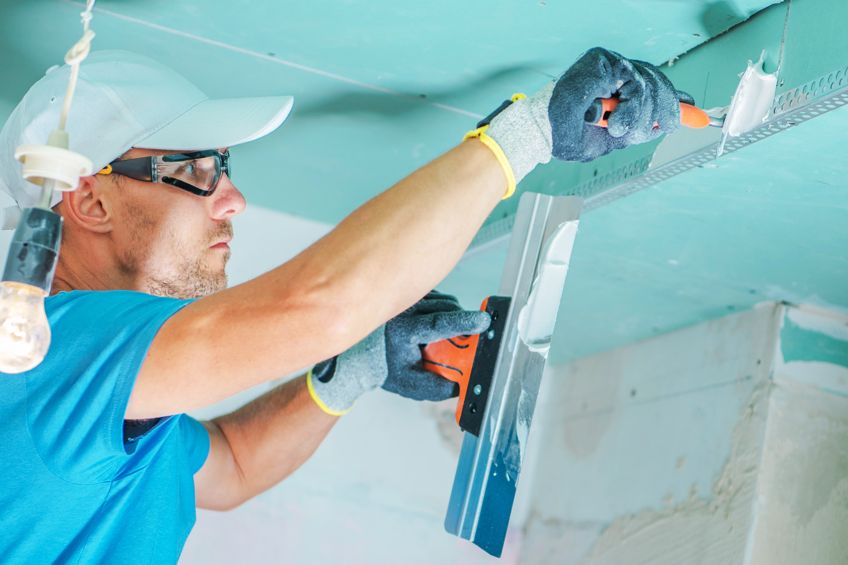
Once you have made them nice and smooth ensure that you remember to pop some joint compound into those recesses housing the nails/screws of the drywall and smooth them out as well. Once you have this sorted, you should allow time for the newly applied compound and tape to dry. You can give it a few hours or wait until the next day to move onto the next step.
Applying Your Filler Coat
Time for the hard work to begin. This will be the step where you will apply the majority of your joint compound to the surface of the drywall panel. Sand down the now dry joint compound you applied previously and ensure that it is as flush as possible before continuing. Get your large applicator/drywall knife and start applying the bulk of your joint compound to the joints of the drywall.
This application should be more generous than your previous one, and you will notice that the areas where you applied tape and mud precisely will not be virtually flush with the surface of the drywall you are working with.
Once you have don’t this with all of the areas you have previously applied mud and tape to give it some time to dry before giving said areas another once over with your 120-grit sanding paper. Ensure that there are no bumps or uneven surfaces once you are done and be sure to wear a mask when sanding down joint compounds as it can cause serious discomfort if inhaled.
Appling Your Surface Coat
When finishing sheetrock this is the longest step, although you don’t have to worry about precision as much as you did in the previous steps. Get your hands on your largest drywall knife/applicator and all of your joint compound and start covering the surface of your drywall board. Out of all the drywall mudding tips and tricks out there, the best one to know when finishing the surface of your drywall is to water down some of the joint compounds you will be using. This will allow you to apply and spread the compound a lot easier than if you were to apply it as is.
Make sure that you apply your compound evenly and that you create an even surface, remember that the more evenly you apply the compound with your knife the less work you will have to do when you are sanding it down in the next step. You might notice that this is a trend when finishing drywall, so keep in mind that whichever part of the process you decide to save a few minutes on in an earlier step, you will eventually have to pay back that time down the line.
If we were to rank drywall mudding tips and tricks, this would undoubtedly be number one, so remember to be patient and get it right the first time. Allow time for the joint compound to dry before moving on to the next step.
Finishing the Overall Surface
This step can prove to be therapeutic and will require you to feel out when exactly you are done. Get out your sanding sponge and attach it to its extension and get going. As mentioned previously, feel has a big part to play at this stage of finishing sheetrock, so be careful not to go so deep that you hit the tape. It is not the end of the world if you do though, this is when you have that topping compound close by to patch up any mishaps.
Also ensure that you are working in a well-ventilated area when sanding down drywall compounds in these volumes, and don’t forget to wear a face mask regardless of ventilation. Ensure that your drywall is completely dry before taking this step as it will ruin your finish and your sanding sponge if it is not.
Now that you know what the different kinds of joint compounds are, the different types of drywall tape available, and how to successfully get your drywall finished it’s time for you to go out and test your new skills! Remember to always work in a well-ventilated area, always ensure that you are wearing a mask when sanding drywall, and protect your hands with a decent set of gloves, especially when working with certain drywall tapes.
Frequently Asked Questions
How to Finish Drywall Ceilings?
If you are wondering how to finish drywall ceilings the process is pretty simple. It’s the same as finishing ordinary drywall, ensure that your surfaces are clean, apply your mud and drywall tape, tape over them, and allow time for the compound to dry. Once the compound has dried apply your surface coating, allow time for it to dry, and sand to your satisfaction before painting.
What Are Good Mudding Drywall Techniques?
There are many drywall techniques, particularly drywall mudding tips that will put you ahead of the curve when you are having your first go at it. One of the most common drywall mudding tips is to not let any tape bubbles escape your eyes while you are applying joint compound and to ensure that you always have the correct joint compound for the type of wall you are trying to finish. Ensuring you have the right tools for the job is often more important than the actual drywall techniques, but the before mentioned will help considerably your first time around.
Is Finishing Drywall Hard?
Finishing drywall might sound like a complicated process but in reality, it is actually quite simple and just requires some elbow grease. Once you have the right tools for the job, the execution is entirely dependent on your skill level and willingness to be patient throughout the entire process. Having to go back and fix something you rushed will cost you time and possibly some money if you are in a rush.