How to Apply Polyurethane – Get the Perfect Polyurethane Finish
This post may contain affiliate links. We may earn a small commission from purchases made through them, at no additional cost to you. You help to support resin-expert.com
When you use a stain on your wood surface, it not only adds color but also brings out the beauty of the wood grain. When you apply a polyurethane wood finish, it forms a shield and protects the wood from chemicals, scratches, spills, and daily wear and tear. So, whether you want to paint stain your wood first or leave it in its natural state, you still need to consider using polyurethane to protect your wood surface. In this article, we will be going through the process of how to apply polyurethane in greater detail.
Table of Contents
Selecting Your Polyurethane Finish
A polyurethane varnish is regarded as one of the most durable protective wood finishes on the market, as well as one of the easiest to use. Once you have applied the polyurethane wood finish, you will have a surface that is a lot more resistant to solvents, water, scratches, impacts, and daily wear and tear than any of the ordinary varnishes you can buy.
However, before you go out and buy your polyurethane, you first need to establish the purpose and use of a particular project. This will help you to purchase the correct type of polyurethane varnish for your particular project requirements. Will your project experience heavy daily use that needs extra protection, like a tabletop, or does it need less protection because you only use the surface occasionally?
If your project is subject to high humidity and strong sunlight like bathroom cupboards, outdoor furniture, windows, kitchen countertops, or doors, then you will need to protect the wood surface from moisture as well as the sun’s UV rays.
Type of Polyurethane
You can purchase polyurethane in water- and oil-based formulations. The method of application and performance of the two products are very similar. However, oil-based polyurethane brings out the color and depth of the finish far better than water-based polyurethane, although the smooth finish is the same for both products.
The decision to use water- or oil-based polyurethane largely depends on the type of project you are busy with, or simply your personal preference.
Oil-based polyurethanes appear to be a lot easier to apply; they are much thicker due to their containing more solids, so they will only need two or three coats, whereas a water-based polyurethane requires three or four coats. Oil-based polyurethane does take a lot longer to dry, however, which could result in dust or bugs sticking to the finish before it has a chance to dry properly. The slow drying time also means that oil-based polyurethane requires a longer waiting time in-between coats. You will also require mineral spirits to clean it as a result of its oil base.
Water-based polyurethane, on the other hand, dries much more quickly than its oil-based counterpart. It is also more self-leveling and emits far less of an odor. However, water-based polyurethane tends to raise the wood grain. It can cause a problem when applying it over certain wood stains, and this type of polyurethane is also prone to watermarks. That having been said, water-based polyurethane is significantly easier to clean, as it only requires soap and water.
Depending on where you are going to apply your paint, such as on outdoor furniture, the type of polyurethane you use is very important. An oil-based polyurethane is ideal for outdoor surfaces as it can withstand the elements and can also be used indoors, whereas a water-based polyurethane is best used indoors, as it does not have the same properties as oil-based polyurethane for outdoor use.
Polyurethane Color and Sheen
Oil-based polyurethane gives your wood a warm amber glow, especially when applied to lighter woods such as birch, white oak, or maple. Water-based polyurethane, on the other hand, is more neutral in color and appears milky white when applied, although it does go clear once it dries. Polyurethane comes in either a satin, semi-gloss, or gloss sheen, and you need to decide which will suit your project best. Remember that whatever sheen you choose, the durability will remain the same. Do keep in mind, however, that the glossier the sheen, the more all the imperfections will show through.

How to Apply Polyurethane
The main purpose of applying polyurethane to your wooden surface is to protect it from wear and tear as well as any other damage it may encounter. Whether you use a water- or oil-based polyurethane is up to you, as they all come in a variety of sheens from matte to gloss. You will also need to decide whether you need to brush, spray, or wipe it on. We will now take you through the process of applying polyurethane so as to guarantee a beautiful finish.
Tools and Materials Needed
When you are going to apply polyurethane, it is a good idea to have all the necessary tools and equipment ready before you begin. To simplify things, here is a basic list for you.
- 120-, 180-, 220-, and 320-grit sandpaper for brand new projects, as well as 80-grit sandpaper for refinishing jobs
- A sanding block or orbital sander
- Oil- or water-based polyurethane
- A good-quality brush: Use a natural bristle brush for oil-based polyurethane, and use a nylon bristle brush for water-based polyurethane
- A tack cloth or clean, dry lint-free rags
- Mineral spirits for thinning your oil-based polyurethane, or distilled water for water-based polyurethane
- Automotive rubbing compound
- Automotive polishing compound
- Vacuum cleaner
Prepare the Work Area
You need to make your workspace as clean as possible, ensuring that it is completely free from dust. This should be done the day before you start or at least a couple of hours before applying your polyurethane. To remove any dust, it is always advisable to use a vacuum cleaner, a mop, or a (clean) wet cloth to clean any working surface, as you do not want any dust to settle onto your wet polyurethane.
The next thing you need to do is to ensure you have sufficient lighting. As your polyurethane is clear, you will only be able to see imperfections on your wet finish from the reflection of the lights. This is important, so set up some additional lighting if necessary.
The next step is very important: You need to ensure that you ventilate your workspace properly, as your polyurethane will emit some toxic fumes that could be dangerous to your health. This means that you need to open a window or two to create a cross-breeze, which should get rid of most of the fumes. Some people make use of a fan, but this is not always a good idea as it may cause the dust to settle on your wet polyurethane.
The best solution is to install an exhaust fan that can take the fumes away from your workspace. Even if you have a suitably ventilated area, make sure that you wear a respirator with an organic cartridge to protect yourself from the fumes.
Lastly, make sure that you use a tarp or some plastic sheeting to place underneath your workpiece and all around, as this will make it that much easier to clean up afterward. Now, clear away any other objects that you do not want to coat, just in case you make a bigger mess than you first anticipated.
Prepare the Wood Surface
If you are doing a refurbishing job, you first need to remove any old coatings like lacquer, wax, shellac, paint, or varnish. You may want to take this operation outside where there is better air circulation so that dust does not land all over the place.
Next, it is time to sand down your workpiece, making sure it is smooth and clean, as the clear polyurethane will show any imperfections on your wood surface. You need to get your surface smooth and level, and for this, you need to use coarser sandpaper of 80- or 100-grit. From this point, you can use finer sandpaper, for example, 120-grit and then 180-grit, and finally finish it with 220-grit. This should leave you with a smooth and even finish.
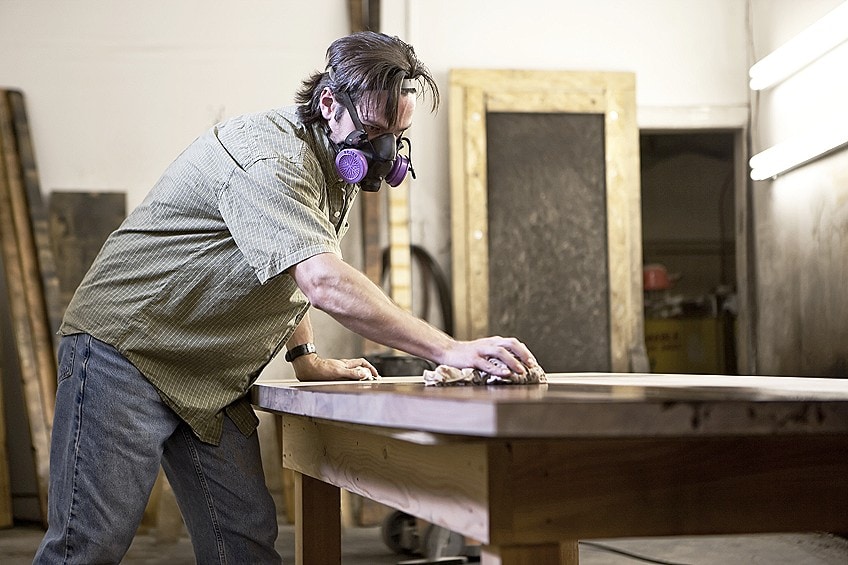
During this process, make sure that your windows are open and your extractor fan is working. Also, you should be wearing your respirator, as you do not want to inhale too much of the fine dust. Now use the vacuum cleaner to remove most of the dust. Take a lint-free cloth and soak it in mineral spirits for oil-based polyurethane, or take a cheesecloth soaked in denatured alcohol for water-based polyurethane, and use the cloth to wipe all the remaining dust off of your wood surface.
The Best Method to Apply Polyurethane
This question is very important as it will affect the finish of your project. There are three different ways in which you can apply polyurethane. Sometimes you do not even have to choose what method to use, and you can make use of all three techniques together when applying polyurethane. The three basic methods are:
- Brush-on method
- Wipe-on method
- Spray-on method
The method of application is important as it will complete the final look of your workpiece, depending on what project you are busy with. Some work surfaces are flat, which is best for the brush-on method; some are contoured, which is better for the wipe-on method; and some have very difficult and hard-to-reach spaces, which can be covered by using the spray-on method. Everything needs to be coated to protect your wood properly to make your project perfect and complete.
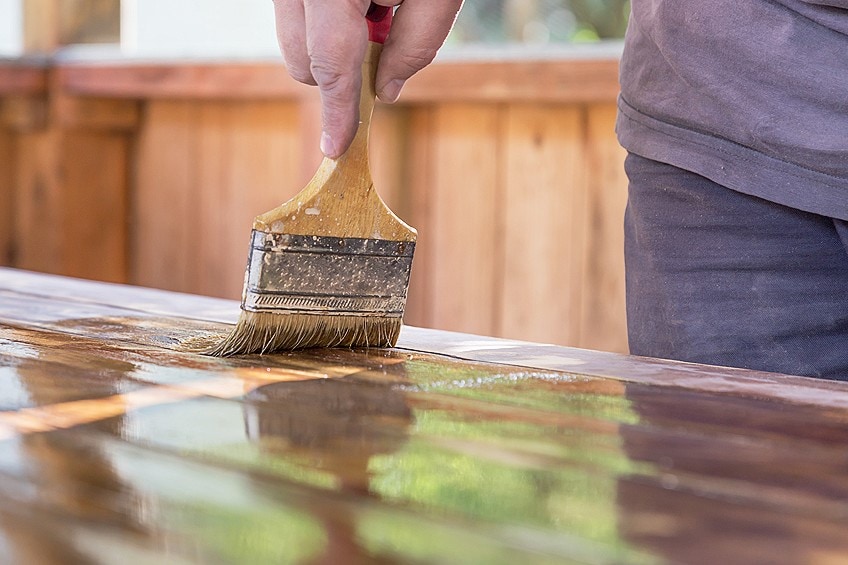
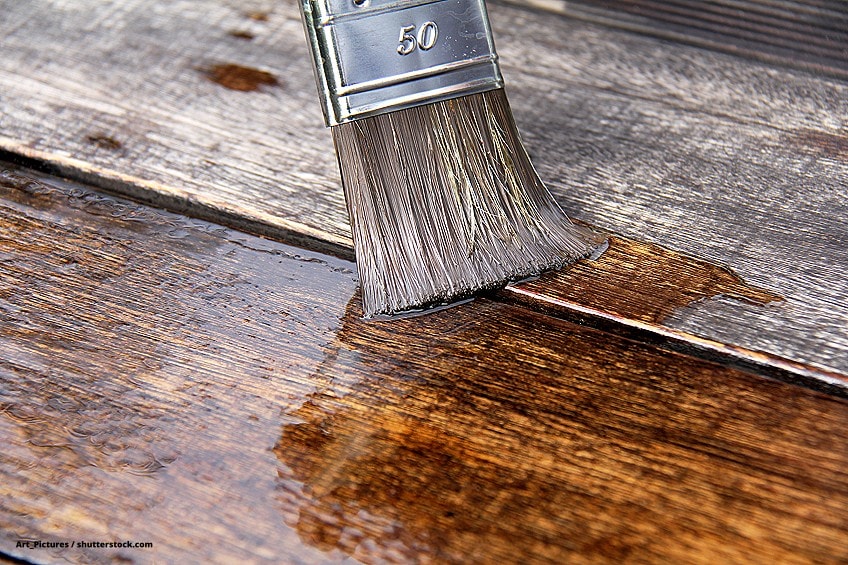
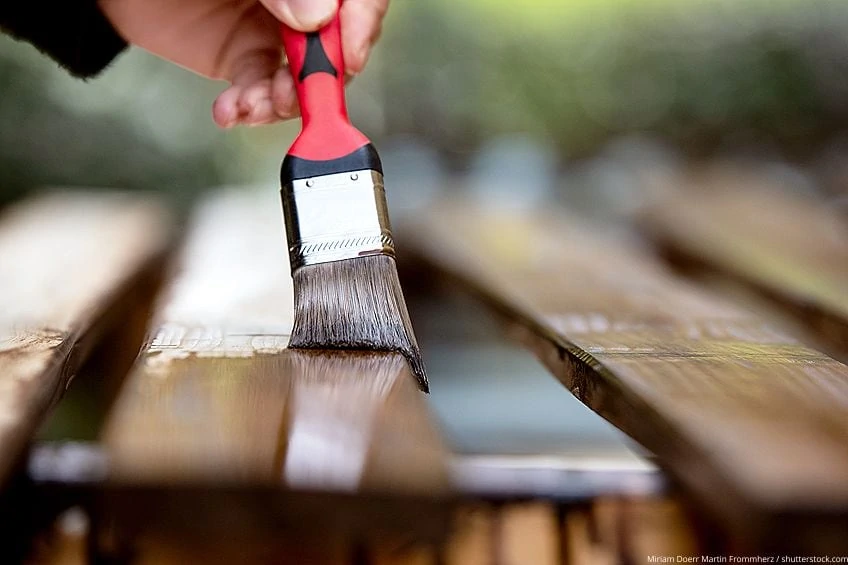
Brush-On Technique
This technique is used mainly for large and flat surfaces that need to be covered evenly with the correct coat thickness. You can use fewer coats with this technique as a brush gives you thicker application. Make sure that you apply using natural-bristled brushes for oil-based polyurethane and a nylon bristle brush for water-based polyurethane.
- Immerse the brush about one-inch deep into the polyurethane to load it.
- Now, brush in the direction of the grain using even, long strokes.
- After completing each stroke, run the brush over the same area, removing any drips.
- Be sure to overlap half of the beginning of each previous stroke to prevent gaps from forming.
- After completing each coat, check to see if there are any drips you missed and remove them.
Wipe-On Technique
If you have any contoured surfaces, you need to use this technique, as it provides thinner coats and allows you to cover these areas better than brushing. You therefore need to double up on the amounts of coats when using this technique in order to give your workpiece an even finish. Try to avoid any paint drips, as they may be difficult to remove on these spots.
- Take a clean cloth and fold it into a square about the size of the palm of your hand.
- Dip the edge of your cloth into the polyurethane.
- Wipe it onto the wood surface using even strokes and apply in the direction of the grain.
- Try to overlap the previous wipe each time you wipe on the polyurethane to avoid gaps.
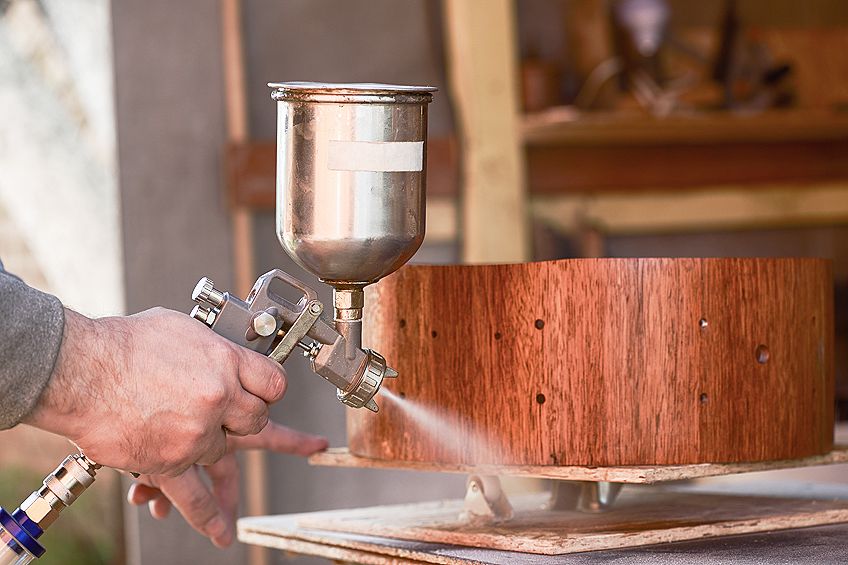
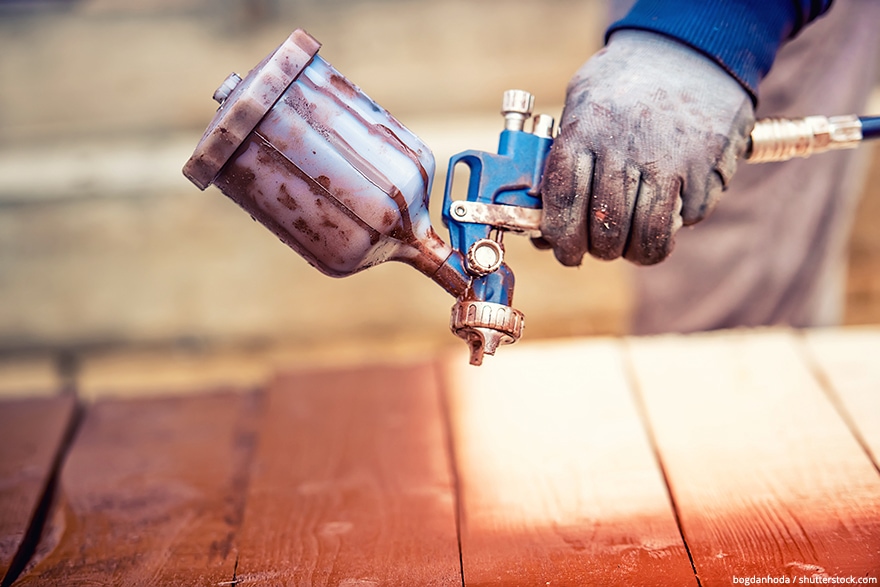
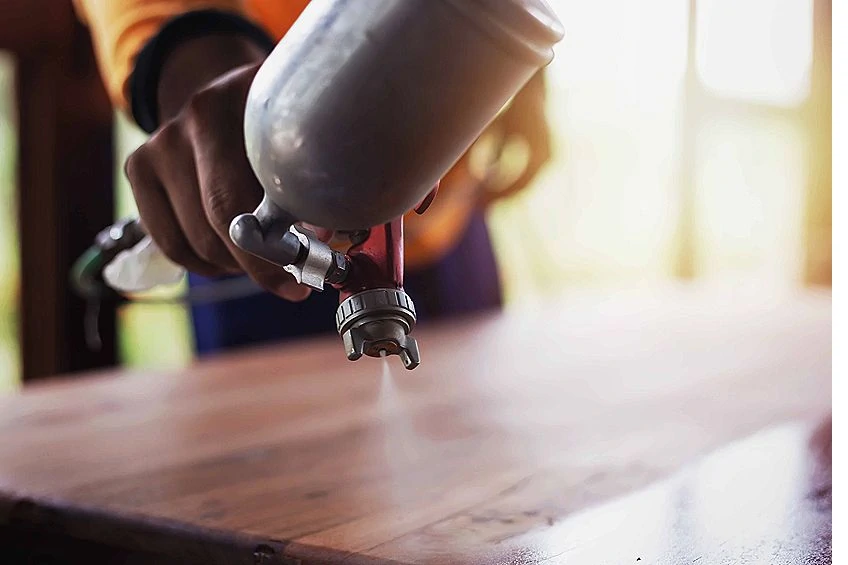
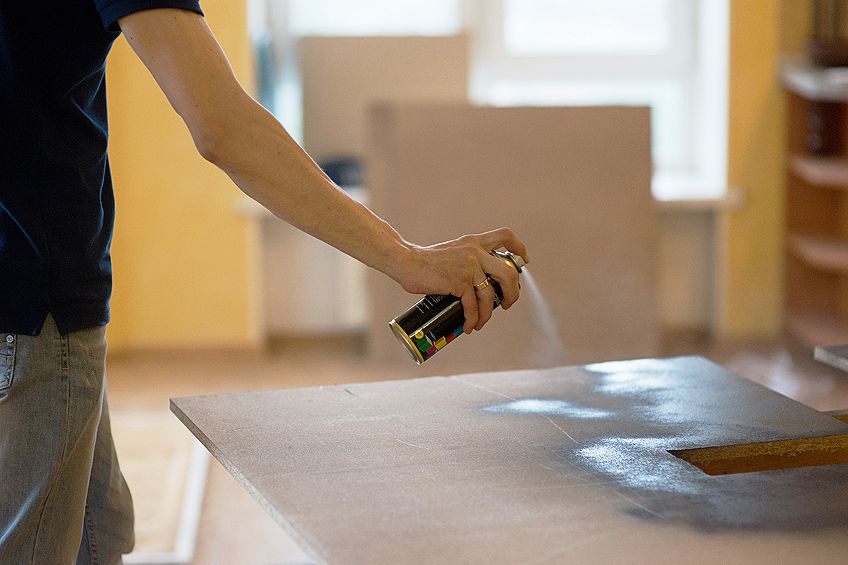
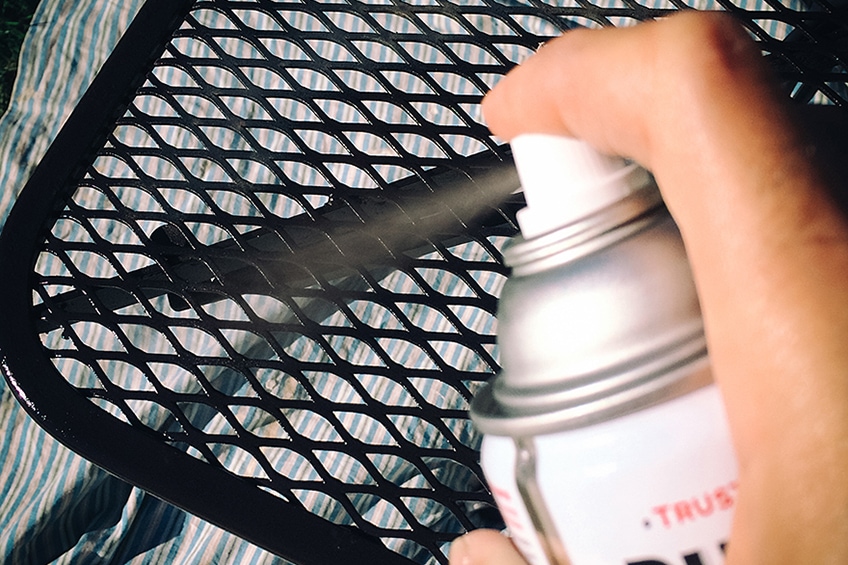
Spray-On Technique
For this technique, you need a polyurethane aerosol spray to be able to coat any of those difficult-to-reach areas that you cannot paint with a brush or a cloth. Try to spray in short bursts in order to avoid any paint drips forming, as these will be very difficult to repair afterward. Also, make sure that you protect any surrounding area that you do not want to coat.
- This technique creates very thin coats, so you may have to apply more coats in order to achieve an even polyurethane finish.
- This technique may require some practice to improve your skill.
Tips on How to Apply Polyurethane
- Once you have opened the tin and before you start, you need to stir the paint to mix all the components evenly together, as they may have settled on the bottom of the tin. Remember to stir the paint and not shake the tin, as this could create bubbles, which will leave an uneven finish.
- The sealing coat can be thinned using minerals spirits before applying, but it is not a necessity. Always be sure to read the manufacturer’s instructions on the label. The mixture should be made up of one part mineral spirits to two parts of polyurethane. However, thinning the paint will help to improve the flow and make it easier for it to get into any nooks or crannies, thus avoiding paint build-up.
- Allow the sealing coat to dry before you continue. Now, you can sand the wood surface again using 220-grit sandpaper. This is to help avoid any scratches on the surface that will show up on the finished product.
The process of sanding after each coat must be adhered to throughout the entire process of application. Ensure that all the runs, drips, and bubbles that have formed are removed, including any visible brushstrokes.
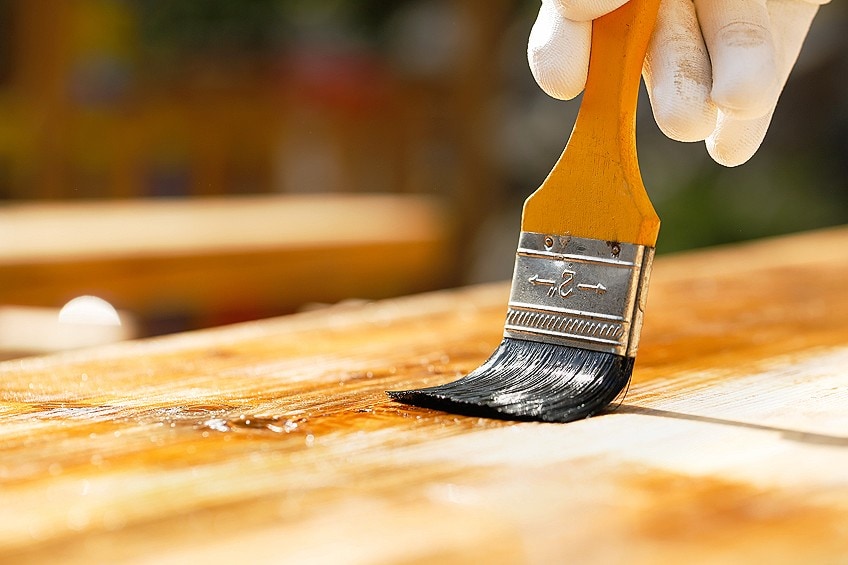
How to Apply Oil-Based Polyurethane
Take a fine, natural-bristled brush and paint on the first coat. Stay away from the cheap bristle brushes, as they tend to leave brush marks. When working on a flat, smooth surface, you can also try a foam brush as they are reasonably priced and leave no brush marks.
While applying the polyurethane, use even, long, and straight brush strokes to avoid creating any bubbles. Always apply parallel to the wood grain. Avoid overloading the brush with paint as you need each layer to be thin. After you have finished the first layer, go over it again, but this time without dipping the brush into the paint. Remove any drips or runs and allow it to dry, which should take around 24 hours.
Once the first coat has dried properly – after around 24 to 48 hours – it needs to be sanded again using 320- or 400-grit sandpaper. The surface should be easy to sand, so be careful not to sand away too much of the thin coat and damage the sealing coat underneath. Use a vacuum cleaner and tack cloth to remove any dust before you continue to the next coat.
You are now ready to apply the second coat. Follow the same process as above, ensuring that you sand each coat after it has dried. You can follow this process for at least three coats until you are satisfied that you have a smooth and clear polyurethane finish.
How to Apply Water-Based Polyurethane
If you are refurbishing a piece of furniture, you need to establish what type of finish it has, as water-based polyurethanes will not work well if applied to an oil-based stain. You first need to take some steel wool and make the surface rough, which will allow the water-based polyurethane to bond properly onto the wood surface.
If you fail to take this step, you may end up with a finished surface that looks the same as when water forms on a car that has been freshly waxed.
The same principles and techniques that you followed when applying the oil-based polyurethane can also be applied with the water-based polyurethane. Try to apply thin coats each time and work in the direction of the grain to avoid raising the wood grain.
Unlike oil-based polyurethane, water-based polyurethane will be dry within just a few hours, after which time you can start applying more coats. If you follow this process, it may not be necessary to sand between each coat, but you need to read the manufacturer’s instructions carefully to make sure. With water-based polyurethane, you need to apply at least three coats, and at least four coats for wooden floors to achieve the necessary protection for your wood.
Polishing the Finished Surface
If you have wet sanded the second coat, you can then polish the surface once it has dried properly, after around 48 hours. Apply some automotive rubbing compound to your wood surface. Then, take a clean cloth that has been soaked in some water and begin to rub the compound into the surface using circular movements. This method will remove any fine scratches that have been left by the sandpaper.
After you have finished the rubbing process, you may notice that the surface is a little cloudy. Simply repeat the rubbing process until it is clear. After you have finished rubbing the surface using a clean, dry cloth, you can buff the surface, which will give you a beautiful, shiny finish. If you are still not happy with the finish, then use some automotive polishing compound to give you an amazing glass-like finish.
There is one final process you can use if you are still not entirely happy with the job – this is known as power buffing using a buffing machine.
How to Apply Polyurethane to Wood Floors
A coating of polyurethane on your wooden flooring will protect it from those day-to-day spills and scratches, as well as bring out the wood’s beautiful grain. Applying polyurethane to your floor can be slightly tricky and a little different when compared to other wood surfaces as above. However, we will help you through the process of the best way to apply polyurethane to wood floors to give you that awesome finish. When using polyurethane, you have two varieties and several sheens available.
Water-Based or Oil-Based Polyurethane?
You need to make a clear decision on what polyurethane to use, although both of them will protect your wooden floor. However, there are a few differences with both of these polyurethane finishes, and you need to consider them before you go out and buy one. This is to make sure that you have the best way to apply polyurethane. Below is a basic table showing some of the differences that you need to take into account.
| Water-Based | Oil-Based | |
| Effect on Wood | Clear and will not alter the color of the wood | Enhances the color of the wood and gives it a soft glow |
| Viscosity | Fairly thin, requires more coats | Much thicker, requires fewer coats |
| Drying Time | Dry within 8 to 10 hours | Dry within 24 to 48 hours |
| VOC Level | Will not emit strong fumes | Emits strong fumes – need to wear protective equipment |
| Cost | Expensive | Much cheaper |
| Durability | Less durable – lasts for 2 years | Very durable – lasts for 10 years |
Tools and Equipment Needed
- Sandpaper (36-, 60-, 120-, and 220-grit)
- Orbital sander
- Good-quality brushes (synthetic brushes for oil-based and natural brushes for water-based polyurethane)
- Vacuum cleaner
- Respirator
- Safety gloves
- Mineral spirits
- Masking tape
Preparation Time
Start by vacuuming the surface of the floor, making sure that you get into all the corners. Now you can start to sand, but be careful not to sand for too long as you may score the wood. Check to see if there are any splinters or dents in the wood surface, and use the vacuum cleaner to remove all the dust. Then, using a clean lint-free cloth soaked in mineral spirits, you can wipe the floor clean.
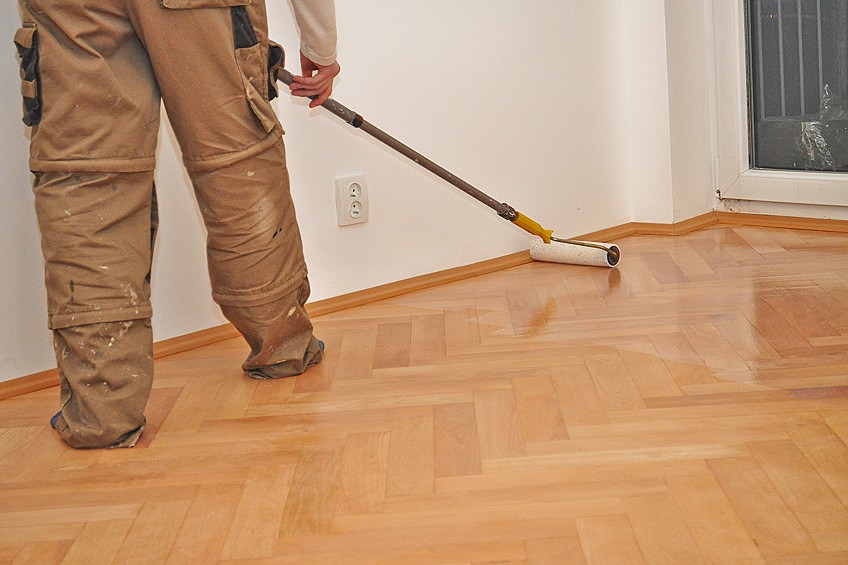
Applying the Polyurethane
Start by stirring the polyurethane, being careful that you do not create any air bubbles. Load your brush or your applicator with polyurethane. Start in a corner and work in the direction of the grain, about one foot at a time, using long strokes and overlapping as you go to provide an even coat.
Using your sandpaper, sand down the surface, making sure that you remove any drips, runs, or blemishes. Allow the first coat to dry completely before you apply the second coat, and be sure that you read the manufacturer’s instructions regarding the drying time and recommended number of coats.
Can You Apply Polyurethane to All Surfaces?
Polyurethane is a preferred product for wooden surfaces, as it brings out the beauty of the wood while giving your wood a protective coating against day-to-day wear and tear. However, polyurethane can be applied to many other types of surfaces. Any surface that you want to apply polyurethane to first needs to be prepared. This means it must be dry, clean, and free from dust, grease, or wax.
Metal Surfaces
Polyurethane is a common type of sealant for metal and can be applied to steel, copper, stainless steel, aluminum, and galvanized steel. However, you will have to apply a primer beforehand as the polyurethane is not able to adhere to the bare metal surface.
Plastic Surfaces
Modern cars contain a lot of plastic parts, which need to be protected and sealed, thus giving them a glossy finish. Plastic is very much the same as metal and needs to have an adhesion promoter, much like a primer, applied before you can apply your polyurethane coating.
Concrete or Cement Surfaces
Polyurethane is much thicker than an acrylic sealer and forms a protective, high-build finish on your concrete surface. A coat will give you excellent resistance to chemicals as well as abrasions. You can safely use polyurethane for interior or exterior concrete surfaces, and it will give you a very durable and non-yellowing finish that can last for more than 10 years.
Safety Precautions When Using Polyurethane
Polyurethane is a great product to use for the protection of your wood surfaces, but you need to be careful when using it as it can be dangerous to your health. There are a few precautions that we are going to share with you. We highly recommended that you adhere to them for the well-being of yourself, your children, and your pets.
- Polyurethane can be flammable, so be sure that nobody is smoking in the vicinity and that there are no fires or flames nearby.
- Both water- and oil-based polyurethanes emit certain fumes that could be toxic and cause you bodily harm. Wear a respirator or at least a face mask to protect your throat and lungs.
- Wear safety goggles to avoid irritation to your eyes, as small droplets tend to fly around during application.
- Wear some protective clothing to protect your body from spills, as well as protective gloves to protect your hands and skin.
- Ensure that you have sufficient ventilation by opening windows to allow a draft, and, if possible, use an extractor fan to carry the fumes away from your work area.
- Ensure that you clean up properly afterwards, as leaving tins open, spills on the floor, or contaminated rags lying around could all pose a fire risk.
- When storing your polyurethane, ensure the tins are properly sealed and stored in a cool place.
Frequently Asked Questions
Do I Need to Sand Before Applying Another Coat of Polyurethane?
Yes, it is advisable to sand between coats, as this will provide a better adhesive surface for the layers that are to follow.
Does Polyurethane Yellow Over Time?
Water-based polyurethane will remain crystal-clear, but oil-based polyurethane can turn an amber shade over a certain time.
Can You Put Polyurethane Over an Already-Painted Surface?
Yes, you can, but you need to be sure that the paint has dried properly before you apply the polyurethane.
How Many Layers of Polyurethane Do I Need to Apply?
One coat will not be enough, so for a better protective finish, we suggest that you apply at least two coats for oil-based polyurethane and about four coats for water-based polyurethane.
How Long Between Coats of Polyurethane?
When working with oil-based polyurethane, between 24 to 48 hours. When using water-based polyurethane, you can start the next coat within 12 hours.
What Do I Do with Bubbles in Polyurethane?
Wipe them off with a cloth that has been dipped in mineral spirits for about 20 minutes and no harm will come to the coating. Alternatively, you can wait for the polyurethane to dry and then sand the bubbles off the surface.
Can You Remove Brush Marks from Polyurethane?
You can remove brush marks by using fine sandpaper to sand them off, ensuring that you do so evenly. To avoid brush marks, you can apply a thinner coat, as thicker coats tend to produce brush marks.
How to Thin Polyurethane?
Use mineral spirits for thinning your oil-based polyurethane and distilled water for thinning your water-based polyurethane.