Gas Tank Repair with Epoxy Putty Compound [Tutorial]
This post may contain affiliate links. We may earn a small commission from purchases made through them, at no additional cost to you. You help to support resin-expert.com
How to fix a leaking gas tank? When a tiny hole or leak appears in your fuel tank, it will cause petrol to leak out. This is a waste of your money, but it can also be dangerous. Gas tank leak repairs in your fuel tank can prove to be a difficult job, especially if there is still fuel in the tank. No need for alarm, as we have a temporary solution to offer for your fuel tank repair. The best solution is for you to put in a new fuel tank, but this solution is not always possible when you need the car. You do need to eventually replace your fuel tank. However, an emergency repair solution is possible, so you can still use the car.
Table of Contents
What is Required for Making Fuel Tank Repairs?
How to fix a leaking gas tank? To repair fuel tank leaks requires the correct products and some basic preparation work.
Materials or Products Needed
When the fuel tank still has gas inside, the 2 Part liquid epoxy system will not be very effective. The fuel will not dissolve the epoxy; however, the fuel will leak through before the epoxy cures properly. So, in the end, you remain with the same issue. The correct material to use in this situation is a gas tank repair epoxy putty compound stick, which allows you to do a wet repair. This 2-part epoxy putty stick comes as a single stick, where the two components have already been measured out.
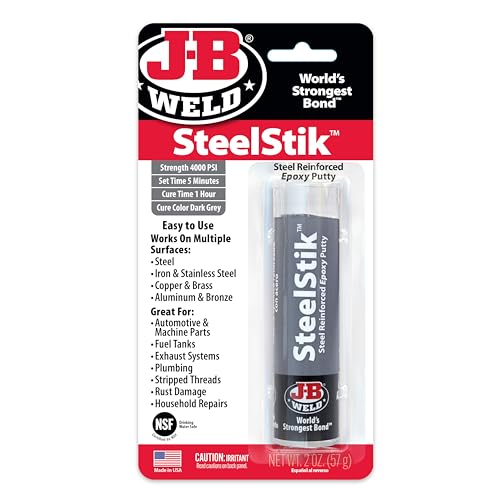
- Two-part epoxy putty reinforced with steel particles for lasting repairs
- The epoxy takes only 5 minutes to set and cures within an hour
- This epoxy can be molded, shaped, sanded, drilled, and tapped
All you need to do is cut off the required length and blend the two components. Then apply to the leak on the tank, it will become hard in 5 minutes and cures completely in 1 hour. Because the gas tank repair epoxy putty compound has a clay type of consistency, the gas or any other liquid will not be able to leak past or through it. This epoxy putty can withstand temperatures of 300° F as well as 900 Psi of pressure, making it the perfect product to seal your leaky fuel tank.
Surface Preparation
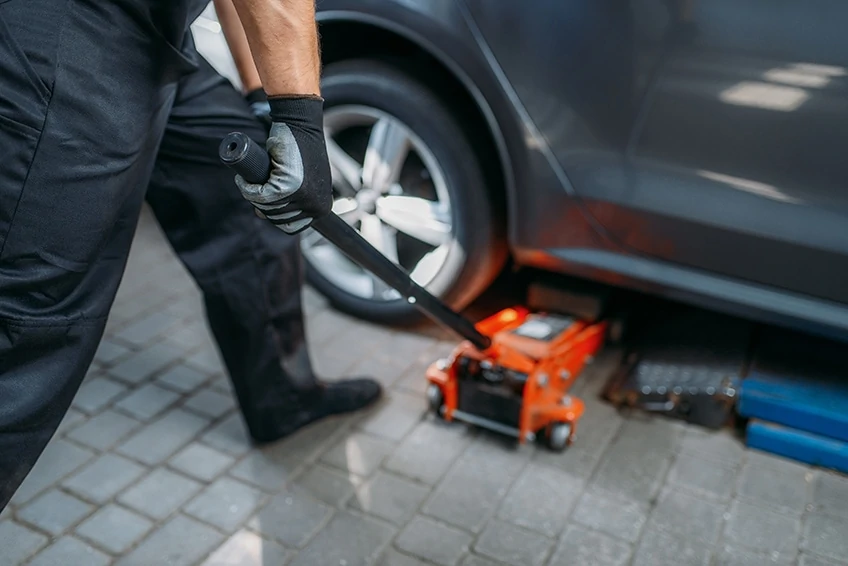
Before you can start with any repair work, you will first need to locate the leak. The leak may be tough to find. However, you can use a towel, simply dry the tank which should allow you to see where the leak is.
When the tank is very dirty or rusty, you will need to use a little brake cleaner. Now that you have successfully located the leak, mark the spot. The area around the leak now needs to be thoroughly cleaned, make sure it is clean for about 3 to 4 inches around the leak. Use some sandpaper to clean the entire area you just marked off, making sure it is clean down to the bare metal surface.
This sanding process has a two-fold purpose, firstly it removes any rust, old paint, road dirt or muck from the fuel tank. Secondly, it provides the epoxy putty with a good rough surface to cling to.
Finally, use some cleaning solution to getrid of all the dirt, and do this several times until you are satisfied that the area is properly clean.
How to Apply the Gas Tank Epoxy Repair Putty Compound?
- Cut off the required length of epoxy putty you need, making sure there is enough to cover the entire area you have just cleaned
- Blend the black and white components by mixing the colors, you should end up with a dark gray color
- Before you apply the epoxy blend, ensure that the area is still clean and dry. Squash the gas tank epoxy putty into the hole
- Flatten the putty against the gas tank, as you do not want to end up with a big blob of putty on the tank
- Check to see if the hole has been thoroughly sealed
Finishing and Curing the Epoxy Putty
It only takes about 5 minutes for the epoxy to harden and it should be fully cured within the hour. We recommend you wait for an hour or two before you drive your car. We also propose you keep checking the repaired leak for the next few days. The repair to your fuel tank is now done and you can use your car. Even though you have done a gas tank leak repair successfully, it should last for a long time.
We do suggest that you do not wait too long before replacing the gas tank with a new one. We say this because if the leak was due to rust, it is certain that another leak will appear very soon.

Questions and Answers
Can you use JB Weld on Fuel Tanks?
Yes, because when JB Weld has fully cured it is 100% gasoline and water-resistant. Also, it is resistant to any other automotive chemicals or petroleum products.
Can Gasoline Dissolve Epoxy?
If you are using the 2-part liquid epoxy, the fuel will not dissolve the epoxy, but it will leak through before the epoxy fully cures. However, if you use the fuel tank repair epoxy putty compound stick, the fuel will not leak through and when fully cured, it can withstand temperatures of 300° F and pressures of 900 Psi.
Can you Repair a Plastic Gas Tank?
Yes, you take a soldering iron and start soldering the crack. While the gas tank is still warm, take a plastic gas tank patch and lay it over the crack and continue to solder the whole area until the heat fuses the plastic. Give the tank time to cool and dry out, then mix your epoxy glue and cover the entire area where you have applied the gas tank patch.
