Boat Stringers Repairing and Replacing [Guide]
This post may contain affiliate links. We may earn a small commission from purchases made through them, at no additional cost to you. You help to support resin-expert.com
Owning a boat can give you a lot of pleasure over time, but just like a car, it needs to have regular maintenance and checks. Over time, your boat is exposed to a lot of pressure and after a while will require repairs. Boat stringers are one of those things you need to keep an eye on, as they will eventually need your attention. It is possible to repair your own boat stringers, by following instructions and making sure you put in your best work.
Table of Contents
What are boat stringers?
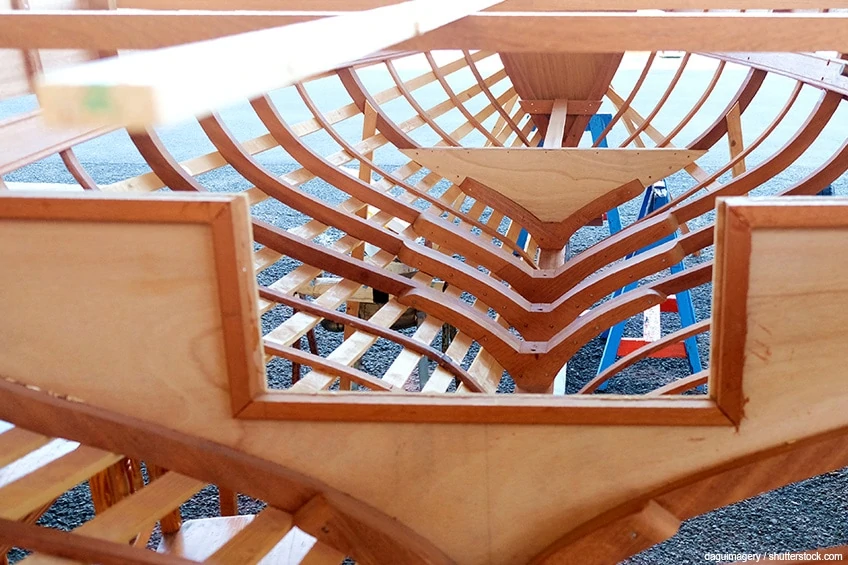
So, what are stringers on a boat? The boat stringers main purpose is to offer structural support on a boat and are situated underneath the boat deck.
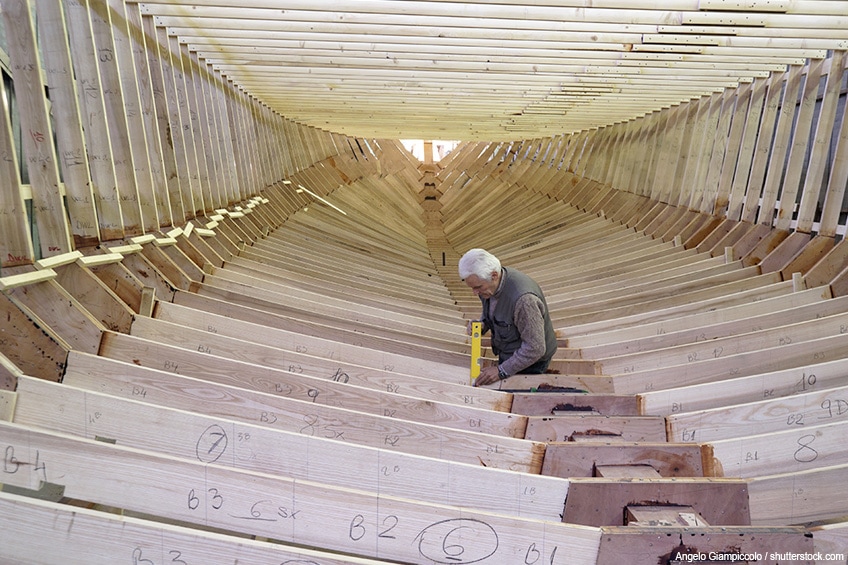
The boat stringers in older boats are usually made out of wood. The wooden stringers are then laminated or can be covered in fiberglass. The more modern versions are crafted out of manufactured fiberglass molds.
The stringers are positioned in a grid-like form and cover the length of the boat, which creates the best support structure. Boat stringers help to support heavy structures such as the engine but also supports things like the cockpit.
A boat in most cases is placed under a lot of stress and therefore requires careful maintenance. Replacement of boat stringers might be needed if it has been irreparably damaged. As mentioned, you have stringers made of wood, but there are other options for boat stringer material available.
Many have experimented with different materials from epoxy, carbon fiber to Kevlar. All of these materials offer great structural support and stiffness and unlike wood, will not rot.

Inspecting your boat stringers
If you suspect that there might be a problem, it is time to inspect your boat. In order to see if there is a problem, the best way to find out is to have a look. You may have to cut a few small holes to get a visual on the problem.
You can easily fix these holes again if you do not find anything, but if there is a problem, this will save you in the long run. Inside will be pretty dark, so using a torch and mirror may come in handy in spotting the problem.
When to repair or replace Boat Stringers
The main reasons you will need to repair or replace boat stringers include:
- Rotting wood: water can get into the wood due to the laminate surface separating from the wood.
- Overall stress or impact damage can cause fractures as well as delamination.
More signs you should take into consideration.
- Old boats should be inspected for damaged boat stringers.
- Inspect your boat regularly and check to see for any holes that have not been sealed. This could mean water is getting in and this will eventually rot the stringers. You might notice that the deck begins to feel less secure, a sure sign there is something wrong.
- When water gets through, the wooden stringers may begin to show brown spots. This is a clear indication to replace or repair old boat stringers.
- The wood used is sometimes of the cheaper variety and a lot of the time the wood is not treated. When inspecting your boat and you spot something, there is an extremely high chance that there will be more than one problem throughout.
One of the more common stringer repair methods is allowing the damaged area to dry and then injecting the epoxy. This might be an easier way, but not the most effective. You cannot see what is going on underneath the fiberglass skin, so the extent of the damage or rot could be worse than it appears. You can also not determine with 100% accuracy that the repair was done properly.
Even though completely replacing stringers is a much bigger job and will more than likely cost you more, it is often the better choice. Sometimes, replacing only a section of a stringer is an option, but again it might be easier and save you in the long run if you do a complete replacement.
Repairing the fiberglass skin
Boat stringer repair will have to be done at some point, especially for an older boat that has seen a lot of wear and tear. Where there is a fiberglass boat, you have a fiberglass skin, which overlays a core material like wood. The wood material is known as an active core stringer because it is responsible for providing structural support.
The fiberglass skin is used to protect the wooden stringers and also plays a role in attaching everything to the hull of the boat. Sometimes, the fiberglass skin layers come apart and separate, which leaves an opening for water and moisture to enter.
If this is not taken care of, it can lead to even more damage, or even the need to replace the entire boat stringer structure. So, it is important to find the problem and repair it quickly.
Once you have repaired or replaced your core material that might have been damaged, you need to also replace the fiberglass skin. In order for this to work properly and create an effective bond, you need to correctly prepare the surface.
Preparing the fiberglass fabric
First, you will have to cut some fiberglass strips, the pieces should be long enough to extend the length of the stringer. The complete thickness of the fiberglass skin should be the same as the one you are replacing. So, there will be a number of layers needed.
To determine how many layers, you can take the thickness you want and divide this by the single-layer thickness of the fabric you will be using.
The first layer should be able to cover the stringer and extend to the tabbing located on each side. The next strip and each strip thereafter should be cut a little narrower, an inch to half an inch for every strip. To increase strength and stability, make sure to step the edges of the fabric.
This tapered effect will help to distribute the load more evenly. Otherwise, the bulk of the load will be transferred to where the tabbing ends, which can result in damage. Use the same method at the bulkhead or transom edges of the stringers.
Preparing the surface is also an important step. You can use a solvent to wipe away any contaminants or dust and quickly dry the surface with a paper towel. If there is any oil spots or gasoline, you can use a degreaser first before using the solvent.
The surface needs to be further prepared for bonding; you can use a 50-grit grinder for this purpose. If the surface has a gel coat, simply grind it in order to create a non-gloss or dull appearance. Remove any dust.
When there is existing fiberglass, grind a 12-to1 bevel on the stringer. The new fiberglass will then attach to the old and provide a surface area which offers even support. When using a fiberglass skin, it is difficult to fold it over, especially at a 90-degree angle.
Therefore, you will have to adjust the core material by rounding off the top edges. You will also have to round out the inner corners between the core material and hull and between the core material and bulkhead.
Applying fiberglass skin
Here is a basic step-by-step process for applying fiberglass skin.
Step 1
Take the resin and hardener mixture and apply to the prepared bonding surface and the stringer.
Step 2
Take the first piece of your fiberglass skin, which is the largest and place it over the stringer and apply the resin and hardener mixture. Remove any excess epoxy, but make sure the entire surface has been soaked through.
Step 3
Follow the same process with each new piece of fiberglass skin/fabric. Each piece can be placed immediately after each other, or before the fabric cures completely. As mentioned before, the pieces should be tapered. Let all of the pieces reach the initial cure. When applying each coat make sure it does not cure completely, this means you will not have to sand between each coat.
Step 4
Follow up with two or three more layers of epoxy, then leave to reach a final cure. This next step is optional, you can add a special marine-grade epoxy-based liquid color to the last coats for a better finish.
Finishing
When working with fiberglass you are bound to have a few sharp edges. This is easy to fix by using an 80-grit sander, which will smooth things out. Since the repair area is mainly in the bilge area where there is little light and appearance does not matter, you do not have to do much finishing off.
You can easily paint any repair work done if you like a more finished appearance. Choose a paint color that is closest to the area you are busy with. First, prepare the surface by washing it, the epoxy surface can then be sanded. Remove any dust and then apply a primer followed by a topcoat of paint.
After you have completed repairing or replacing boat stringers, the next step is to keep up maintenance and to keep up regular inspections. If you have done a good job, the stringers should last for many more years to come. The stringers are an important part of the boat, they are the foundation, so to speak, so giving them a bit of extra attention is well worth your time. You will now have a cleaner and more professional look.
Tips for Replacing boat stringers
When attempting to replace boat stringers, the first thing you consider is making sure you have time to complete the process. The whole project will take up a lot of your time.

More tips for replacing stringers in a fiberglass boat:
- Once you take things apart, be prepared to encounter some problems, as it is not as easy putting everything back together again.
- When replacing or repairing your boat stringers, it is advisable to take your original construction and to copy it precisely. In other words, use the same dimensions, shapes, core material, fiberglass thickness and position the stringers in the same spot as the original.
- The whole process will cost you, maybe even more than you anticipated. Make sure you have some money saved up for extra costs that may arise.
- Stock up on latex gloves, as you will be using quite a few. Include some nitrile gloves as they tend to last longer.
- Part of the preparation is having the correct protective gear. Think of getting yourself a proper respirator, which will help protect you much more effectively than a basic dust mask. The fiberglass particles can be dangerous if you inhale it in. Eye goggles are just as important for eye protection. Any itchiness on the skin can be prevented by wearing long sleeves when working with fiberglass.
- Purchase a diamond cutter wheel for the grinder, this will easily cut the stringers and slices effortlessly through fiberglass.
- When shaping the stringers, ensure you do not rush the job. Shaping them exactly right will be worth the time and effort.
- Measure and measure again, it is better to be thorough so you will only have to cut once.
- Remember to round the stringer tops, this will make applying the fiberglass skin a lot easier.
- Learn all you can about the entire process, there are plenty of websites and videos showing you what to do.
What to look out for when buying a boat
Buying a new boat is easy, but if you are considering a secondhand purchase, you should definitely check the boat out first. Also, if you are going to be paying a cheap price, expect that there will be problems and that it might cost you more for repairs. What should you do to ensure the boat stringers are in good shape?
- Check all areas of the boat, the general condition of the boat should indicate its quality.
- Ask questions: When last have the stringers been repaired or replaced? If the boat has not been properly maintained over the years, it might be best to move on.
- Are the stringers made of plywood or what kind of core material? Has the wood been covered with fiberglass? If it has not, this means water might have already damaged the springers. Check inside to see if there is any exposed wood.