Alcohol Ink and Epoxy Resin – Creative Projects
This post may contain affiliate links. We may earn a small commission from purchases made through them, at no additional cost to you. You help to support resin-expert.com
With this easy to understand guide we would like to show you the various possibilities of so-called Alcohol Inks in connection with Epoxy Resin in an uncomplicated way. In addition, you can also learn the trendy art form Petrified Rainbow: Create your own artistic Resin Petri Dishes or Coasters from suitable Resin and Alcohol Inks. In addition, you will find further creative tutorials on subject of Alcohol Inks in this article.
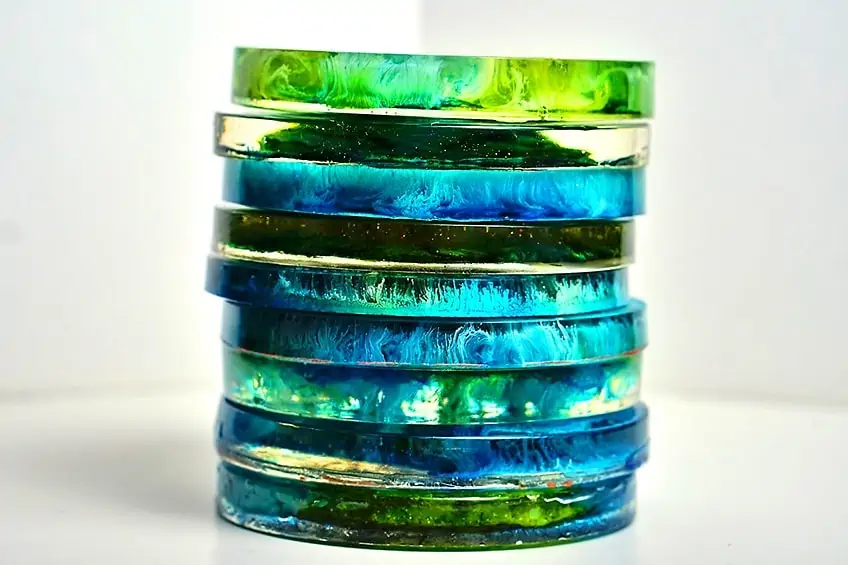
Main Image: © Seda Özses, www.instagram.com/madebyseda
Table of Contents
What is Alcohol Ink
The increasingly common term Alcohol Ink is used in various contexts: First of all, it is used to describe the alcohol ink, which is used for various purposes as a painting ink. At the same time, the term is also used to describe the painting technique of fluid painting, which is used when painting with Alcohol Ink. This trend was first established in the USA and has now spread to many other countries. This explains the fact that this special method has already become a common trend in the USA, while in this country it is still a niche technique. Alcohol Ink inks consist to a considerable extent of alcohol and are enriched with intensively concentrated color pigments.
The fact that alcohol evaporates quickly at room temperature due to its specific properties is a central factor in this painting method. After all, the colors dry quickly due to the evaporation of the alcohol, but can be easily liquefied again later if required. All you have to do is add fresh ink or simply pure alcohol to the colors. Paintings that have already dried can be easily reworked and changed again and again with new colors at a later date. With acrylic paints and many other colors, however, this is not possible once the painting has dried.
Pros
- Very good compatibility with all epoxy and UV resins
- Extremely brilliant color quality
- Due to the high concentration, only a few drops are needed at any one time
- Amazing color effects like the Resin Petri effect can be achieved with little practice
Cons
- Alcohol inks are not very light-resistant and may fade over time
Best Alcohol Ink – Our Comparison
Basically it is worthwhile to buy high quality and highly pigmented Alcohol Inks. Here you find our recommendations:

- Offers 26 vibrant colors, providing a wide range of options to create dynamic and colorful resin art
- Highly concentrated alcohol-based formula
- Versatile application
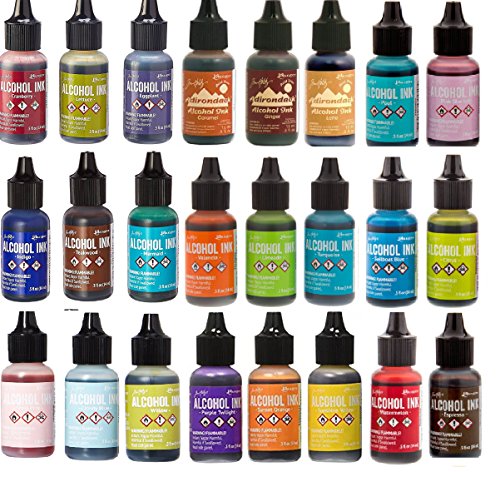
- Set of 24 different Alcohol Ink colors
- Tim Holtz guarantes a very high quality
- Works perfect for Resin
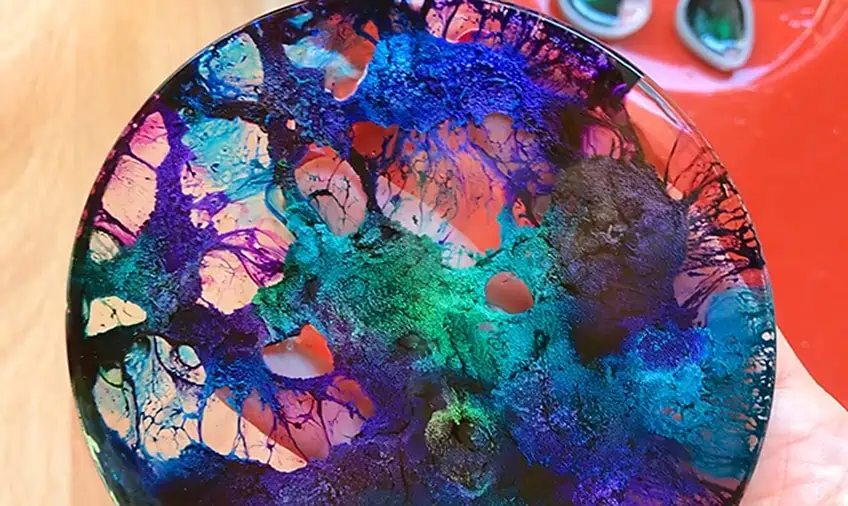
Project No 1: Petrified Rainbows or Resin Petri Dishes
You may have heard the term Petrified Rainbow if you are interested in resin art with alcohol ink. This special painting technique of Petrified Rainbows is also called “petrified rainbow” in German. This description hits the nail on the head, because when the alcohol ink is dripping into the resin, really fascinating color spectra can be created.
In fact, it will seem to you yourself as if you are using this artistic technique to capture a real rainbow in a petri dish and forever trapped in a rock-hard crystal. Sometimes the technique of Petrified Rainbows also appears under terms like Resin Coasters or Resin Petri Dishes. Coasters is the English word for coasters, and the resin-cast discs with the rainbows enclosed in them can really be used as coasters for glasses and coffee cups. They create real eye-catchers.
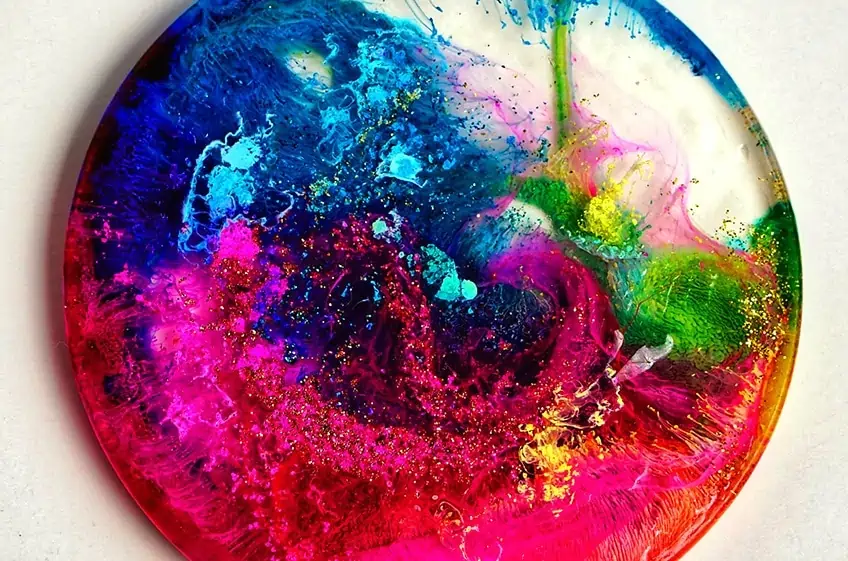
Image: © Seda Özses, www.instagram.com/madebyseda
Materials you need for creating Resin Coasters
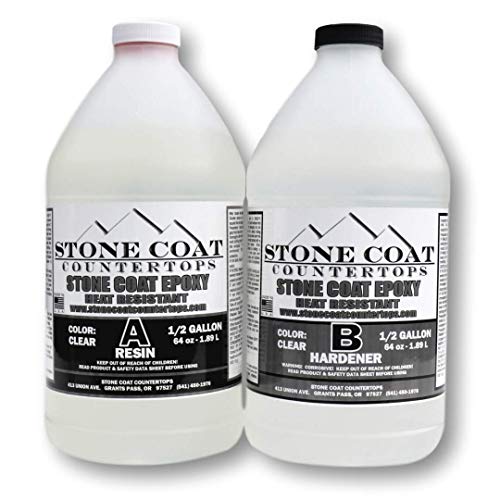
- High temperature Resin - Heat Resistant up to 500°F
- Crystal Clear and UV stable, zero VOC
- Cured in 24 hours, self leveling
You also need this material:
- Suitable Release Agent
- Mixing Cups and Sticks
- Level
- Nitrile gloves
- Respiratory mask with filter
- Well-fitting safety glasses
Safety Precautions when working with Epoxy Resin
Whenever you work on your own Resin Petri Dishes, health protection should always be your first priority. You should therefore always take appropriate protective measures when working with resin. The absolute minimum equipment should therefore include suitable gloves such as nitrile gloves and professional respiratory protection with a breathing mask. Some resin manufacturer labels may state that the resin is non-toxic. Nevertheless, when working with this type of resin, you should only ever work in well-ventilated rooms. This is not least because the alcohol of the Alcohol Inks is a solvent mixed with the liquid resin. This can lead to a chemical reaction with corresponding evaporation. You should never inhale the resulting vapours directly.
Suitable Respiratory Protection
In view of the fumes that may be generated when working with resin, a respiratory mask should be worn without exception when working with resin indoors. If toxic fumes are produced during the processing of your materials, you are at least protected as best as possible from the effects. In principle, many high-quality resin products promise to be absolutely non-toxic. However, we still recommend that you take the necessary precautions to be on the safe side in terms of physical integrity and still wear a respirator.
Disposable Gloves to Protect the Skin
You should always take care not to get the resin or hardener in liquid form on your skin. Standard vinyl or latex gloves are unfortunately not stable enough for this purpose. We recommend to always wear nitrile gloves when working with Resin and Alcohol Ink. High-quality Uvex nitrile gloves protect against direct skin contact with chemical substances such as acids and alkalis as well as the resin and hardener.
Step by Step Tutorial Resin Petri Dishes with Alcohol Inks
Prepare the Silicone Mold correctly
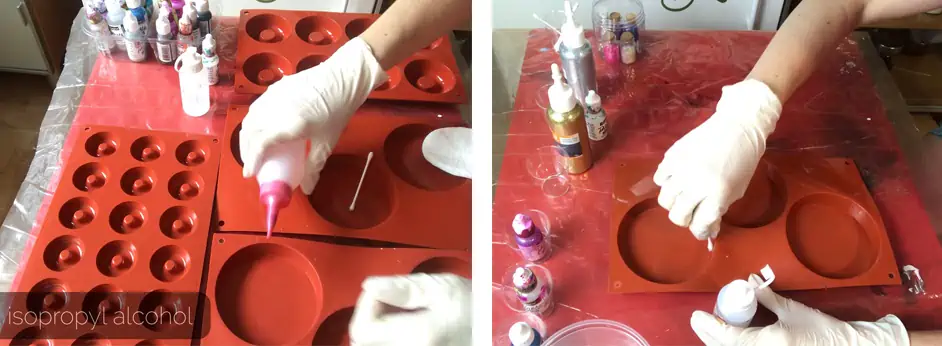
Once you have ensured that all necessary safety measures have been taken, you can prepare the molds for your work project. It is absolutely essential that you always work with a perfectly clean mold. It is essential to remove all hair, dust and other dirt particles from the mold, otherwise they will be fixed in the resin during casting.
Cast dirt particles cannot be removed from an already cured resin work piece. Therefore you should wipe out the silicone mold with a clean cloth or a piece of kitchen paper before casting. Afterwards, the mold should be rubbed with alcohol or with 96% isopropyl alcohol available in specialist shops or pharmacies. After you have wiped the mold with it, let it air dry for a short time. Then wipe the mold with silicone oil, which can prevent it from sticking. This step can also be done with a cotton swab.
Prepare other Materials
As a rule, you should find the instructions for the correct preparation of your epoxy resin on the manufacturer’s labels on the packaging. If you want to pour out a silicone mold with cavities for 3 Petri Dishes with a diameter of 10 cm each, you will need a quantity of about 400 ml resin. The exact amount depends of course on the size and thickness of the Petri Dishes you want to make. The bigger a Petri Dish is to be, the thicker the resin will be poured into the Petri Dishes.
Please note that, especially with cheaper resin brands, there may be limitations in the layer thickness due to the heat generated during the curing process. However, the information necessary to clarify this issue should usually be available on the label of the resin. When using special ArtResin, pour the exact same amount of resin and hardener into a prepared plastic cup for mixing.
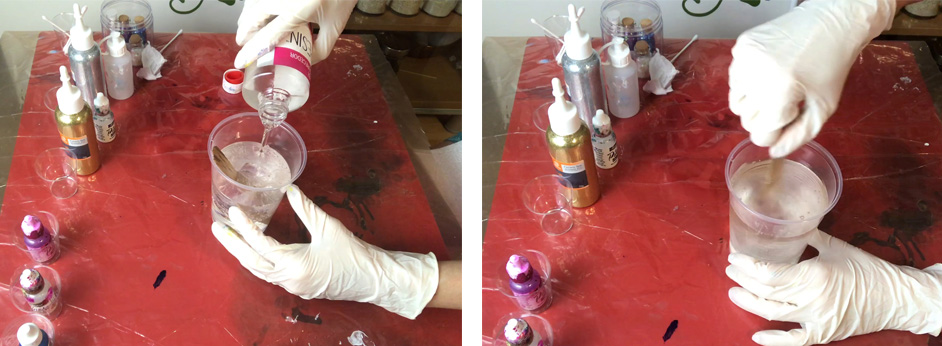
Mix your Resin Components
You should proceed absolutely slowly and carefully when stirring. For example, if the label on the resin container indicates a stirring time of 3 minutes, you should pay less attention to the clock and more to the consistency of the resin. After mixing resin and hardener, the mixture usually looks rather cloudy at first. However, this cloudiness gradually clears up with stirring.
A very important quality factor is the speed of stirring: If stirring is deliberately slow, far fewer air bubbles are introduced into the mixture than if stirring is faster. If there are fewer air bubbles in the resin right from the start, they can be removed more easily from the still viscous resin later on. After all, the finished Petri dishes only look truly flawless if they can cure without a significant number of trapped air bubbles. At some point, the mixture should finally have the transparency of water, then it is ready for further processing.

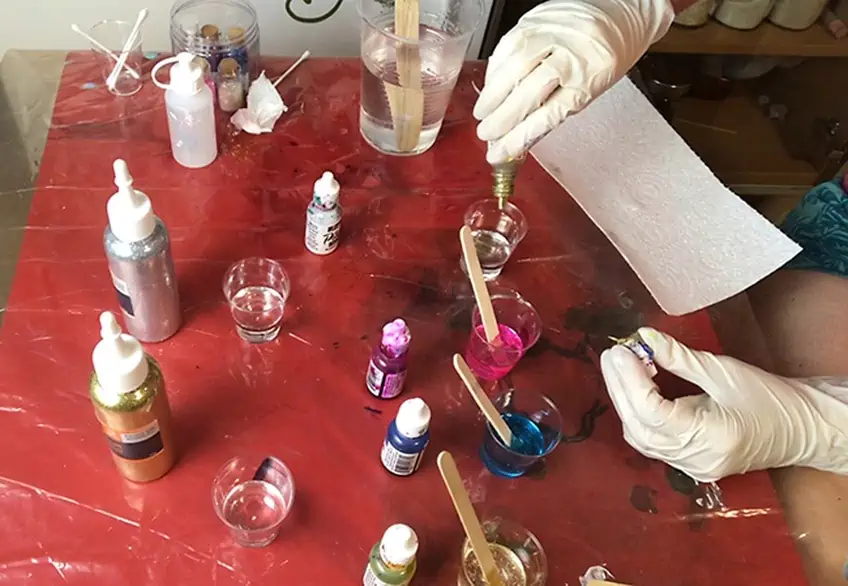
Best Alcohol Inks to work with
For coloring your resin you should buy high quality alcohol inks, for example Let’s Resin or Jacquard Pinata alcohol ink. Of course, the use of other noname products is also possible. However, the color effect of this product can quickly become too intense or the Petridish effect is not as strong, which is also a matter of taste. To mix resin and alcohol ink you should pour some resin into a disposable plastic cup and remove the air bubbles with short heat shots through a Bunsen burner. Then add a few drops of your Alcohol Inks to the resin in the cup. When stirring the ink again you should work very slowly and evenly to avoid air bubbles in the material when mixing the alcohol ink with the resin.
Fill the Mold with Resin
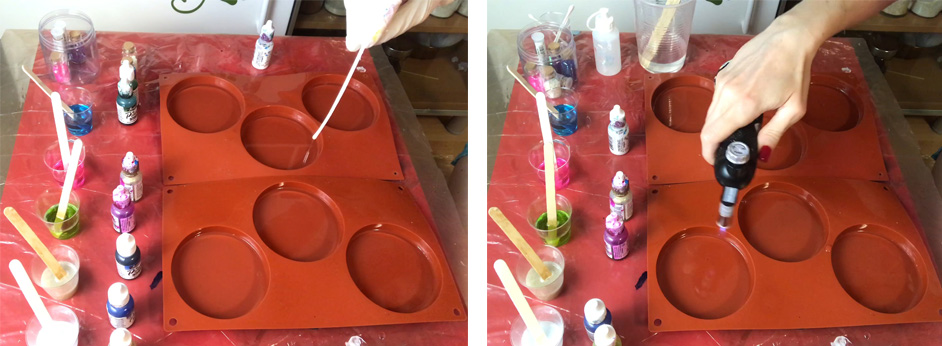
In order to be able to pour really even Petri Dishes, you should first of all level your workplace exactly with a spirit level. Then the next step is to test the consistency of the resin: if it still runs down quickly from a wooden stirrer, you’d better wait a few more minutes. As soon as the resin runs down slowly from the stirrer, the ideal time for the next step is reached.
Then pour the resin in equal portions into the 3 recesses of the silicone mold. Again, any air bubbles that may be trapped in the material should be removed with a short “torch” using a Bunsen burner or a hot-air dryer.
In any case you should follow the manufacturer’s instructions for processing the respective resin. There are certain brands and types of resin which, due to their specific product characteristics, must not be torched at all. With ArtResin, however, the manufacturer’s information states that it is permissible to torch the material to remove air bubbles. With this product, the air bubbles rise to the surface of the resin due to the heat generated by the Bunsen burner or hot air dryer and can burst there. This produces a clear epoxy resin that can be used to make perfect Petri Dishes.
How to use Alcohol Ink
To work as fast as possible, you should place the existing Alcohol Inks with already screwed on closures (but still covered by them) next to your prepared silicone mold. Now first try to add a few drops of alcohol ink to the resin with a paint. If the ink spreads very quickly, the resin is probably still too liquid. If the paint hardly spreads at all or only very slowly, the resin has already started to harden.
As a rule, the most beautiful Petri Dishes can be created by working with a more viscous consistency of the resin. But of course this is also a question of personal taste. It can’t hurt if you allow some experimentation in your first attempts to create beautiful Petri Dishes and find your individual way in this matter through different curing degrees of the resin.
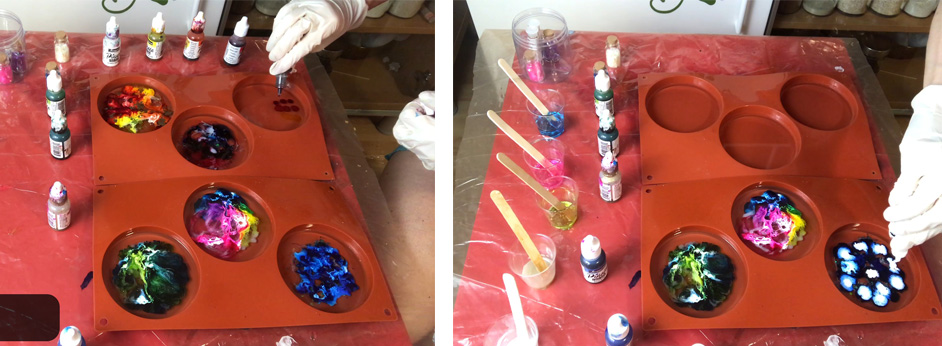
The desired effect of the so-called Petrified Rainbows can now be created by dropping a drop of white Alcohol Inc on each of the drops of paint already in the resin. Since the white ink is a little heavier than the other colors, the colored Alcohol Incs are automatically pressed down a little bit. By a reaction of the alcohol ink with the still viscous resin, a shape is created that resembles a small anemone with fine tentacles.
Now you can also see if your resin is already viscous enough: If not, the heavy white alcohol ink will fall through to the bottom of the silicone mold and leave an unsightly white stain in the cured Petri Dish.
Covering Poured Molds
Once you have dripped the alcohol ink into the resin and are satisfied with your work, you should cover the silicone mold. This works very well with a cardboard box or a plastic box, for example. However, the lid should not touch the resin or the silicone mold. The resin should be able to cure in the silicone mold on a flat surface without any interference. The exact duration of this curing process can be found in the manufacturer’s instructions on the label. Sometimes this time period can vary greatly. If you work with ArtResin, it can usually be touched after about 24 hours and is finally cured after about 3 days.

Remove hardened Petri Dishes from Molds
After the long wait, you are probably very curious about the end result of your work. The removal of the fully cured Petri Dishes from the molds is always a little surprise. Start by carefully removing the sides of your cured coasters from the silicone mold. You will probably be amazed at the great patterns created by the dripped Alcohol Inks!
Tip: Have you ever heard of something called “lacing”? You can achieve this beautiful veining through your Petri Dishes by first wiping out the entire silicone mold with silicone before pouring resin. This prevents the alcohol ink from spreading too much and creates decoratively separated color cells.
Tutorial Images: © Seda Özses, www.instagram.com/madebyseda
Project No. 2: Painting Alcohol Ink on Yupo Paper
Step by step guide Alcohol Inks on Yupo Paper
- Before your first experiments with Yupo paper, you should first provide all the necessary utensils such as the Yupo paper, the necessary alcohol inks and a special blending solution or alcohol as a substitute.
- For the start, smaller painting formats are suitable. We recommend that you cut Yupo paper sheets in DIN A4 format in half or perhaps even use the back for experiments while practicing. This way you can avoid wasting an unnecessary amount of material for the first steps in this area.
- Choose a color from your Alcohol Inks and put a drop of it on the sheet of Yupo paper. The drop of paint should spread out in a circle on this special synthetic paper very quickly.
- Next, you can drop another drop of paint in a color of your choice in the middle of the first circle. As it spreads out, the second color will now displace the first color that has dripped on. However, it is also possible to let the second color drop onto the paper next to the first color circle, so that two individual color circles aesthetically slide into each other.
- With special Blending Solution or pure alcohol, colorless circles can be created on the Yupo paper, which, with their displacement effect, displace the individual colors like alcohol ink. In this way, some dark shiny edges are created, whose contrasting effect is visually very attractive.
- As soon as the desired number of shapes and colors have been applied to a sheet of Yupo paper, you can add artistic decorations with a wooden stick, cotton swabs or a fine brush.
- Even with a colored marker, you can still add various ornaments and frames after an alcohol ink painting has dried.
Decorative Color Gradients can be created
On a substrate that has been previously brushed with alcohol, individual drops of the paint can be moved in specific directions by swivelling the paper or by the targeted air flow from a straw. If you want to use this technique of artistic color gradients on a regular basis, it is worth buying a so-called borehole blower. This small, practical device consists of a tube and a handy pump balloon. Since this procedure does not require heated air to breathe, condensation cannot drip down onto a painting, as is sometimes the case with a straw.
However, the technique also works if you use a hair dryer with cold air setting. But never forget that you are working with highly flammable alcohol in your creative work. There can therefore be dangers if you do not work with the coldest setting of the hairdryer. Furthermore, by using cold air, you also ensure that the Yupo paper, which is made of plastic, does not make irreversible waves. You should always move the hair dryer slowly towards the paper sheet. The starting point should be at a distance of about an arm’s length. Set the hair dryer to the lowest possible fan speed to avoid unwanted movements of the alcohol or uncontrolled distribution of alcohol ink.
Further Design Ideas for working with Yupo Paper
Stamp Motives with felt Stamps
The manufacturer Tim Holtz makes special felt stamps, which are suitable for a creative work design with alcohol ink on Yupo paper. You should buy these stamps together with your alcohol ink. Soak the felt piece with colored alcohol ink or Blending Solution and press the stamp onto cards or sheets of paper to create special effects.
More Ideas and Special Tools for creative Projects
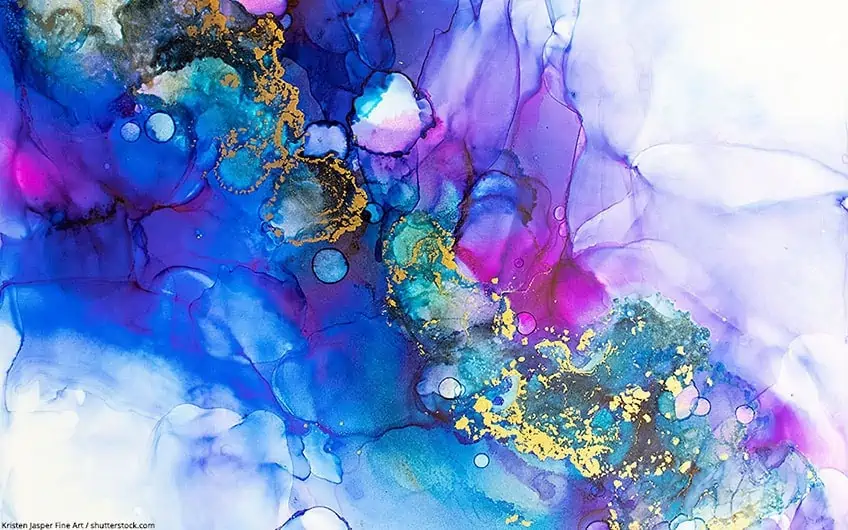
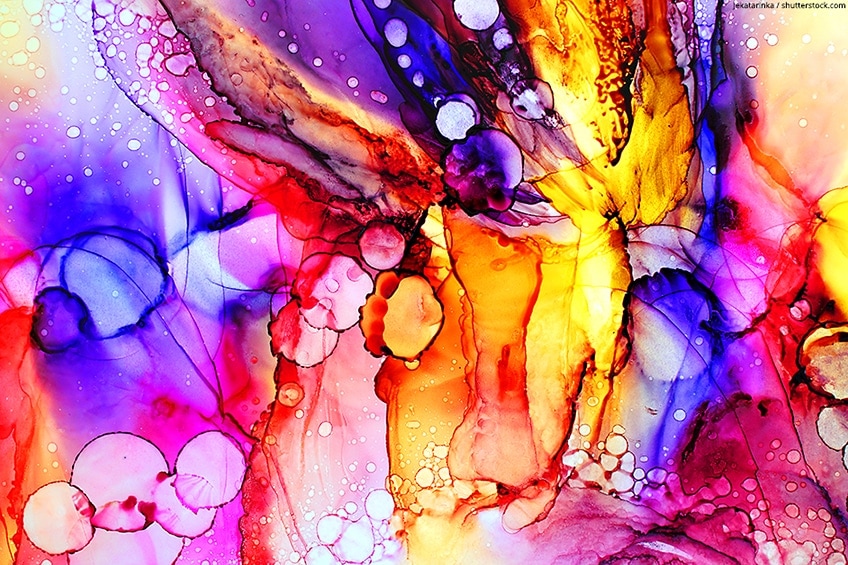
The popular Alcohol Ink technique can not only be used for the design of abstract motifs. The versatile alcohol ink can also be used to paint realstic paintings of landscapes or animals. However, it takes some practice to be able to use the almost unlimited possibilities of this creative painting technique with alcohol ink. You will have to experiment with these special materials for a while and gain experience before you can really become a master in this field.
But it is also a lot of fun to test the properties of the Alcohol Inks and how they spread and react to each other. Even different levels of brightness and nuances of different colors can be created more and more clearly over time. However, in your work you will not be able to do without a certain basic equipment of helpful tools such as hair dryer, various brushes, cotton pads from the cosmetics department, straws and thin wooden sticks. Feel free to be creative and test the properties of different products by mixing and matching them with each other, always combining new techniques. Working with alcohol ink offers an almost inexhaustible number of possibilities, which are really worth getting to know.
Protecting your Beautiful Art with a Perfect Finish
Since Alcohol Ink is generally very light sensitive, every painting created with it should be protected from the influence of UV light with a protective sealant after completion. This is especially easy to do with a spray varnish, which can also prevent slight mechanical damage in addition to the loss of quality caused by UV light. Based on our experience, we can recommend high-quality products such as the painting varnish by Solo Goya or the Schmincke Universal Varnish.
Project No. 3: Combine Handlettering with Alcohol Inks
Wonderful artworks can also be created by combining the above described paintings made of alcohol ink in combination with hand lettering. First of all, you need a nicely designed alcohol ink painting with beautiful color transitions. Once it has dried, you can use waterproof markers to letter over it. You can also use masking fluid to create your brushlettering first and pour an alcohol ink painting over it. After your painting has dried, you can release the masking fluid.
Project no. 4: Decorating Porcelain with Alcohol Ink
Tiles and tableware such as vases, plates and cups can also be creatively embellished with Alcohol Inks. Basically, the working technique differs only slightly from designing on Yupo paper. However, the round shapes will sometimes present you with certain challenges. After all, this shape can cause unexpected color gradients due to gravity. Alcohol inks can therefore also be applied to porcelain with an airbrush gun in precisely dosed quantities. Even realistic painting motifs can be realized very well with a targeted application of paint.
We would also like to give you a tip on how you can improve the adhesion of the alcohol ink on the surface of the porcelain: Simply place the finished painted porcelain in an oven at a temperature of about 302 °F for half an hour. In this way you can burn the applied colors into the surface and increase the abrasion resistance. Nevertheless, even after this treatment, the painted pieces should never be put in the dishwasher for cleaning. The aesthetic design of your personal porcelain works of art should be worth the effort of hand washing.
Frequently Asked Questions about Alcohol Ink clearly answered
Can Resin be evenly colored with Alcohol Ink?
Yes, this is possible. Simply add a few drops of alcohol ink after mixing the resin and hardener. Basically, Alcohol Inks are even better than some other options for coloring the resin, because the transparency of the material can be kept as far as possible despite the coloring.
Can you simply make Alcohol Ink yourself?
Alcohol inks can also be produced from a mixture of isopropanol and printer ink (in the desired color). We recommend mixing 1 part of isopropanol with 2 parts of standard printer ink. In this way you can produce your own alcohol ink for creative projects at very low cost.
Source Resin Petri Dishes Tutorial including Images: © Seda Özses, Made by Seda
